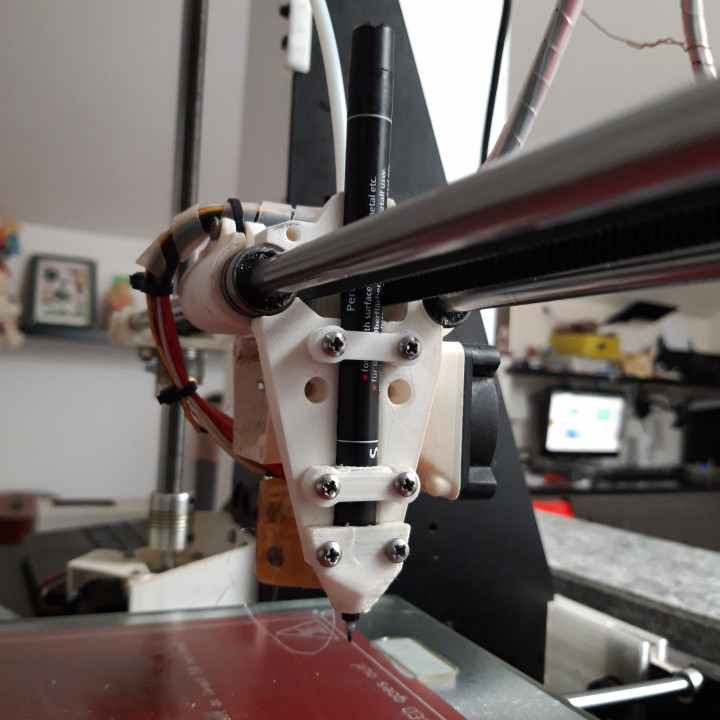
3d plotter attachment
myminifactory
This is an attachment for the compact extruder I previously designed. It serves as a holder for a pen, pencil, or crayon to convert your 3D printer into a plotter. The design allows for permanent mounting on the carriage but can be removed with just four screws. The primary purpose of this was to draw PCB masks directly onto copper laminate boards for etching purposes; however, you can draw anything you want and use your 3D printer's slicer to generate the g-code for plotting your drawing. The process is slightly more involved than standard 3D printing, but once you set up the parameters, it becomes relatively easy. For PCB etching, it's straightforward because most PCB software allows exporting the layout in DXF format, which can then be extruded using a CAD program to the minimum height accepted by your slicer and adding some g-code parameters before printing begins. I typically extrude mine to 0.3mm; however, if you make it higher, the print head will lift for the second layer, and the pen won't touch anymore and instead draw into the air. For drawings, there are several approaches. For example, OpenSCAD has a function to extrude PNG files, or other CAD software may have the ability to extrude images or text. I use OpenSCAD to extrude DXF files (it's just one line of code: "linear_extrude(0.3) import("filename.dxf");") and for PNG files, it's also straightforward; an example file is included, but you'll need to create the image using black on a white background. OpenSCAD will extrude a 100mm high solid with a full base, so just use intersection with a 0.3mm thick cube to get your file ready for slicing. On my slicer, I adjust the settings accordingly, ensuring the pen is stable in the holder and fine enough to achieve good resolution. If you have a good setup and the pen is properly adjusted, you can print at resolutions similar to your standard 3D printing projects. However, if you're using a permanent marker, the resolution will depend on its tip size. You can even use technical drawing ink pens that draw 0.1mm lines; just be careful not to apply too much pressure, as it might end up bending the tip. You can find more details and videos on this project at the provided links: https://www.youtube.com/watch?v=lpEckPdj5sY, https://www.youtube.com/watch?v=1-n2zXdDo48, and https://www.youtube.com/watch?v=cAStCGr0qjw. For components, filaments, and spare parts at the best prices, you can check out these eBay links where I normally buy materials for my printer and projects: PCB perforated boards - Resistors - Capacitors - Diodes - LED - Wire terminals - Arduino modules - Raspberry modules. You can also find prototype PCB board on Aliexpress along with resistors, capacitors, diodes, and LED lights. If you're looking to support these projects a bit, clicking on these links will help fund future endeavors.
With this file you will be able to print 3d plotter attachment with your 3D printer. Click on the button and save the file on your computer to work, edit or customize your design. You can also find more 3D designs for printers on 3d plotter attachment.
