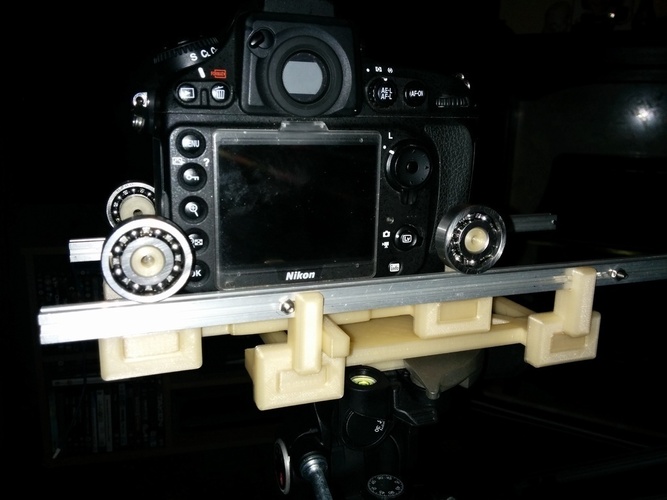
3D Photo Dolly Rig
pinshape
Summary Makes taking anaglyphs incredibly easy with a user-friendly interface. Utilizing a stepper motor to drive the caddy provides precise control and flexibility. Specifically designed for Manfrotto quick release plate tripods and Nikon D800 cameras, but compatible with similar or smaller camera models as well. Larger cameras may work, but results may vary depending on individual experiences. The level of camera and stepper motor control lies entirely in your hands. Similarly, if your camera falls off the rig, that's a risk you'll need to take. The mount arms allow for approximately 12cm of maximum parallax when using the handle, which is more than sufficient for most human viewers. However, if you're taking shots outside and viewing the final image from a distance, this works perfectly well. You can always manually limit the travel to suit your needs. Just Added: Manfrotto 200pl extender.stl has been added to raise your camera or smaller lens up about 20mm, allowing lenses to clear the rails with ease. Instructions For printing: I highly recommend using as much density as possible within your plastic and time budget will allow – 60% plus is a good starting point. For the mount plate, I'd suggest going all the way to 100% due to its critical role in supporting the weight of your camera. If you have a substantial amount of camera equipment balanced on this rig, you'll want it to be strong and durable. This design is optimized for printing at 0.2mm layer height with a 0.4mm nozzle. Additionally, all parts feature friction-fit designs, which work seamlessly in most cases. However, if you're unsure about the fit, heavy-duty glue can provide added peace of mind. All parts print without support, and where necessary, built-in support structures snap off easily once printing is complete. I strongly recommend printing the drive bar within the stepper section with a raft to ensure clean teeth profiles – this can be a challenging task without one. Manual Control Rig You will need: 1x mount plate print 4x mount arm manual prints 1x caddy plate print (the manual version has a handle) 4x caddy arm prints Optionally, 4x caddy arm pin prints if you prefer to glue the bearings in place 4x bearings with specifications: id: 10mm, od:30mm, w: 9mm (6200/2RS ) 2x Makerbeam lengths of 300mm (Technobots) Stepper Control Rig You will need: 1x mount plate print (remove the support for the motor and use the lugs on the side to secure it elastically) 4x mount arm stepper prints 1x caddy plate print (the manual version has a handle, but works just as well) 1x drive bar print 4x caddy arm prints Optionally, 4x caddy arm pin prints if you prefer to glue the bearings in place 4x bearings with specifications: id: 10mm, od:30mm, w: 9mm (6200/2RS ) 2x Makerbeam lengths of 300mm (Technobots) 1x Stepper motor with dimensions: 42x42x33mm (Proto-pic) 1x 3mm HTD pulley with 24 teeth (may require a bore reducer) (Motionco) Assembly should be relatively straightforward, but the tricky part will be aligning the stepper and drive bar. The bar is designed to fit as far forward as possible – refer to the screenshot in the gallery for visual guidance.
With this file you will be able to print 3D Photo Dolly Rig with your 3D printer. Click on the button and save the file on your computer to work, edit or customize your design. You can also find more 3D designs for printers on 3D Photo Dolly Rig.
