3D Modeling Poster
thingiverse
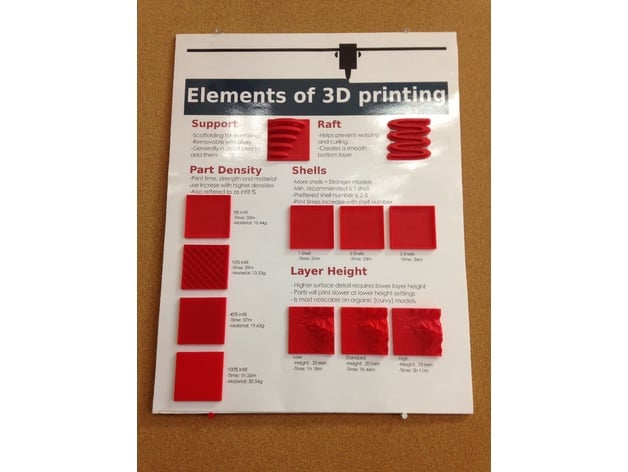
Elements of 3D Printing poster makes an excellent teaching tool that allows students to see various settings that go into making a great 3D print. A huge thank you to Tasker Smith and MIT's Pappalardo Lab for the inspiration. Overview and Background The "Essentials of 3D Printing" poster is used as a feature in your Makerspace, Fablab, or classroom. This teaching tool allows students to learn about various settings that go into printing a model. The .STL files can be attached to the poster using glue or velcro tape, allowing for students to interact with parts while choosing how to print their models. Lesson Plan and Activity Poster: The poster was designed to be printed at standard poster size of 18" x 24", with each print file fitting in a 2"x 2" square. If you choose to print the poster smaller or larger, you will need to change the print sizes accordingly. 3D Prints: If you have a Makerbot Replicator 5th Gen. or a Makerbot Replicator+ running the Smart Extruder+, you can download pre-sliced .makerbot files below from the linked Google Drive folder. For printing these files, add them to your USB stick and print directly from your printer. Makerbot Replicator w/ Smart Extruder: https://goo.gl/fR2tRd Makerbot Replicator+ w/ Smart Extruder: https://goo.gl/tpw1jO Part Density: For part density files, they are all printed with 2 shells, which is the default setting. However, you will need to change both the part density and roof thickness settings. For each differing density, you will need to change the infill density setting while keeping the roof thickness setting set at 0mm. Shells: Each shell file is printed with 0% infill, 0mm roof thickness, and varying shell count accordingly for each print. Layer Height: Since differences in layer height can be best shown on curvy or organic models, the .STL file is topography of the rocky mountains. This file was created using Terrain 2 .STL website. For layer height models, make sure to change back infill to 5-10% and roof thickness to .8mm, and change layer height accordingly for each model. Support: For this model, all that is needed is to choose the support setting for the print. After the print is done, you will want to leave the support on the model for display. Raft: No changes to the print settings are needed for this model. Just leave the raft on the model for display.
With this file you will be able to print 3D Modeling Poster with your 3D printer. Click on the button and save the file on your computer to work, edit or customize your design. You can also find more 3D designs for printers on 3D Modeling Poster.
