3D Emoji's
thingiverse
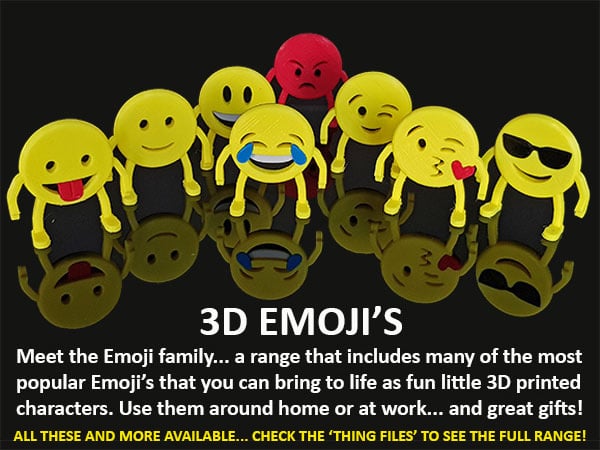
Meet the Emoji Family :-)\r\n\r\nThe 3D Emoji range is a collection of popular emoji's brought to life as real, stand-up 3D printed characters. These emojis can be placed anywhere and everywhere to convey a message, express someone's mood, or simply add fun to any space.\r\n\r\nThey make great gifts!\r\n\r\nTo ensure you get the best prints, please read all of the information provided carefully.\r\n\r\n3D Emojis are quick and easy two-part prints. They consist of a front part that includes legs and arms, while the second part is the back with locking tabs that secure it to the front part (the rear of the face). In multi-colored emojis, the back part also features added details such as eyes, tongue, tears, glasses, and teeth. You'll need to download the matching front and back parts (.stl file names) as they're designed to fit together.\r\n\r\nThe heights of the features on the back have been carefully set so you can pause your machine mid-print 1 or 2 times (depending on the features) and swap filament colors. To do this at the right time, watch the back forming and change colors when the locking tabs and features start appearing above the back surface (which has finished printing to about 3mm height plus raft). If a design requires two color changes (like Tears of Joy with white teeth and blue tears), the second filament change is always straight after the top of the first feature (tears in this example) has finished printing.\r\n\r\nOnce printed, make sure you clean up the model and pay close attention to the mating surfaces of the front and back parts. They need to be smooth with no excess plastic lumps. Any lumps could prevent the parts from fitting together properly.\r\n\r\nThe locking tabs on the back part need to be strong so they don't break when being snapped into the front part. To achieve this, I recommend using 3 shells and 20-25% infill as a minimum. These tabs also need to be checked post-printing to ensure there's no excess filament attached that could stop them from being inserted into the face part.\r\n\r\nThe back/tabs will be hard to snap into the slots in the face part, but this is intentional to make the back permanent once snapped on. To help with the joining process, I suggest spraying a small amount of light silicone or similar lubricant onto these tabs before forcing the parts together. You should be able to snap the parts together by hand, but if necessary, you can lay the parts face down on a flat surface and tap above the tabs gently with a small hammer.\r\n\r\n3D Emojis have been designed to lean slightly forward so they stand well. However, the weight of the back will change with different numbers of shells and amounts of infill. If your 3D Emojis want to fall backwards, you can fix this by either (a) gently filing the underside of the feet slightly so they lean more forward or (b) holding your Desktop Emojis' feet in hot water for a short time, then gently bending the legs slightly so they lean more forward.\r\n\r\nOnce the plastic has cooled again, it will be as hard and strong as usual.
With this file you will be able to print 3D Emoji's with your 3D printer. Click on the button and save the file on your computer to work, edit or customize your design. You can also find more 3D designs for printers on 3D Emoji's .
