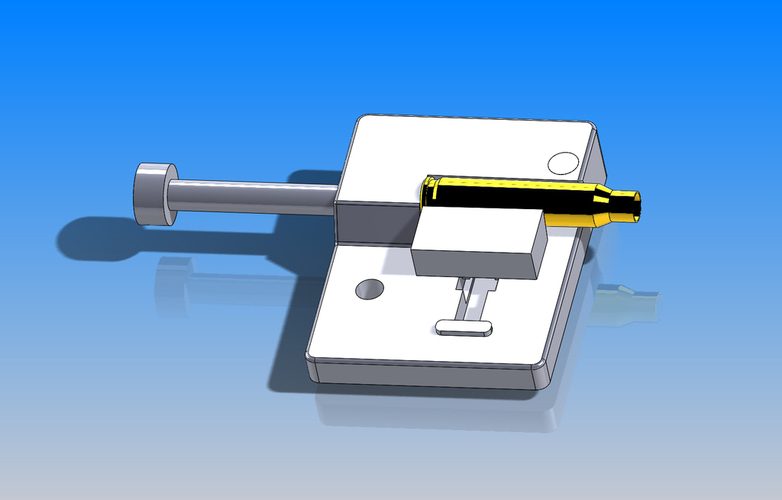
300BLK 2" Saw Jig
pinshape
New V2 requires no support as it features a plunger that can push the brass off the fixture after cutting, shortening the cut length to 1.37"-1.38" for reduced trimming. This jig is specifically designed to cut 223/5.56 brass, allowing it to be formed into 300 blackout. It cuts the brass to a precise 1.39"-1.40" on a 2" mini chop saw. Print settings include: Rafts: Not necessary Supports: Yes, due to the locating pin sticking out on the bottom face Resolution: 0.2mm Infill: 20% The new V2 has eliminated the need for support, with the locating pin printing separately and a plunger provided for easy ejection of brass from the fixture after cutting. The clamp file remains the same for both versions. To accommodate the fixture's design, supports are required due to the locating pin sticking out on the bottom face. Ensure flat surfaces by supporting everywhere, taking advantage of slots designed for clamping alignment. An AR-15 Buffer Retainer Spring is necessary for this setup (.19" diameter x .92" long). For installation: Remove the factory vise from the chop saw and insert the fixture's locating boss into the base hole. Place the thumbscrew through the fixture, threading it with a nut in the bottom groove of the saw base. Align the fixture square using eyecromiters. Position the clamp in the slot clearance pocket and slide it forward along the rails. When installing the clamp, orient the dovetail to touch the brass. Insert the spring into the pocket, and you're ready to trim brass.
With this file you will be able to print 300BLK 2" Saw Jig with your 3D printer. Click on the button and save the file on your computer to work, edit or customize your design. You can also find more 3D designs for printers on 300BLK 2" Saw Jig.
