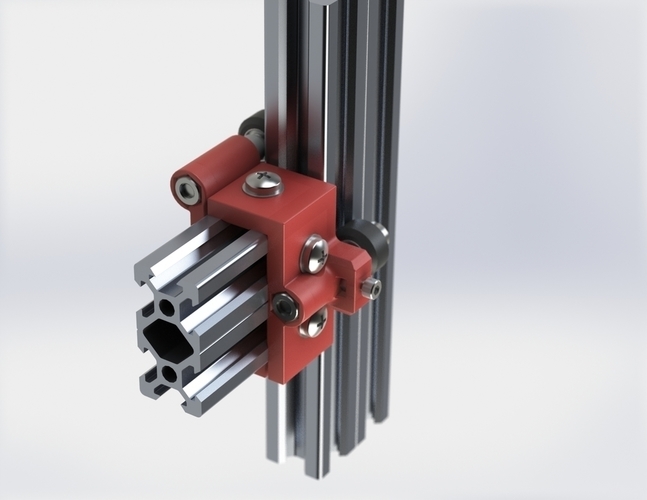
3-wheeled Z guide (Re-D-Bot)
pinshape
Summary Hi all! This is my three-wheeled mount for the Z-axis. By using a three-wheeled design, you can save one wheel instead of using the original four-wheel setup. Additionally, calibrating this version is much easier. In the files, you'll find two versions. The first version consists of two parts: Z_Wheel3_Guide-Part1 and Z_Wheel3Guide-Part2, where Part 2 can be used with a tensioner or an eccentric. The second version, labeled as Z_Wheel3_Guidev2, is stronger and preferred by me. I recommend using this version; however, it only comes with a tensioner. The tensioner is very useful and easy to work with. P.S.: On Re-D-Bot and D-Bot analogs, Micro V Wheels are used. Print Settings Printer Brand: RepRap Printer: Re-D-Bot Rafts: Doesn't Matter Supports: No Resolution: 0.2mm Infill: 100% Post-Printing For the tensioner, you will need one M5*15 (or a suitable length) and one M5 nut. 01.14.17 Update The design has been updated with an extra 1 mm on the outside for easier assembly. The updated files are: Z_Wheel3_Guide_v2-With_tensioner.STL Support me If you want to support me and receive cashbacks on Aliexpress, check this out: http://epngo.bz/cashback_index/v1nphb I really like their service; on Aliexpress, you can get double cashback (about 18%).
With this file you will be able to print 3-wheeled Z guide (Re-D-Bot) with your 3D printer. Click on the button and save the file on your computer to work, edit or customize your design. You can also find more 3D designs for printers on 3-wheeled Z guide (Re-D-Bot).
