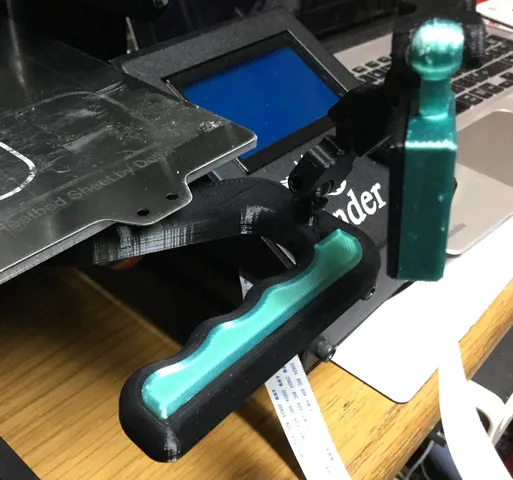
3-Point Levelling Bed Handle with Raspberry Pi Camera Mount
prusaprinters
Installing a 3-point bed-levelling solution helped me level the bed faster, but it also removed one of the two bed screws that I used to hold on my Ender 3 Bed Handle with its integrated Articulating Raspberry Pi Camera installation.I tried just living with having to install a screw specific to that handle, but it got in my way when reaching under the bed to adjust the level. Fortunately, gulfcoast_robotics has incorporated additional tapped screw holes for mounting their own bed handle designAll I had to do was pull their handle model and mine into 3D Builder, cut the mounting post off mine and merge it into theirs. The result is a handle with a post onto which I can mount my articulating camera mount, which can be downloaded from thing 3850321Print SettingsPrinter Brand:CrealityPrinter: Ender 3Rafts:NoSupports: NoResolution:0.20Infill: 20%Filament: CCTree PETG Black Notes: I actually printed with 80% infill, because I forgot to change it from a previous print. 20% should be plenty.I had some blistering on the top of my handle, probably because of the high nozzle temperature (230) and the slow printing speed (25mm/s). Not worth printing all over again, but you may want to take note and reduce the extruder temp for the final couple of layers.NOTES:Other elements of my Pi Camera installationSince the camera travels with the bed, the cable connecting the camera to the Pi needs to be long enough to allow unrestricted Y-axis movement. In my case, the Pi is mounted in a box underneath the LCD. I use a 50cm cable, which I bought from Amazon.NOTE: You will see in the photo that I put a twist into the camera cable, to stop it from getting trapped in the Y-axis belt pulley. My first one got pinched, shorted something in the Pi camera processing circuit, and forced me to replace both cable and Pi.The "box" in which I mounted my Pi is this one., except that I did not make the camera mount that came with that design, preferring to just pass the cable out between the box and the rail on the camera-side of the box and to mount the camera to the bed handle.I have tried mounting this camera in 3 different positions now: 1. fixed to the X axis, 2. fixed to the Y-axis and 3. fixed to the frame. Of these 3, my personal preference is fixed to the Y-axis. The camera tries to auto-focus, so when the subject keeps moving toward or away from the camera, the image is constantly going in and out of focus. Fixing to the Y-axis solves that problem, at the cost of managing the moving cable.Updates22March 2020: Disappointed by the blisters on the top of the handle, I decided to add a thin cover. I used Fusion360 to copy a slice off the top of the handle, shrank it a bit to follow the same contours but leave a black border, and the result is the two-tone version in the photo.I am liking the effect so much, I am adding silky green covers to the slots of the aluminum rails and to the extruder cable chain.I have uploaded the STL file for this mod, here, as Top.stl. Category: 3D Printer Accessories
With this file you will be able to print 3-Point Levelling Bed Handle with Raspberry Pi Camera Mount with your 3D printer. Click on the button and save the file on your computer to work, edit or customize your design. You can also find more 3D designs for printers on 3-Point Levelling Bed Handle with Raspberry Pi Camera Mount.
