3 Axis Skull and 2 Axis Eyes - Halloween Skull Project
thingiverse
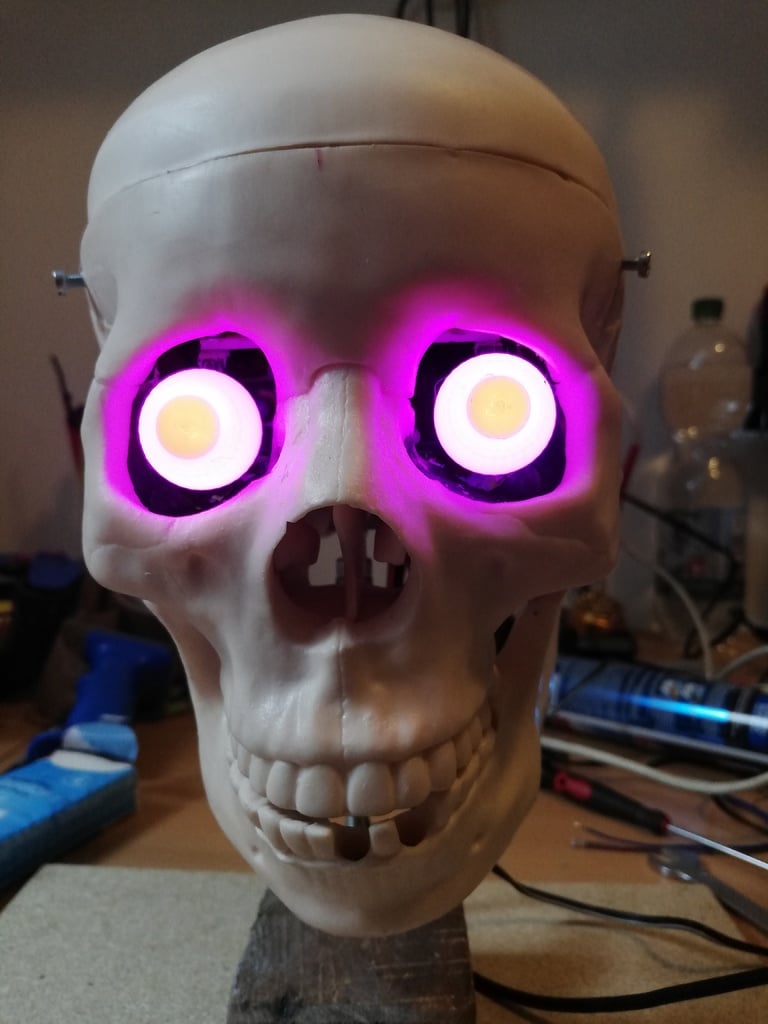
This project was inspired by a YouTube video featuring an animatronic skull. I wanted to create my own, but the expensive kits available made me decide to use my 3D printer instead. Living in Germany, I couldn't find the Lindberg skull in Europe, so I looked for a cheap alternative and found the XC-104 skull model from China. It's heavy at 1.2 kg, but works well after some modifications. To prepare the skull, I removed a lot of material inside using a Dremel tool, which took about 30 minutes and was quite messy. If you accidentally remove too much, it won't matter - it's supposed to be a rotten skull! The area from the nose down towards the upper jaw needs to be cleared to make space for the eyes animatronic board. It must fit perfectly or it will interfere with the skull servo board. The lower jaw is linked to the skull by two cable straps on each joint. I'll include schematics later. The animatronic is controlled by a cheap Arduino nano clone from China, which costs 4 EUR. However, this special Arduino has one flaw - when steering servos, they cannot run on the same power supply as the Arduino. To fix this issue, I used a cheap voltage DC-DC converter for less than 1 EUR. The Arduino runs on 12V directly, while the servos run on 5V. In this configuration, everything works perfectly. This project is still in progress, and especially the programming needs to be done - it's currently just a small test program. The programming must be on a time code to synchronize the movement of the jaw with an audio file. In my case, I want three skulls singing the Ghostbusters song, so I need to sync three skulls with one master Arduino that will start them simultaneously and control the sound file and lighting effects. This will be done in the future. I'm a complete beginner in programming Arduino, and what I present here is mostly copied from various online sources. It works for now, but as the project is not finished yet, it's far from perfection or elegance, so please don't criticize me for the imperfect code! Each skull must be individually tested on each servo to determine their physical movement limits - I'll include the test program later. I used the cheapest servos available from China, which are MG945 and SG90. These servos do not center correctly and often end up in a different position near the defined angle. This is unacceptable for an RC model, but suitable for this project. I haven't calculated the cost of a complete skull yet, but estimate it to be below 100 EUR. This includes one animatronic skull with servos and Arduino - a pretty attractive price for a 3-axis animatronic skull with RGB lighted 2-axis eyes. The hole measures in the printable parts are small, so you can easily drill them to any dimension you need. For example, the tube for the eyes servo board to connect to the center eye ball is 4 mm or approximately 1/6 inch - you'll need to drill holes in both the board and the center eye ball accordingly. Halloween 2019 Installation: https://www.youtube.com/watch?v=-8c9RkCJJGA Playlist of all tutorial videos: http://www.youtube.com/watch?v=9NNKajxI0-s&list=PLTyc4D895PUEJc8eNipVYug8fxN45OCBS Please find a collection of all source data and Arduino code programs on GitHub: http://www.github.com/3D-Gurke/Finuccis-Animatronic_Skull Please find all necessary files in the GitHub folders - you may remix as you see fit. Have fun and good luck! Good luck, 3D-Gurke
With this file you will be able to print 3 Axis Skull and 2 Axis Eyes - Halloween Skull Project with your 3D printer. Click on the button and save the file on your computer to work, edit or customize your design. You can also find more 3D designs for printers on 3 Axis Skull and 2 Axis Eyes - Halloween Skull Project .