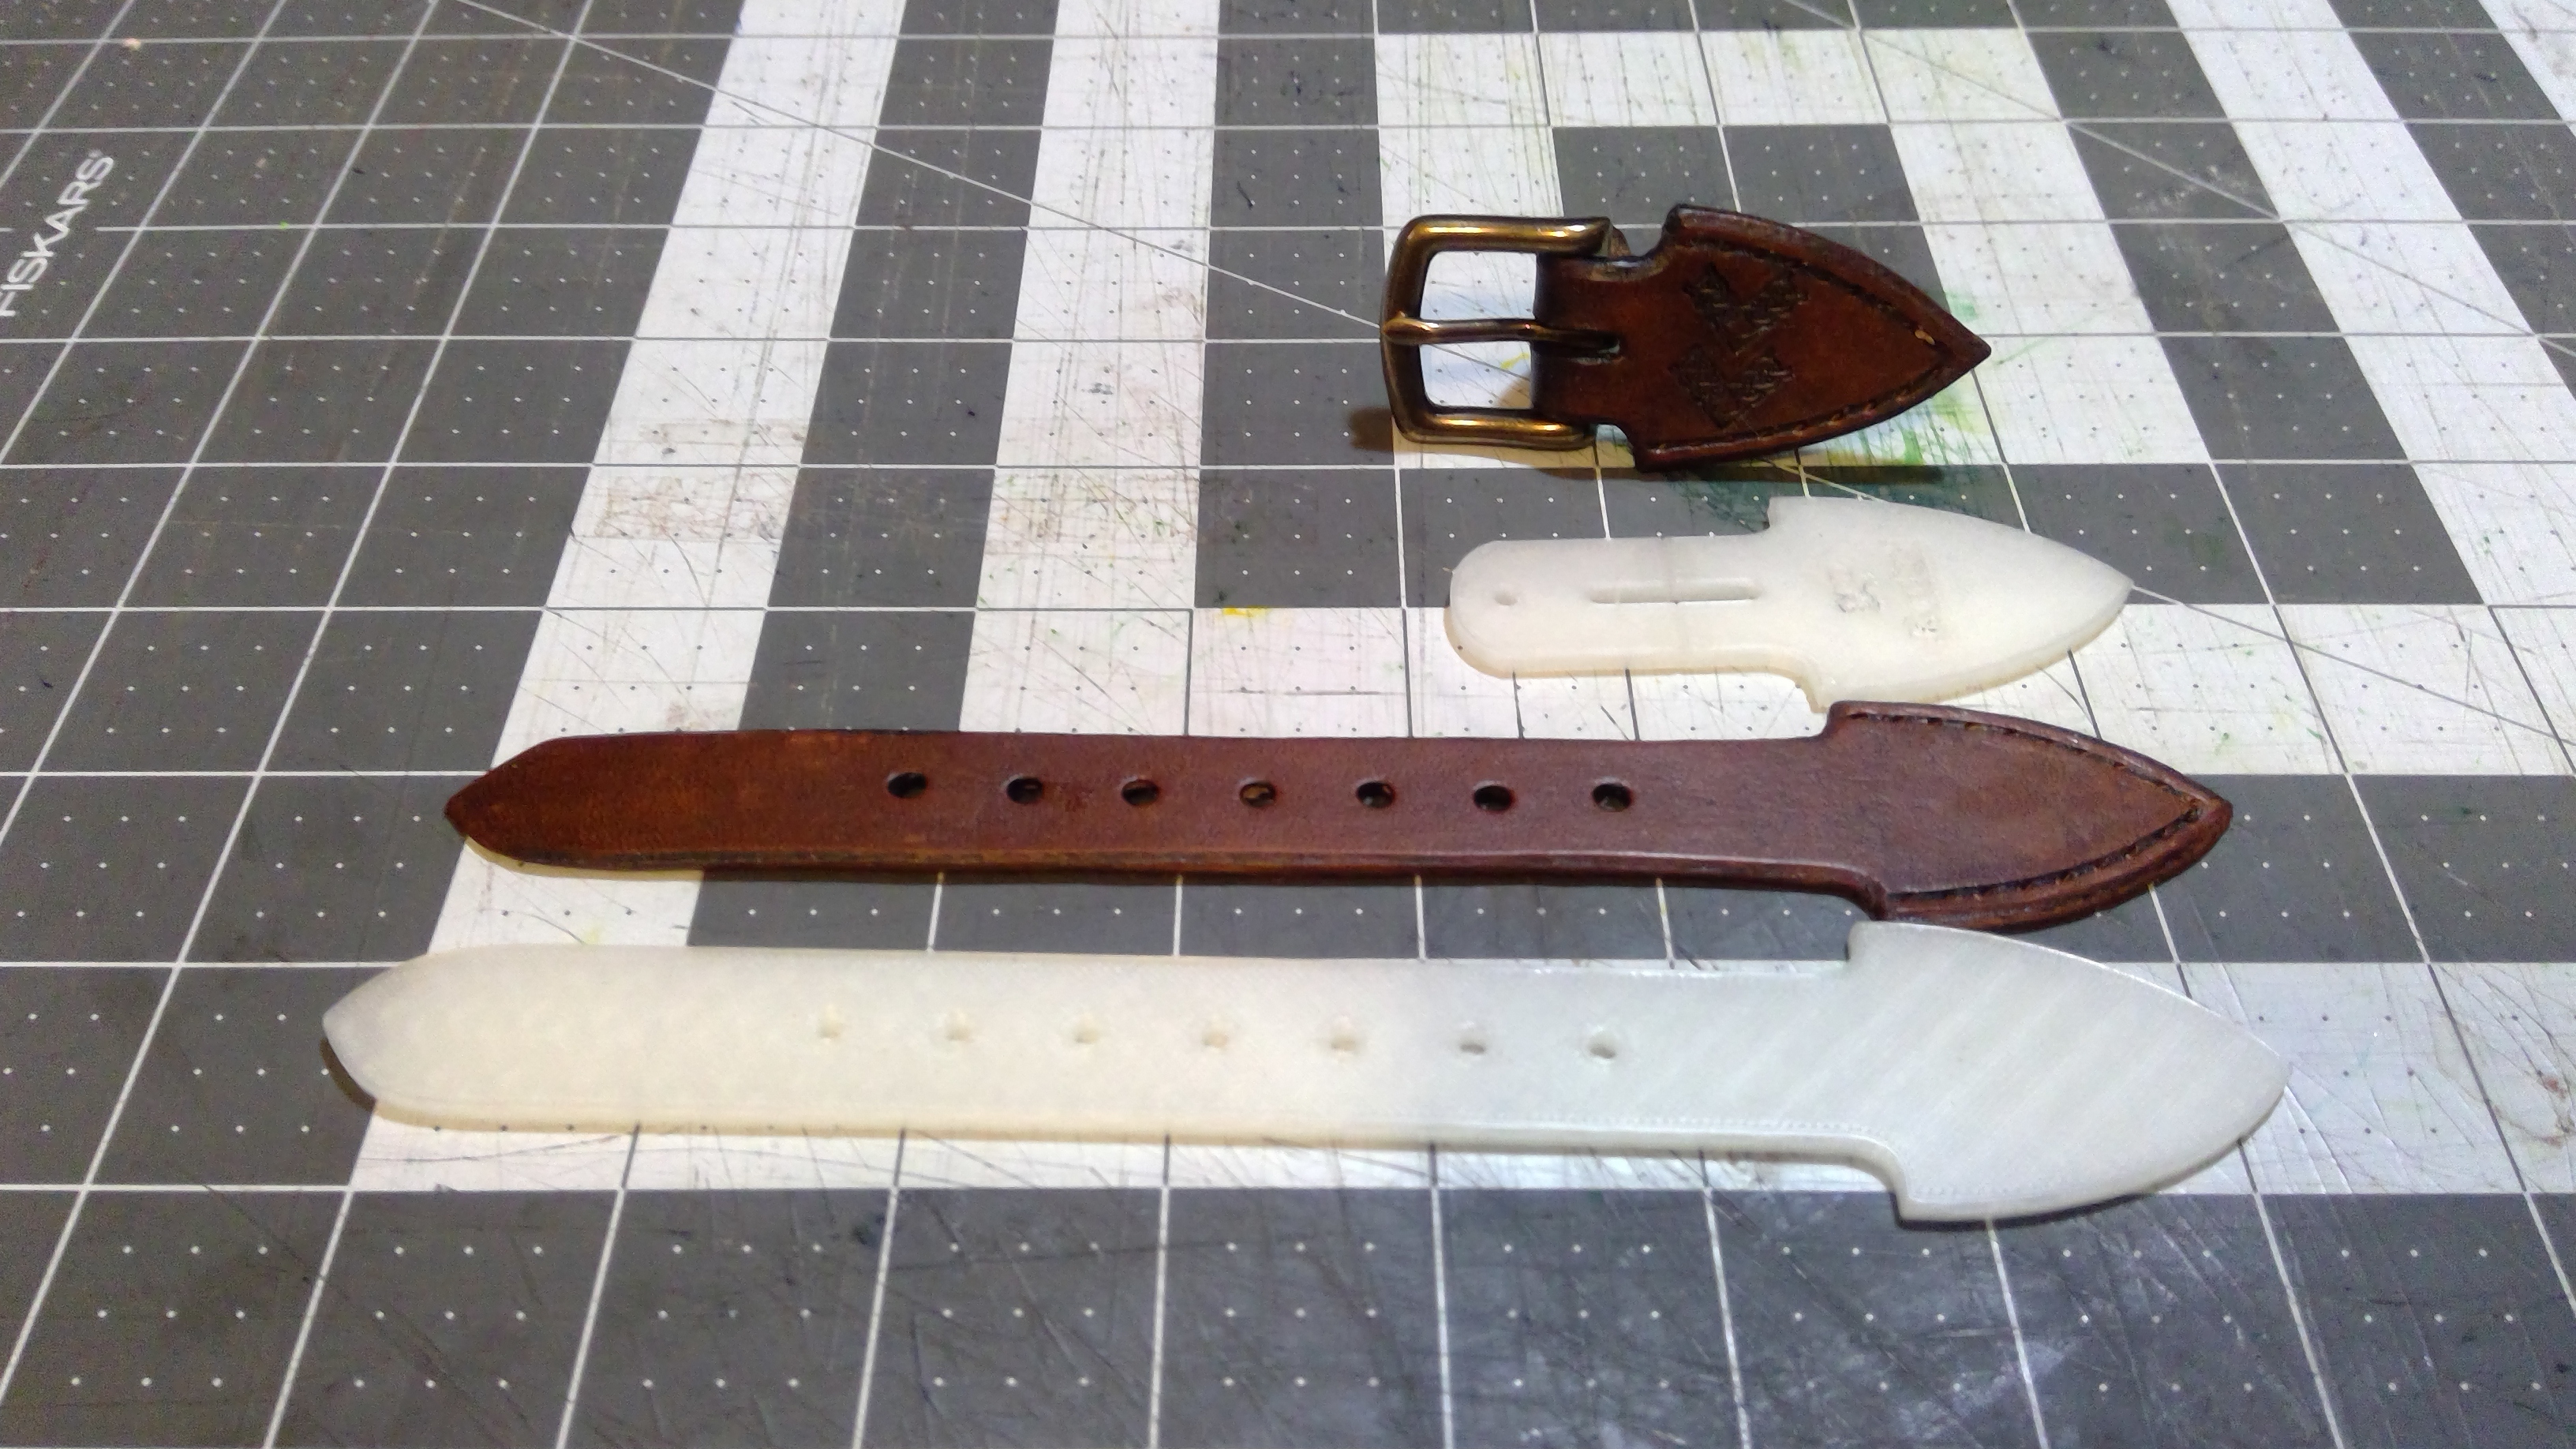
3/4in Billet Templates
prusaprinters
<h3>Printing Templates</h3><p>To print these templates chose your favorite slicer and import the STL file. I use the Prusa slicer and I used the PLA config and 2.0 Speed settings. It might come out a little nicer with the 2.0 Quality but speed settings work just fine. </p><h4>Using the Templates</h4><p>If you are new or old to leatherwork you can use billets to add just about anything to a surface. These templates are for a ¾" strap and buckle. If you would like a different size let me know in the comments. </p><h5>First</h5><p>Place the template on the leather and use a scratch awl or stylist or pencil to draw out the shape onto the leather and all holes and slots. You don't have to be exact in the hole outline as you should use a punch to make the hole but you do want to be able to get a good idea of where the center should be so the punched holes are still aligned. Cut out the leather now or wait until after the next step is finished either way is fine. </p><figure class="image"><img src="https://media.prusaprinters.org/media/prints/152272/rich_content/22a842d5-dc7a-4e12-a7ec-c58a14257650/20220318_164814.jpg#%7B%22uuid%22%3A%220b6f74f7-765d-4dc3-be78-2044a91b355f%22%2C%22w%22%3A3000%2C%22h%22%3A4000%7D"></figure><h5>Second</h5><p>Punch out the holes. The holes in the strap and top of the billet are obvious but the slot and the flared edge are also easiest to punch out. For this set use a 3/32" or 2.5mm punch for the holes and the top and bottom of the slot. For the flare of the billet use a ¼" or 6.5mm punch just outside the line so the punch will make a nice sweeping transition to the strap. Cut out the slot by starting on the very edge of the hole and cutting toward the other hole. Do not finish the cut as you can easily cut through and ram the knife into the opposite side of the hole leaving an ugly mark, one that will open once the strap is bent around the buckle. Flip it around and start in the hole again and meet the previous cut, then do it again for the other side.</p><figure class="image"><img src="https://media.prusaprinters.org/media/prints/152272/rich_content/d8a206ca-37d7-48b3-be8f-8ef321f92cb1/20220318_170125.jpg#%7B%22uuid%22%3A%2267a55121-ffde-4fc2-9561-f15a1b50186d%22%2C%22w%22%3A3000%2C%22h%22%3A4000%7D"></figure><h5>Third</h5><p>Use the cutout in the slot to mark where the bend should go. The best way to make sure the bend occurs well use a V-groover to gouge a line counter the slot. Next, use a groover to put a groove about 3/16 or 4mm from the edge of each side of the billet. This groove will be where you sew the billet onto your project. </p><figure class="image"><img src="https://media.prusaprinters.org/media/prints/152272/rich_content/4910c0b7-4b8a-4f4d-8309-c11d54f9838c/20220318_170421.jpg#%7B%22uuid%22%3A%22ee60c0a7-5125-4010-83f4-7a405ff0cc73%22%2C%22w%22%3A3000%2C%22h%22%3A4000%7D"></figure><figure class="image"><img src="https://media.prusaprinters.org/media/prints/152272/rich_content/ca4ae63f-ca97-490a-85d0-76113fac9930/20220318_170800.jpg#%7B%22uuid%22%3A%2233fdf4e5-2c76-4e22-acb1-9b0eeee9544c%22%2C%22w%22%3A3000%2C%22h%22%3A4000%7D"></figure><h5>Forth</h5><p>Finish the edges. First, use an edge beveler to take off the corners all around the top of the template except at the tip of the strap past the middle of the slot. Also, do the bottom of the strap as it needs to be rounded. Then skive the tip of the tip so it is about half as thin as the original leather. You can use whatever method you like to finish your edges but I like to use some gum tragacanth and a wood slicker. Get a good coating on the edges and rub them smooth. The slot should also have some slicking and is easiest to do with the shaft of your scratch awl. </p><figure class="image"><img src="https://media.prusaprinters.org/media/prints/152272/rich_content/d8b2556f-a017-4ffa-ad53-753479ae79eb/20220318_171052.jpg#%7B%22uuid%22%3A%22c56d132f-d609-4f3a-9418-6b89efa2573a%22%2C%22w%22%3A4000%2C%22h%22%3A3000%7D"></figure><figure class="image"><img src="https://media.prusaprinters.org/media/prints/152272/rich_content/f39de216-e0f7-416e-82ea-39766a8820f7/20220318_170926.jpg#%7B%22uuid%22%3A%22f2b6a152-653f-47fd-b817-abb8307ff5fa%22%2C%22w%22%3A3000%2C%22h%22%3A4000%7D"></figure><h5>Fifth</h5><p>If you want to stamp or tool a design, now is a good time to do it. I just stamped an easy makers mark on one of the two I did during this project. Then its time to wet form the buckle billet so you can easily form the strap around your buckle. First, wet the top and bottom of the strap around the slot. Gently roll the strap until it's close to the shape it needs to be for the buckle. Insert the buckle and gently apply pressure until the leather forms to the buckle's bar. Don't go too quickly as that will make the leather split or crack. Add water as needed and then let dry for a few minutes. </p><figure class="image"><img src="https://media.prusaprinters.org/media/prints/152272/rich_content/e1a1d0bc-95df-4440-9715-d4762e77f859/20220318_173535.jpg#%7B%22uuid%22%3A%2296fdf388-b9b9-4c46-9ea8-cb8c98afea67%22%2C%22w%22%3A3000%2C%22h%22%3A4000%7D"></figure><figure class="image"><img src="https://media.prusaprinters.org/media/prints/152272/rich_content/9805318c-9fdb-4177-8c0e-ee653c1d2810/20220318_173815.jpg#%7B%22uuid%22%3A%2212a8fbc0-5db3-4f9c-ac4e-5ee78cb8695f%22%2C%22w%22%3A3000%2C%22h%22%3A4000%7D"></figure><h5>Sixth</h5><p>Time to dye the leather if you are going to or apply any finishes. You will need to undo some of the last step; but if you dye then wet form you can make the dye thin out or run. Dye using whatever method you like and the instructions for that product. I use the Eco-Flow Medium Brown Antique. Rub it on with a wool dauber and make sure to get in all the cracks then wipe off with a paper towel. Let it dry and make sure to bend the buckle strap over while dying so it stays a good consistent color. </p><figure class="image"><img src="https://media.prusaprinters.org/media/prints/152272/rich_content/c123bb62-fee0-4f93-b883-085ffa59eec7/20220318_225733.jpg#%7B%22uuid%22%3A%22a3ed2fa4-85fc-45c4-94c3-fa18e23c6d44%22%2C%22w%22%3A4000%2C%22h%22%3A3000%7D"></figure><h5>Final</h5><p>Sew it onto your project. First, rivet the top hole of the buckle billet down after installing the buckle. Then glue the billet flat to the project. Then its time to make the sewing holes. Just make sure that your spacing is even and you can take the thread off the top of the billet to secure it well. It also helps if the sewing holes meet at the tip of the billet so it's consistent the whole way around. There are lots of ways to mark and make the sewing holes but I like to use sewing chisels in 6mm spacing, I use a mallet to punch the holes all the way through the project and then use a saddle stitch to sew it on. </p>
With this file you will be able to print 3/4in Billet Templates with your 3D printer. Click on the button and save the file on your computer to work, edit or customize your design. You can also find more 3D designs for printers on 3/4in Billet Templates.
