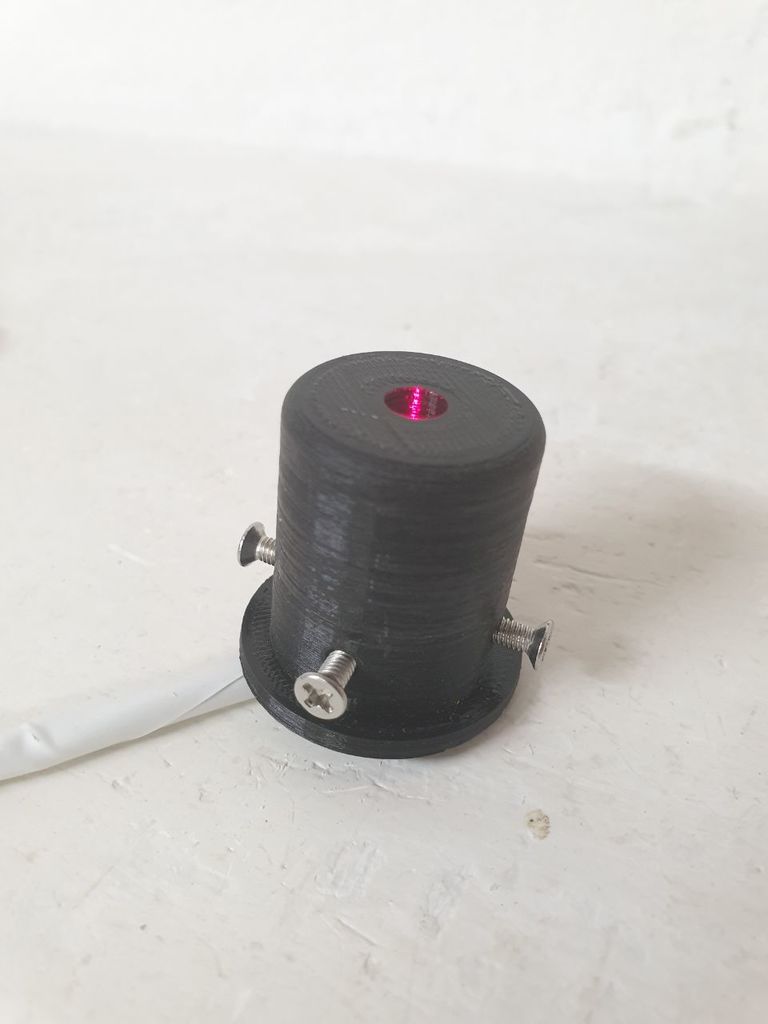
24mm CO2 Laser Alignment tool
thingiverse
This is a remix of https://www.thingiverse.com/thing:4696157 CHANGES: Adapted outer diameter to 24mm laser gauge Added holes for 4x M3 screws that help align and fix laser in position ORIGINAL DESCRIPTION (with editions that apply): This is a "reverse alignment laser" that you can use to align a CO2 laser mirrors starting at the end furthest from the tube. CO2 lasers are invisible IR so you usually use a "scorch test" where you stick some tape in front of the mirror (not on it) and turn the laser on till a black burn appears. You adjust the mirrors one at a time starting at the laser tube till the laser is burning in the same spot regardless of the position of the moving mirrors. This tool works the same way except you start at the mirror furthest from the tube. Because the beam is visible its safer and you don't have to keep opening the lid to adjust or see something. You can buy these and they aren't too expensive and are accurate when they arrive! I recommend you buy one of these. https://american-photonics.myshopify.com/products/k40-reverse-laser-alignment-nut You can buy a “boresight laser” and easily make your own, these boresight lasers cost about U$12-20 online and I think that's what APC uses anyway. When you've got the time to waste and a 3D printer sitting idle you use a cheap 6mm laser (less than $10 for 10 pcs online) which is badly aligned and poorly focused, print this thing and do the alignment by hand. <s> It's only 4g of filament (1.43m $0.17 - takes 36 minutes to print - almost enough time to have some tea) </s> The diameter of the tool must be the same as your lens tube! This one is <s>16mm.</s> 24mm. Method Focus your laser before you start the next step. The lens can be adjusted. If its glued then it may be good enough. Align the tool When you've printed the part you stick the laser in the wide end till it jams not too tightly in the narrow 6mm part. Now use a corner, like putting a nice square box on the table, put the tool (with the laser powered) in the corner and roll it into the corner so it turns but stays in the corner. Watch the laser dot and adjust the laser from behind with <s>a toothpick</s> the M3 screws till the dot doesn't move as you roll the tool. When the dot is stable and doesn't draw circles, <s>epoxy or CA glue it into position permanently</s> tighten the screws. It is now aligned on the axis. Use APC has a nice video using their tool https://youtu.be/qF-iK_BElBM Remove the K40 lens. Insert the tool into the lens tube so that it shines the dot up into the third mirror and reflects it back towards the second mirror. It should be a snug fit so that its aligned perfectly with the lens tube. Wrap some tape around if it falls out to keep it in place. Place a piece of paper in the spot where the second mirror is. Adjust the 3rd mirror so that the dot is in the same spot whether the head is nearest or furthest from the second mirror Do the same but use the second mirror do direct the red dot at the first mirror, it should stay in the exact same position on a piece of paper in front of the first mirror as you move the gantry from the back to the front. Only adjust the second mirror for this alignment. Unfortunately you can’t see the dot that comes off the first mirror, it’s reflected into the CO2 laser. Now you do the whole thing in reverse using the CO2 laser and the scorch test. You likely only have to adjust the first mirror because the other 2 are already aligned.
With this file you will be able to print 24mm CO2 Laser Alignment tool with your 3D printer. Click on the button and save the file on your computer to work, edit or customize your design. You can also find more 3D designs for printers on 24mm CO2 Laser Alignment tool.
