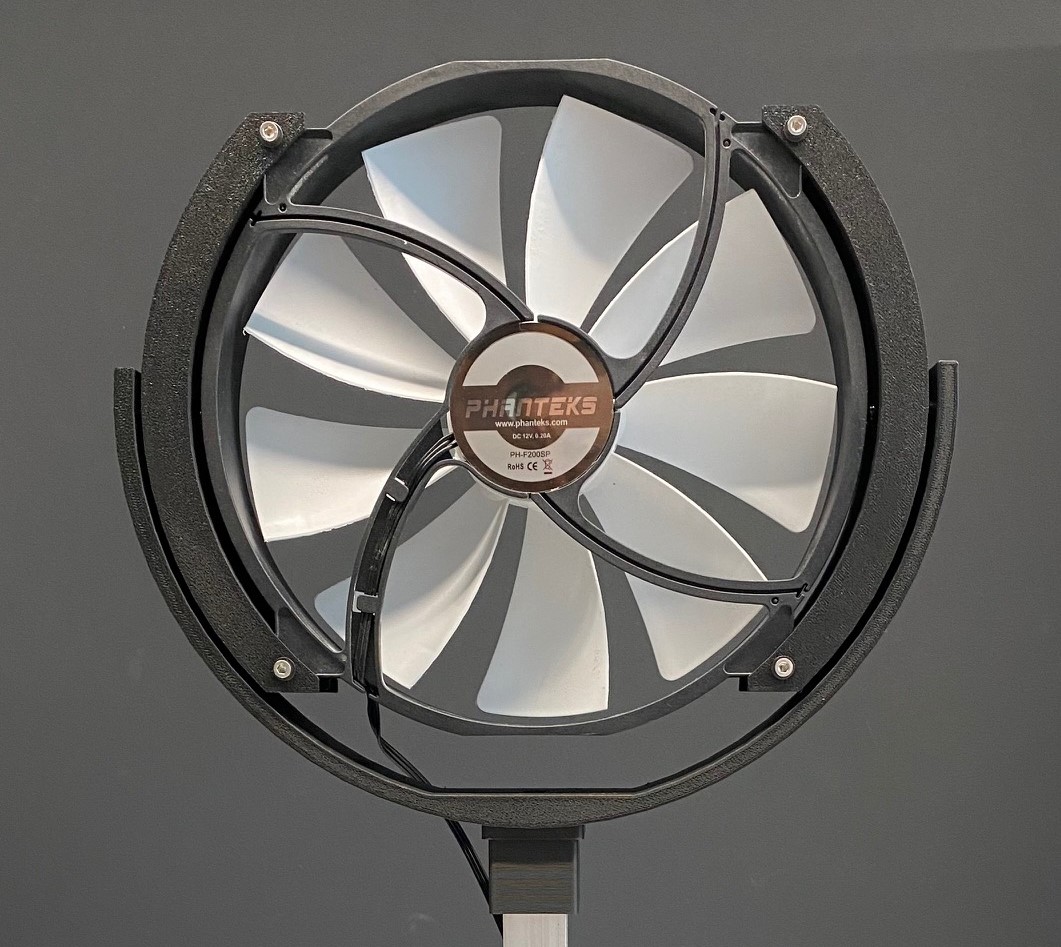
200mm PC Fan Desktop Fan
prusaprinters
<p>Summer is coming.</p><p>My office is getting hot.</p><p>I had a spare 200mm Phanteks PC case fan and decided use it as a desktop fan.</p><p>I have previously designed and printed some “feet” (https://www.thingiverse.com/thing:4515078) to angle the fan just enough for desktop use, but I was not satisfied with this solution, so I have designed a full desktop fan with adjustable angle.</p><p>I use a USB to 12v converter to drive the fan at 12v. When driven at 5v it is not powerful enough to create a cooling breeze. Something like this: <a href="https://www.amazon.co.uk/12V-Voltage-Step-Converter-Cable-5V/dp/B07J6NYVJV">https://www.amazon.co.uk/12V-Voltage-Step-Converter-Cable-5V/dp/B07J6NYVJV</a>. This also allows to use the fan with a USB power bank. You can also use any 12 power supply.</p><p>In addition to printed parts you will need:</p><ul><li>1 x 200mm 12v case fan - e.g a Phanteks - <a href="https://www.amazon.co.uk/Phanteks-PH-F200SP_BK-F200SP-200mm-Fan/dp/B00NC08E9Y)">https://www.amazon.co.uk/Phanteks-PH-F200SP_BK-F200SP-200mm-Fan/dp/B00NC08E9Y)</a>. This is nice fan that is pretty much silent and moves just enough air to create a cooling breeze. </li><li>2 x M4 x 18mm cap screws to secure the fan surrounds to the gantry (M4 x 20mm would be fine)</li><li>2 x M4 nylock nuts to secure the fan surrounds to the gantry</li><li>6 x M4 washers to use as spacers between the gantry and the fan surrounds (3 each side)</li><li>4 x M4 x 40mm cap screws to secure the fan to the surrounds</li><li>4 x M4 nuts to secure the fan to the surrounds</li><li>1 x M4 x 18mm to secure the gantry to the pillar curtain (M4 x 20mm would be fine)</li><li>2 x M4 screws (or 1 x M4 nylock) to the gantry to the pillar curtain</li><li>Aluminium 20mm square profile for the pillar. Cut to preferred length based on desired fan height - mine is approx 25cm.<br><strong>Note</strong>: You may be able to use 2020 profile assuming you can add a M5 tap on center. You'll need to modify the pillar curtain for M5 rather than M4 cap screw. I have not tried this… you're on your own :)</li></ul><p><strong>Printing</strong></p><p>The largest part (gantry) <i>just </i>fits on an MK3s bed - rotate until you have a fit</p><p>Print settings I used were slight tweaks on the MK3s 0.3mm layer Draft profile:</p><ul><li>3 perimeters</li><li>5 top and bottom layers</li><li>10% infill for the fan surrounds, 20% for the rest</li></ul><p>For the fan surrounds supports are needed. I painted support blockers on the holes in the center, but allowed supports for the ends. For all other parts no support are needed.</p><p>Depending on the length of the piller print one or more of cable clips </p><p><strong>Assembly</strong></p><ol><li>Print all parts</li><li>Secure both fan surrounds to the gantry with the 18mm M4 cap screws, 3 x washer between the gantry and the fan surround and a nylock nut as captive nut on each side</li><li>Rotate the surrounds 90 degrees vs the gantry and insert the fan. Rotating the surrounds allow the flexibility of the gantry part to allow the fan to be inserted easily</li><li>Secure the fan with the M4 x 40mm cap screws and nuts</li><li>Insert M4 x 18mm cap screw through the base of the gantry and the end of the pillar curtain. Secure with nut(s)</li><li>Insert the 20mm profile pillar into the base and the pillar curtain - its held with friction</li><li>Clip the cable to the piller with the cable clip(s)</li></ol>
With this file you will be able to print 200mm PC Fan Desktop Fan with your 3D printer. Click on the button and save the file on your computer to work, edit or customize your design. You can also find more 3D designs for printers on 200mm PC Fan Desktop Fan.
