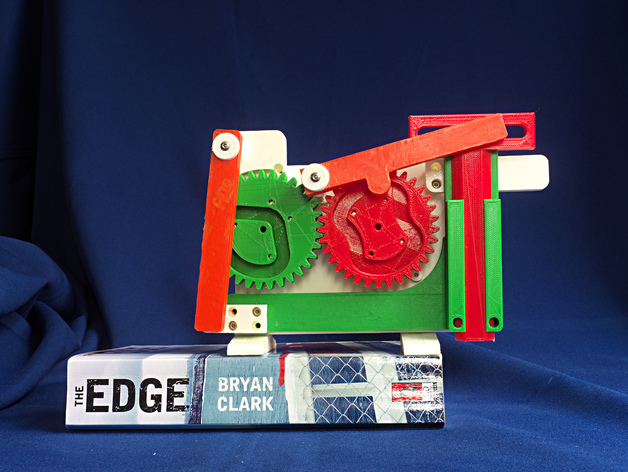
2 Geared Cams
thingiverse
A mechanism initially seen on GrabCad: https://grabcad.com/library/gears-cams-sliders-hammer-mechanism-1 An outstanding example of a cam-operated shuttle mechanism is showcased here. Designed using Moi (Moment of Inspiration), simulated in SimLab Composer Mechanical, and manufactured from Diamond Age PLA on an Ultimaker original printer. A video simulation of the final design (bar one change) can be viewed at: https://youtu.be/cHt5Pa25lRg And a video showcasing the printed model is available here: https://youtu.be/8rOMdYrTlWI A 3D pdf file allowing viewing of the running model from any angle is included in the files. Print Settings: Printer Brand: Ultimaker Printer: Ultimaker Original Rafts: No Supports: No Resolution: .02mm Infill: 20%-40% Notes: All parts are manufactured from Diamond Age PLA. It is crucial to ensure that larger parts are as flat as possible, particularly the base. Redesigning it to reduce material usage and carefully setting the nozzle print surface gap were essential steps I took. A brim was used on all parts. For the base, 1.2mm walls, 1.0mm top and base, and 20% infill were utilized. Most other components feature 1.2mm walls, top, and bottom, along with 30% infill. Temperature: 210C. The screws are all 3mm Button Head Cap Screws measuring 10mm in length. I employed 20, but there is provision for a total of 32. Post-Printing: Excess material should be removed, and the holes where things rotate must be opened to size. Hand reamers (with these handles: http://www.thingiverse.com/thing:386855) are used for this purpose. Verify that the slid parts slide freely. Ensure that the pegs move easily within the cam groove and the various slots. Start assembling. Three-millimeter Button Head Cap Screws, 10 millimeters in length, were utilized. Twenty screws were employed, but there is provision for a total of thirty-two. Initially, attach the blocks to the base. Next, align the gears so that their grooves are (more or less) positioned as shown in the first photo. Pre-assemble the main bracket and then slide it into the groove in the base. Finally, assemble the levers.
With this file you will be able to print 2 Geared Cams with your 3D printer. Click on the button and save the file on your computer to work, edit or customize your design. You can also find more 3D designs for printers on 2 Geared Cams.
