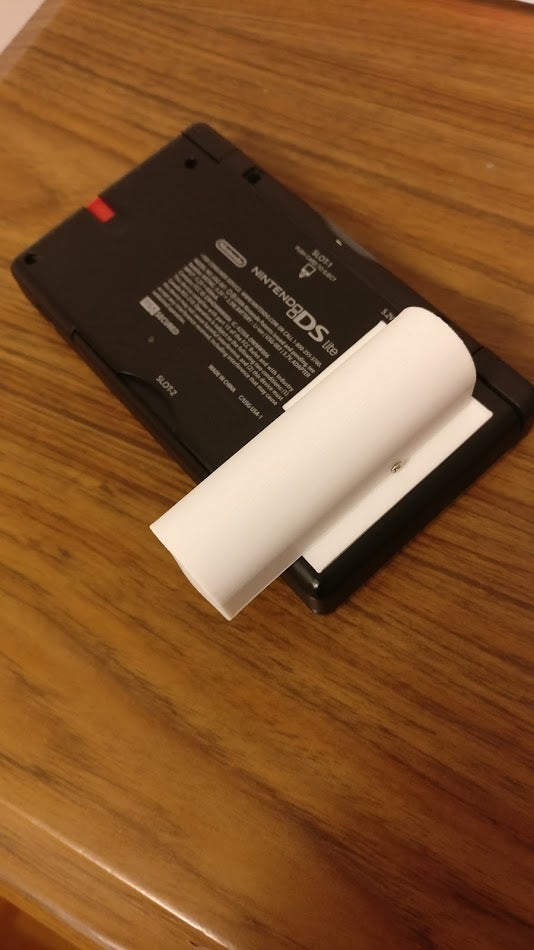
18650 Battery Adapter for NDS Lite
prusaprinters
<p>The NDS Lite is a great little machine but now it's hard to find working batteries for this thing. You go online to buy a battery advertised as 800mah but it comes as 400mah because it's been sitting in the warehouse for 5 years. Well forget that, just hack in a fresh 2400mah 18650 battery instead! It's still lithium so it recharges with the original recharging cable too.</p> <h3>Print instructions</h3><h3>Category: Video Games Summary</h3> <p>The NDS Lite is a great little machine but now it's hard to find working batteries for this thing. You go online to buy a battery advertised as 800mah but it comes as 400mah because it's been sitting in the warehouse for 5 years. Well forget that, just hack in a fresh 2400mah 18650 battery instead! It's still lithium so it recharges with the original recharging cable too.</p> <h3> Print Settings</h3> <p><strong>Rafts:</strong> No</p> <p><strong>Supports:</strong> No</p> <p><strong>Resolution:</strong> 0.2</p> <p><strong>Infill:</strong> 15%</p> <p><strong>Notes:</strong></p> <p>Designed for PETG for its flexability and good layer adhesion - my material of choice.</p> <h3> Post-Printing</h3> <p><strong>Assembly</strong></p> <ol> <li>Solder 2 pieces of wire about 5-10cm, each with a small spring on one end and a small strip of copper on the other.</li> <li>Wrap the strip of copper on the fake battery and glue it on the backside so the NDS's contacts can touch them when the battery is inserted.</li> <li>Insert the fake battery and leave the wires passing through its central hole. Secure the wires onto the fake battery with glue gun or your adhesive of choice.</li> <li>Remove the securing screw from the original lid and transfer it over to the new lid.</li> <li>Install the new lid, using the screw to secure the new lid just like the original.</li> <li>Insert the 18650 cell into the battery bay (cyltop) with the sprint contacts in the correct orientation. Note that the + terminal is closer to the back of the NDS so ensure this terminal is connected to the + of the battery.</li> <li>Squish the excess wire into the battery bay and install the small battery lid (cylbotlid).</li> <li>Mate the battery bay to the protruding fake battery and insert the M2 screws to secure.<h3>How I Designed This</h3> </li> </ol> <p><strong>Tools used:</strong></p> <p>Fusion 360, vernier Calipers, cell phone camera, sheer autistic perfectionism</p> <h3> Ingredients</h3> <p><strong>Non printed ingredients</strong></p> <p>1x PROTECTED 18650 cell, usu. for flashlights.<br/> 2x copper strips for interfacing the battery contacts in the NDS<br/> 2x wire<br/> 2x spring for interfacing the 18650 cell<br/> 1x original securing screw from the NDS battery bay lid<br/> 2x 4mm M2 Screw</p> <h3> DO NOT MESS THESE UP:</h3> <p><strong>Ensure that...</strong></p> <p>... the 18650 cell is protected, i.e. has overvoltage and undervoltage protection, not flat top raw cells.<br/> ... the M2 screws are not long enough to scratch the 18650 cell when installed. Shorter than 5mm is fine.<br/> ... the polarity of the battery is correct when installing, or you could damage your NDS lite.</p>
With this file you will be able to print 18650 Battery Adapter for NDS Lite with your 3D printer. Click on the button and save the file on your computer to work, edit or customize your design. You can also find more 3D designs for printers on 18650 Battery Adapter for NDS Lite.
