160mm Hollow ball
pinshape
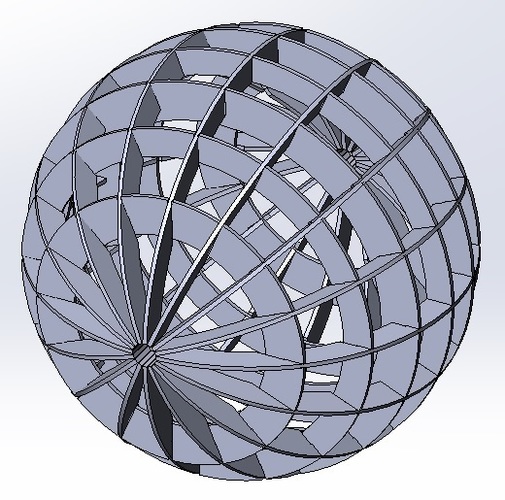
Assembly Instructions for a 160mm Hollow Ball Model Printed in 3D To create the 160mm hollow ball model, start by slotting together individual components. The first step is to attach two 4th rings, one on each side of the assembly. Next, add two 3rd rings, positioning them between the 4th rings and ensuring secure fitment. Following this, install two 2nd rings, securing them firmly in place alongside the 3rd rings. The middle ring is then attached to complete the lower section of the hollow ball. Finally, attach sixteen array parts to form the upper portion of the model.
With this file you will be able to print 160mm Hollow ball with your 3D printer. Click on the button and save the file on your computer to work, edit or customize your design. You can also find more 3D designs for printers on 160mm Hollow ball.