$16 Wireless USB-C Powered ESPHome Temperature & Humidity Sensor
prusaprinters
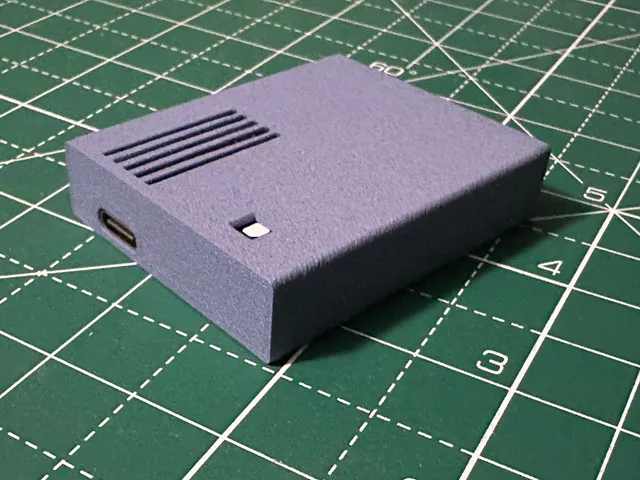
This device is an ESPHome capable temperature and humidity sensor that can be powered over USB-C. While it supports Bluetooth we will be using Wi-Fi for this model.It is divided into 3 chambers with an insert separating them to provide separation of the MCU and the sensor, so the heat from the MCU will not affect measurementsThis was designed using the CAD assets we have created on printables for the Seeed Studio XAIO ESP32C3 MCU and SparkFun Si7021 breakout board.Please note that this is a build with tight tolerances and small parts. It requires basic soldering skills and also consideration of the difficulty of the inner M2 Ruthex inserts (see below). Please read the whole guide before committing!A wall mountable variant of the case is now also available! Note that the holes in the tabs for wall mounting are 5mm wide.Sensor Specific Note:This sensor is not suitable for outdoor use, or use in very humid environments above 80% RH, usage in such environments may permanently affect the sensor to the point where it will never produce an accurate reading. It will work inside well however where the humidity is lower. Also, it will lose accuracy of about 0.25%RH per year and despite being marketed as a sensor that is not susceptible to interference it definitely is - please site this away from sources of EMI. Required Parts:This model has been very specifically designed to fit:Seeed Studio XIAO ESP32C3 (approx. $4.99)SparkFun Humidity and Temperature Sensor Breakout - Si7021 (approx. $10.95)6x Ruthex M2 threaded inserts (Amazon)4x M2x5 screws2x M2x20 screwsWireOptional but perhaps useful is a small heat sink for the thermal pad on the underside of the MCU. The pad itself is about 3x3mm. There is clearance in the case designed in so that an appropriate heat sink may be fitted if necessary.Printing:Everything prints with the 0.4 nozzle however the insert will have some gaps around the screw holes at this nozzle size. This will still be functional and non-visible. A 0.2 nozzle or MSLA printer will fix this problem.The print pictured above was printed with a 0.4 nozzle.Wiring:This is a very simple job, as the Si7021 already has pull-ups for I2C. Please ensure to use cables that will fit through the holes in the insert.ESP32C3 PinSi7021 Pin3V3+GND-SDADASCLCLIt should be arranged something like this after the soldering:Assembling:Please treat any screw holes in this model as if they are threaded, and turn the screws into them. Do not push them through or you may break parts of the model.I had to make an extra long/thin ruthex insert tool to reach the inner four M2 ruthex inserts, as they are deep in the case and by the edges. This requires extreme care, I also used airflow to stop the case burning.I used a nail in a soldering iron - it worked. Here is the tool:Please ensure the plastic insert is oriented correctly and that you carefully insert the boards which are purposefully a tight fit so it is easier to align in the main case. This may take several attempts with wiggling and poking but you will get there!Software:The board and sensor are supported by ESPHome and hence easy to integrate with Home Assistant. Configuring ESPHome and Home Assistant is beyond the scope of this guide, and you are better served using one of the many guides on the internet to set this up. The easiest way is to install it as an add-on directly in a supervised home assistant. There is some guidance here at the ESPHome documentation pages.When you have done this, also follow the instructions to add a device to ESPHome and install the basic firmware on the devices. Following that, add the following code to the device configuration:i2c: sda: GPIO4 scl: GPIO5 sensor: - platform: htu21d temperature: name: "Temperature" humidity: name: "Humidity"When this is complete HomeAssistant will very quickly find the device and allow you to add it to your specified zone.Versions:2023.09.07: Add wall mountable version of the main case.2023.08.27: Remove 2mm from the back panel guides due to small clearance issue.2023.08.26: Original upload.
With this file you will be able to print $16 Wireless USB-C Powered ESPHome Temperature & Humidity Sensor with your 3D printer. Click on the button and save the file on your computer to work, edit or customize your design. You can also find more 3D designs for printers on $16 Wireless USB-C Powered ESPHome Temperature & Humidity Sensor.
