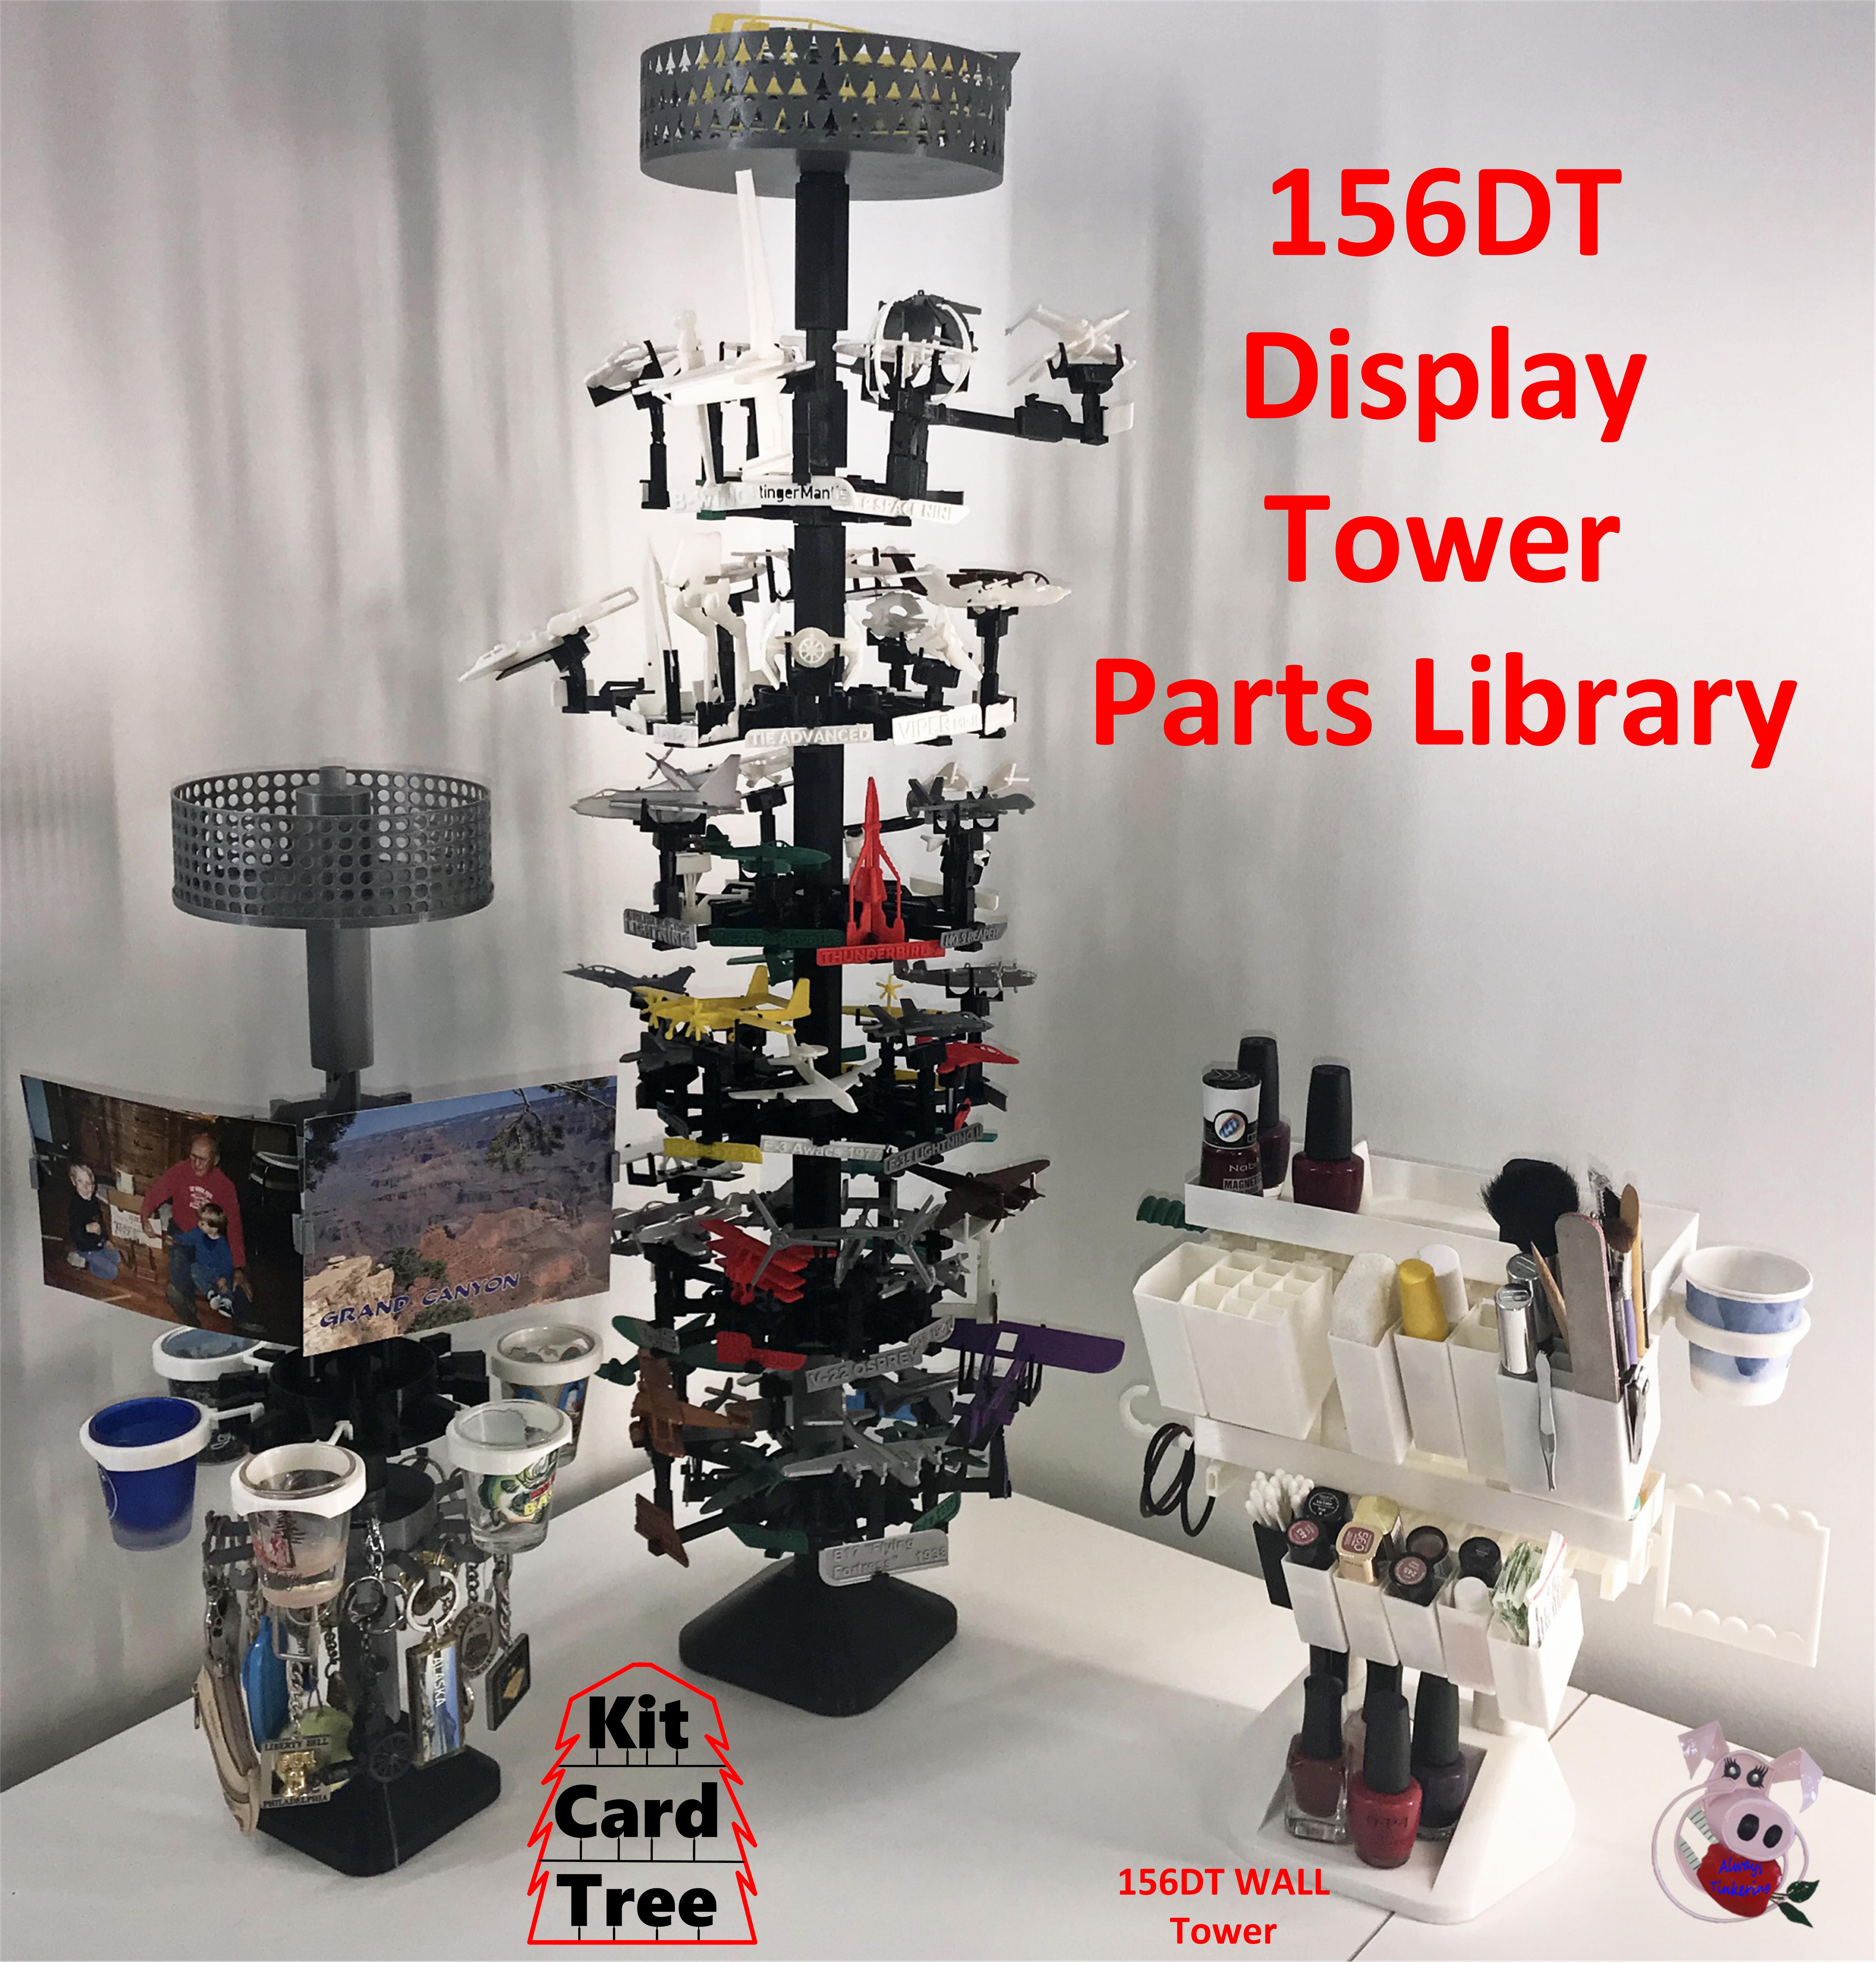
156DT Display Tower
prusaprinters
<p><strong>156DT Display Tree</strong></p><p>This is the library for parts for the 15.6mm Display Tower. This is a modular tower that you build to fit your needs. Optimized for .4mm nozzle .2mm layer where possible. Most parts are printed with no supports</p><p>The tower's initial version was to organize sizes of a specific plastic print. It was then used to build the Kit Card Tree. You only need a few parts to get started as illustrated in the assembly diagram to get started with your first level. </p><p>Shaft Safety note: While shaft wedges do have their ends blunted, please use care when using them.</p><p>Other Libraries associated with the 156DT tower and 3UDC display clip.</p><ul><li><a href="https://www.printables.com/prints/126509">156DT Display Tree Library</a> (this Library)</li><li><a href="https://www.printables.com/prints/126499">3UDC Accessory Library</a> (surface mounts, acessories, extensions here)</li><li><a href="https://www.printables.com/social/116733-alwaystinkering/collections/120395">PrusaPrinters COLLECTION Library of KitCard Platforms</a> (Kitcard Tree Platforms)</li><li><a href="https://www.thingiverse.com/alwaystinkering/collections/kit-card-tree-platform-collection">Thingiverse COLLECTION Library of KitCard Platforms</a> (Kitcard Tree Platforms)</li><li><a href=" https://www.printables.com/prints/126506">3UDC and 155DT Developers Library</a> (Clips and parts for you to add to things)</li><li><a href="https://www.printables.com/prints/126495">Kit Card Tree Parts and the 3UDC pivot platform</a> (Kitcard Tree parts, pivot arm)</li></ul><p><strong>Getting Started:</strong></p><p>Shafts are all printed laying flat. Therefore you will need to add some SUPPORT FROM PLATE only. You should not have any bridging problems at the tops of the shaft holes and no supports are required in the holes. You will need to trim clean your shaft down to size as you remove support material. I recommend the<strong> test hub </strong>as you can rapidly make it too small once you reach the right size. The Test hub should be snug passing the key and then spin freely.</p><p><strong>TEST PIECES:</strong> For your first print I recommend you print some pieces to check the tolerances. I went back and forth .1mm and finally decided on publishing a tighter tolerance first. Please let me know your experience. Tolerances are generally applied to the shaft HOLE and not the shaft. This means you should be comfortable with the tolerance BEFORE you print a base… which has a hole.</p><ol><li><strong>156DT_HUB_20mmTall-Test-Fit+4-Default-tolerance.stl</strong> to Test the SPIN</li><li><strong>156DT_Top_wedge_terminating-Cover.stl</strong> to test wedge fit</li><li><strong>156DT_shaft_049mm_sqr_64_spacing_for-20mm-high-hub.stl </strong>to test shaft and wedge<strong>. </strong> This is a usable piece, however if used in the lowest position I recommend extra perimeters for strength at least 3 to 4..</li></ol><p>Clean the support off the shaft and re-check the wedge and rotation. There is a raised ring the platform rides on. Make sure to clean support material around that ring. </p><p><strong>Pick your parts and print:</strong></p><p>Plan your tower. If what you are mounting will hang below the ring then spacing below the ring should be your space measurement. </p><p>If what you are mounting will be above and below the ring, your estimate will need to take into account the space needed above and below. The shaft sizes show the size of the square part and the estimated spacing between rings.</p><p>See the illustration parts needed for assembly. There will also be some top options like bowls and platforms. </p><p><strong>Bases:</strong></p><p>The bases are designed to be filled with sand (make sure our sand is dry and mildew free). That will provide some level of stability, however the taller you go and the more weight hanging towards the edges may warrant a wider base. You can use the bases before adding sand remembering to add the sand before challenging the center of gravity.</p><p>I have printed the 100mm and 130mm you can see in the pictures. There is a 160mm as well.</p><p>11th Hour Change in offering… A re-enforced tower support.:</p><p>As I work on the 156DTW Wall unit (a cantilever design) I can see the weight pushing on the BASE DUAL WEDGE PIN. To ease the stresses of the cantilever… and tall towers I added a 40mm collar to fit around the square part of the shaft for the wall unit. </p><p>I have extended this as an OPTION item for all bases. The tolerance is .3mm added to the hole that fits around the square. My initial prints show a snug fit that is easily adjusted with trimming of support material and edges.</p><p><strong>Which to pick:</strong></p><p>Up to 3 tiers with plastic parts as the load, the original design is fine. I recommend the base dual wedge pin be printed with extra perimeters.</p><p><strong>Filling your base with Sand</strong></p><p>You don't need to fill it right away. Originally I extended the cuts in the chamber as a diamond which extended above the 10mm bottom of the base. This was interfering with supports making it to the lower surface near the edges. </p><p>There is now a TRIANGLE that extend off the bottom. You can see it in your slicer. When filling it with sand you will need to fill the chamber under the hole then rotate the base to work the sand through the chambers. Tap it, shake it. As you get closer to full, put your finger over the hole and keep shaking with the sand falling towards the bottom where the holes are.</p><p>Work really hard to clean the angled surface before gluing. One grain of sand can be like a bolder causing the cover to not sit flush. I usually put a piece of tape over the glued plug to prevent any dust from getting out.</p><p><strong>Top BOWL versus a Standard Bowl. </strong></p><p>The Top bowl should be more stable in that it spins as its center of gravity is higher above the pivot. It was in my original design so I included it. The TOP bowl technically tops off your tower as it does not provide another wedge for the next level. The TOP fixtures require you to case some support up the center. Try not to let the supports touch the sides as you may never get them clean. </p><p>The standard bowl uses a 20mm tall center hub so it is interchangeable with the shaft that accommodates that. They can be used on any level.</p><p><strong>Ring Types</strong></p><p>The initial choices are:</p><ul><li>Pin Rings: These are of a diameter with a pin length and size that are fixed.</li><li>Bowl Rings: Will hold parts within. The initial sizes are thin walled at .8mm</li><li>3UDC click in rings</li></ul><p><strong>3UDC Ring </strong></p><p>These rings have a 3mm Universal Clip rings. You can find accessories in the<a href="https://www.printables.com/prints/126499">3UDC Accessory Library</a> and <a href="https://www.printables.com/prints/126495">Kit Card Tree Parts and the 3UDC pivot platform</a>. For those wishing to make things with the clip visit the <a href="https://www.printables.com/prints/126499">3UDC Accessory Library</a>.</p><p>These rings come in various configurations and allow you to put on combinations of attachments to your liking. It also allows you to extend beyond the limitations of your print deck size.</p><p>The HEX and Penta rings place two 3UDC sockets 25mm apart and can operate in parallel.</p><p><strong>Stronger Parts:</strong></p><p>The shafts have less flex with more perimeters, but the defaults work great if you are just hanging some plastic on up to 3 levels. </p><p> I printed everything at fast print defaults and things worked fine. Experimenting with 3 and 4 perimeters (vs 2) has demonstrated there is benefit to eliminating some of the flex in the tower pieces.</p><p>I recommend you print the <strong>156DT_shaft_Base_double_wedge_Pin.stl </strong>with at least two additional perimeters as all the weight above is held by this pin. I added a file called <strong>156DTT+1_shaft_Base_double_wedge_Pin===SPECIAL===plus-point1mm_15.7.stl </strong> This is an oversized pin so can trim it to a tight fit should you desire.</p><p><strong>New sizes or combinations</strong></p><p>If you want new combinations for ring sizes and positions or for shaft sizes let me know. Feel free to invent new things and add them for others. You can find pre-cast hubs and shaft parts in the <a href="https://www.printables.com/prints/126506">3UDC and 155DT Developers Library</a>.</p><p><strong>The wall tower parts 156DTW (Flush Wall Base)</strong></p><p>This is a recent experiment. You tend to loose a lot of space around the pillars the way tried it. If I remove the clips the row of compartments could be printed right over the bar. As a cantilever design evaluating what will happen to the pillars with the offset weight. I am thinking of toping it off with a phone stand.</p><p>Definitely print your Shafts with to 4 perimeters. I might have been a little too robust in the beaming, but I did not want to to warp with time under the one sided weight.</p><p><strong>How much weight can a tower hold?</strong></p><p>I have had one in service holding plastic builds for 2 months with no issues. </p><p>Max weight I don't know. The flush wall base is the one I am testing weights on. The one modification I have made is in this library and that is the 40mm collar on the base. </p><p>The shafts are 15.6mm diameter with the outer shell and and inner shell. At level 4 to 5 the natural flex of that many joints, plus the flex of the plastic becomes noticeable. I should note I am working with several generations of development parts. It is flexing at 6 levells, not cracking or creaking. The Sand Filled base has more of a tendency to want to leave the ground at the edge before anything snaps. The bottom pin is probably taking the most pressure..</p><p><strong>Stuck Shafts</strong></p><p>You are dealing with a wedge system with tolerances that are highly dependent on print sizing and lingering support material for the shafts that get printed on their side. In most cases the shafts should just slide together and apart.</p><p>If parts are stuck just let them sit for a few hours. PLA will reshape some under pressure and that will aid with the release. Be sure to check that you have removed sufficient support material.</p><p><strong>Oval vs Rectangular ends on Display Rings with pins.</strong></p><p>I like the oval ends. I have found certain items of specific shapes can ride up the oval and come off the pin as the wheel spins and is suddenly stopped. The rectangular ends put an end to that. So I include both.</p><p> </p><p><br><strong>Credits:</strong><br>To imprint the bowls I called into the <strong>PotteryFactory </strong>bowl generation program written by Stegorex <a href="https://www.thingiverse.com/thing:4926529">https://www.thingiverse.com/thing:4926529</a></p><p>The Monopod bases fit on the <a href="https://www.prusaprinters.org/prints/6297"><strong>Mini Tripod for DSLR and Digital cameras</strong></a></p><p>The Table Clamp dimensions and design are based on <a href="https://www.thingiverse.com/thing:3497278"><strong>The Altoids Shelf Clamp </strong></a></p><p>Print Disclaimer:</p><p>I have printed every TYPE of part with current tolerances, I have not printed every part. If you encounter a problem, let me know. I have also been through many iterations and adjustments and we may find I have let an old part design into the wild.<br> </p>
With this file you will be able to print 156DT Display Tower with your 3D printer. Click on the button and save the file on your computer to work, edit or customize your design. You can also find more 3D designs for printers on 156DT Display Tower.