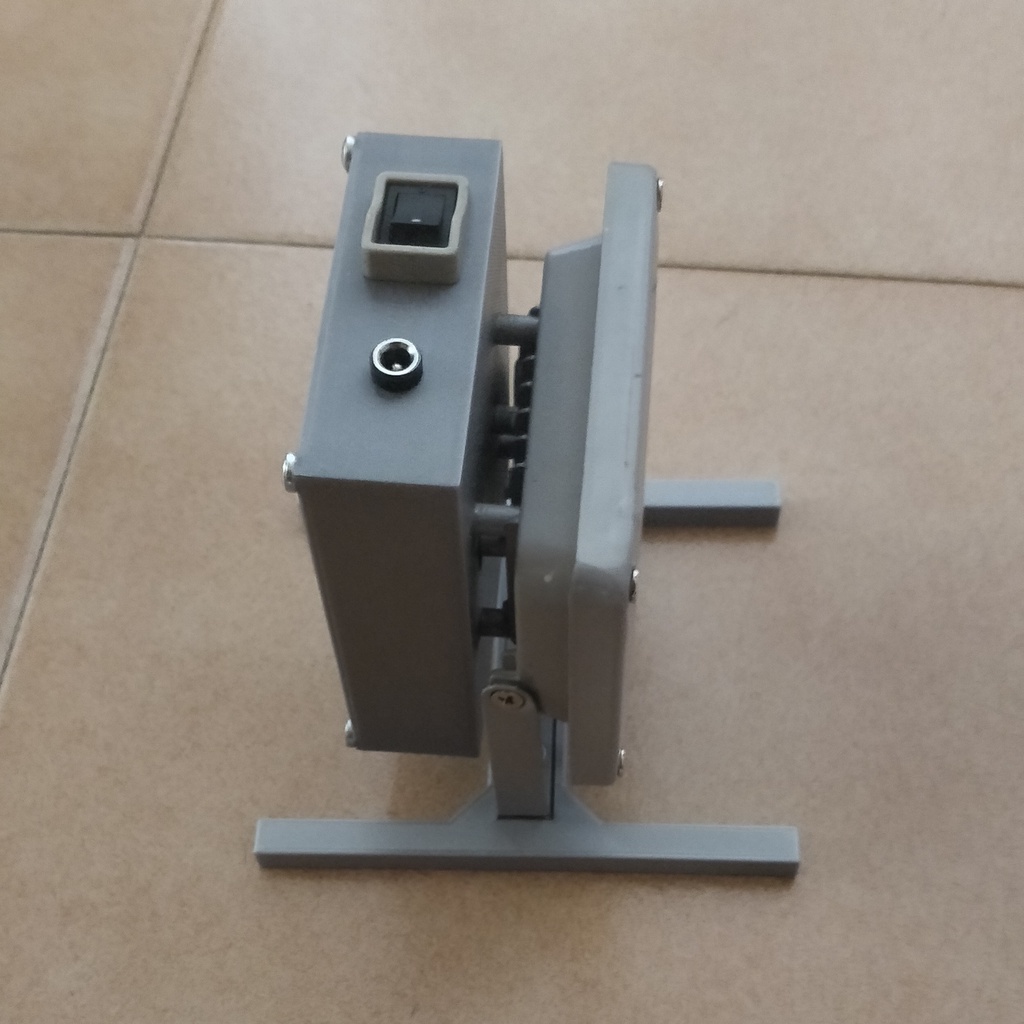
10W led rechargeable worklight
prusaprinters
<p>I like building led lamps, and so i decided to modify a 10w led floodlight to make it like a work light with a stand and all .<br>there are 2 versions of the housing , one with premade holes and one with no hole , in case your lamp has different fixing points , feel free to take the design and remix it :D</p><h3> </h3><p>The housing and the cover should be printed at 100% infill but the foot doesn't really matter , it can also be printed with ABS or PETG for improved resistance</p><p> </p><h3>How to build it</h3><p><strong>Components</strong></p><p> </p><p>here are all the components you’ll need:</p><p>• Boost converter <a href="https://ebay.to/3ISYYR9">https://ebay.to/3ISYYR9</a><br>• 10Wled floodlight <a href="https://ebay.to/33CAewj">https://ebay.to/33CAewj</a><br>• A switch <a href="https://ebay.to/31WZuwX">https://ebay.to/31WZuwX</a><br>• 2.5mm female jack <a href="https://ebay.to/3EY1cMF">https://ebay.to/3EY1cMF</a><br>• Tp4056 <a href="https://ebay.to/3GOATZY">https://ebay.to/3GOATZY</a><br>• 1-2 18650 <br>• 18650 holder (optional) <a href="https://ebay.to/30yukex">https://ebay.to/30yukex</a><br>• 6-10 m4x10 screws and 2 nuts</p><p> </p><p><strong>Start</strong></p><p>Now that we have all the items, we first need to open the floodlight and remove the back completely</p><figure class="image image_resized image-style-align-center" style="width:75%;"><img src="https://media.prusaprinters.org/media/prints/94325/rich_content/c86d1b33-dfe9-4f16-bb17-82377d7f896b/1.jpg#%7B%22uuid%22%3A%22af1cfe47-290a-46a6-a73e-cec71f34be41%22%2C%22w%22%3A4608%2C%22h%22%3A2592%7D"></figure><figure class="image image_resized image-style-align-center" style="width:75%;"><img src="https://media.prusaprinters.org/media/prints/94325/rich_content/1fac1418-d40b-43fb-96d8-df6f1f8ec4f5/2.jpg#%7B%22uuid%22%3A%22c1a40d33-db29-40b4-8389-a3b51f7aedba%22%2C%22w%22%3A4608%2C%22h%22%3A2592%7D"></figure><p><strong>Led and converter</strong></p><p>Then we can take the boost converter and turn the potentiometer clockwise until we hear a click, so it’s not boosting when we are going to adjust the power (it would damage itself and the led).<br>Now we solder the led to the output of the converter and a pair of wires to the input of the converter, we pass the wires through the hole. Remember to apply some thermal paste/grease to the backside of the led before fixing it to the housing.</p><figure class="image image_resized" style="width:75%;"><img src="https://media.prusaprinters.org/media/prints/94325/rich_content/52424adc-dfda-441a-92c9-d0788134d3dd/3.jpg#%7B%22uuid%22%3A%220849692f-d297-4d1c-beba-2067ab643e46%22%2C%22w%22%3A4608%2C%22h%22%3A2592%7D"></figure><p><strong>Back housing</strong></p><p>After passing the wires trough we can screw the back cover on, I used four m4x10, but I had to use a washer since it was too long, use a m4x8 for a better fit.</p><figure class="image image_resized" style="width:75%;"><img src="https://media.prusaprinters.org/media/prints/94325/rich_content/99a3f8d3-9480-44a0-94c1-52ede4eeac94/4.jpg#%7B%22uuid%22%3A%22e7889f8e-17b1-4c75-9364-12b5cdc0e864%22%2C%22w%22%3A4608%2C%22h%22%3A2592%7D"></figure><p><strong>Batteries and tp4056</strong></p><p>Insert the dc jack and the switch, and we can start preparing the wiring, take one or two battery holders and solder wires on the pins, then hotglue those down with a tp4056 and solder the battery wires to the battery terminals of the tp4056.</p><figure class="image image_resized" style="width:75%;"><img src="https://media.prusaprinters.org/media/prints/94325/rich_content/a8fe4953-00bd-430e-b857-dd414d92f369/5.jpg#%7B%22uuid%22%3A%221105a20b-e384-45c1-a3b2-34db99ca3356%22%2C%22w%22%3A2592%2C%22h%22%3A4608%7D"></figure><p><strong>Wiring</strong></p><p>Now crimp or solder the converter input to the switch ,remember to check the polarity and mark the positive wire ( i used a bit of tape )</p><figure class="image image_resized" style="width:75%;"><img src="https://media.prusaprinters.org/media/prints/94325/rich_content/5162d195-3489-44c9-87db-8d6df91cca36/6.jpg#%7B%22uuid%22%3A%22153afe30-366d-47e0-9e33-239bb1bc01e0%22%2C%22w%22%3A2592%2C%22h%22%3A4608%7D"></figure><p><strong>More wiring</strong></p><p>Now solder the output of the dc jack to the input of the tp 4056 and the output of it to the switch again , be careful of the polarity</p><figure class="image image_resized image-style-align-center" style="width:75%;"><img src="https://media.prusaprinters.org/media/prints/94325/rich_content/4a81ba7b-60e9-4b29-8338-357239402ff2/7.jpg#%7B%22uuid%22%3A%22d2872726-8bc8-4de9-934b-1fc9e24512d4%22%2C%22w%22%3A2592%2C%22h%22%3A4608%7D"></figure><p><strong>End</strong></p><p>Now put a battery in the holder and turn the switch on , the led should still be off , start adjusting the potentiometer on the converter ( i keep it at 11v ) and you should be done !<br>close everything up and attach the foot with 2 m4 screws and nuts , after that just recharge the lamp and you're ready to go , i used 2 2150 mah batteries and the lamp lasted 6h35m</p><p> </p><p> </p><p> </p><p>Category: DIY</p>
With this file you will be able to print 10W led rechargeable worklight with your 3D printer. Click on the button and save the file on your computer to work, edit or customize your design. You can also find more 3D designs for printers on 10W led rechargeable worklight.
