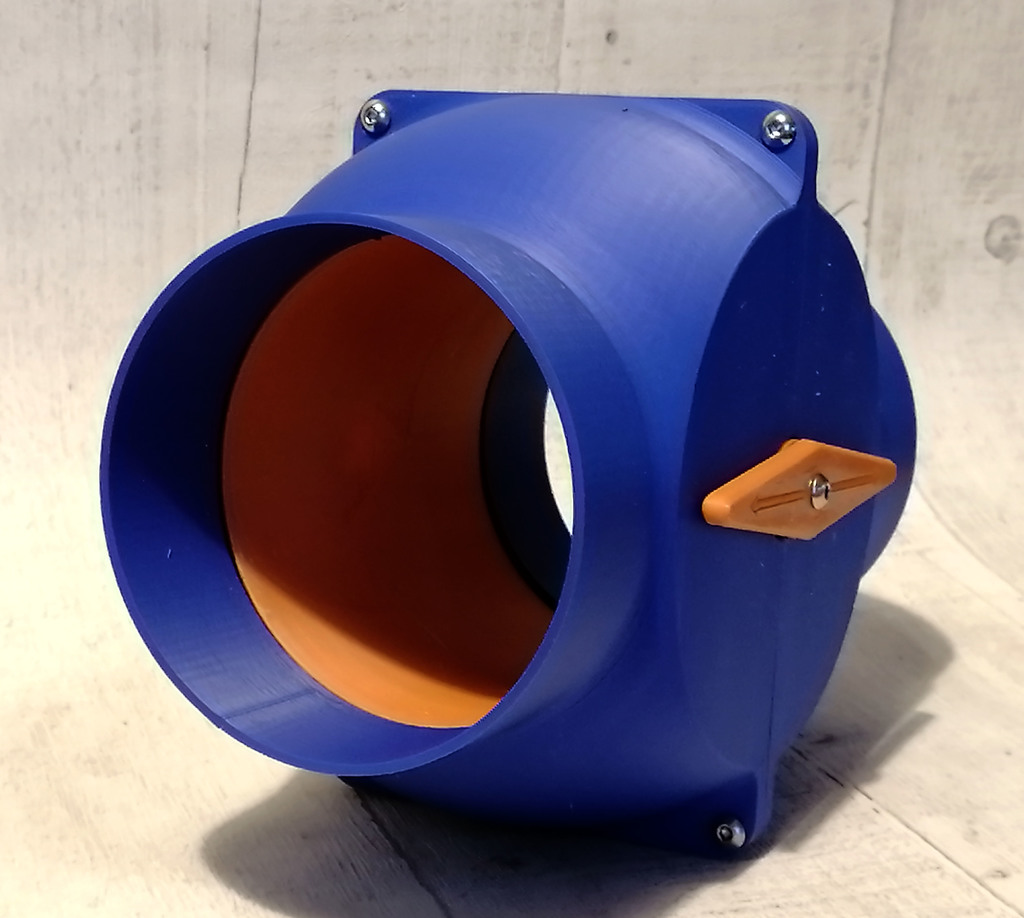
100mm Truncated Ball Valve Type Non-Clog Blast Gate for Workshop Dust Extraction Network
prusaprinters
<p>**************************************************************************************************<br><br>See this YouTube video by Nils Rasmusson ([<a href="/nilsynils/designs">https://www.thingiverse.com/nilsynils/designs</a>]) for a performance comparison of this blast gate with other commercially available designs [<a href="https://www.youtube.com/watch?v=epJ929kZzc4&t=8s&ab_channel=LRN2DIY">https://www.youtube.com/watch?v=epJ929kZzc4&t=8s&ab_channel=LRN2DIY</a>]<br><br>**************************************************************************************************</p><p><strong>Update 16Apr22</strong></p><p>The lever can be hard to grip to open and close the blast gate, so I've designed a pair of alternatives that have lugs to help with their operation. One consequence is that they need to be printed with support under the square drive recess. the arrow-lugged lever retains the concept of the arrow to indicate air flow.</p><p> </p><p>My 100mm ball valve type blast gate (Print <a href="https://www.prusaprinters.org/prints/137794-100mm-ball-valve-type-non-clog-blast-gate-for-work">137794</a>) works well, but is big! This redesign aims to keep the functionality but make it a little more compact.</p><p>This still suits 100mm tubing.</p><p>In addition to printing filament you'll need 4 short M4 set screws to fasten the two halves of the case together, and another M4 x 8mm screw, with an M4 hex nut, to fasten the lever on its bearing (I used M4 x 8mm socket head button screws). If you want to make use of the bracket to mount the blast gate to a wall, you need to replace two of the M4 x 8mm screws with M4 x 18mm (or longer) and a pair of M4 hex nuts. The holes in the case / housing may need to be eased with a suitable drill bit - 4mm on one half of the case and 3.3mm (for tapping to M4) on the other.</p><p>You need to print 2 cases, 1 rotator, 1 bearing, 1 lever bearing and 1 lever for each gate, and the bracket if you want to use it. It's useful to use a different colour for the lever from that used to print the case so that the position of the ball (open or closed) can be seen easily.</p><p><strong>Update 05 Feb 21</strong></p><p>Please see the comments with a Thingiverse post from George (zhushengliang) with regard to the .step files. (<a href="https://www.thingiverse.com/thing:4705215/comments">thing:4705215/comments</a>)</p><h3>Print Settings</h3><p><strong>Printer Brand:</strong></p><p>Anycubic</p><p><strong>Printer: </strong></p><p>Kossel</p><p><strong>Rafts:</strong></p><p>No</p><p><strong>Supports: </strong></p><p>No</p><p><strong>Resolution:</strong></p><p>0.2</p><p><strong>Infill: </strong></p><p>10%</p><p><strong>Filament:</strong> Ooznest, {Kodak}, [Ooznest] PLA Pro [Bracket = PETG] Royal Blue, Midnight Black, [Apple Green], {Orange}</p><p><br> </p><p><strong>Notes:</strong></p><p> </p><p>Print the rotator with one tube opening facing onto the build plate, such that the triangular recesses for the bearings are apex up, as in the image. The contact area with the build plate is very small, so I recommend a brim to keep the rotator on the build plate (I used a 6mm brim). This then has to be cleaned off and the roughness rubbed away with a fine abrasive paper otherwise the rotator will catch on the case.</p><p>Post-Printing =============</p><p>Clean off the brim from the rotator and rub down the roughness with a fine abrasive paper otherwise the rotator will catch on the case.</p><p>The triangular base of each bearing will need to be glued in place to guarantee that it won't slip out of its mounting recess. I used a high quality, rapid set, two part epoxy adhesive. Make sure that the lever will mount on its square drive in the orientation that you want before the adhesive sets (you can use any orientation you like, but I fit it aligned with the air flow direction to clearly indicate when the blast gate is open or closed)!</p><p>There's a recess for an M4 hex nut in the back of the lever bearing. An M4 x 8mm screw will fix into this to secure the lever in place.</p><p> </p><p> </p><p> </p><p>Category: Machine Tools</p>
With this file you will be able to print 100mm Truncated Ball Valve Type Non-Clog Blast Gate for Workshop Dust Extraction Network with your 3D printer. Click on the button and save the file on your computer to work, edit or customize your design. You can also find more 3D designs for printers on 100mm Truncated Ball Valve Type Non-Clog Blast Gate for Workshop Dust Extraction Network.
