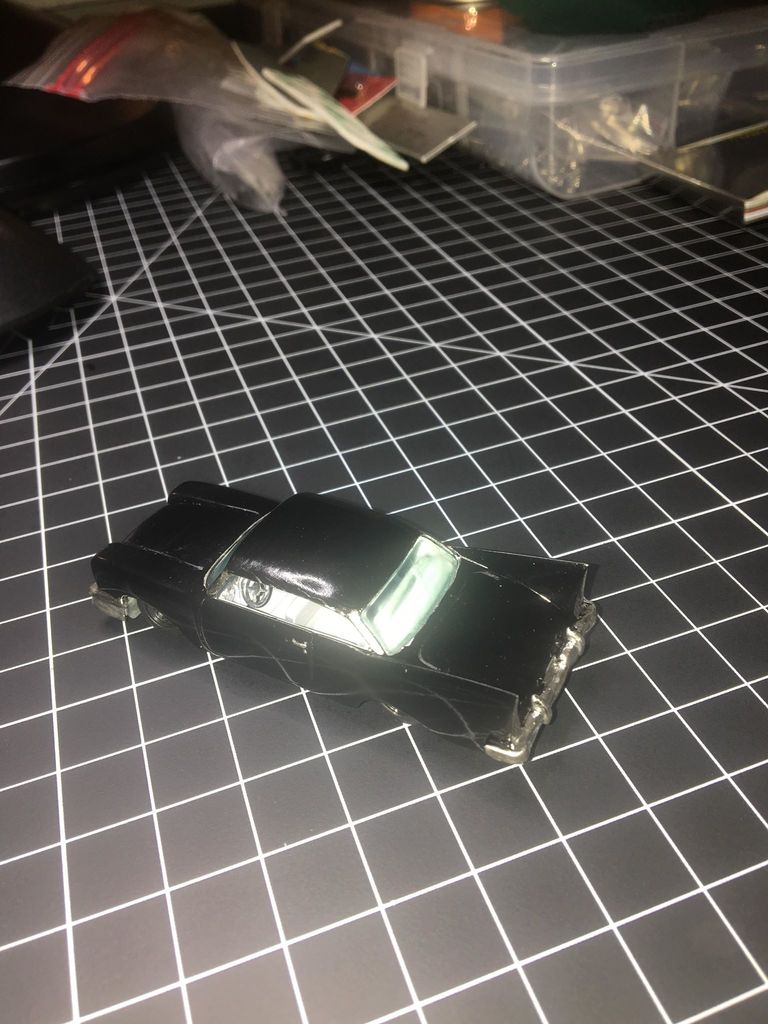
1:64 Chryslus Highwayman Fallout 2 / Customized 1959 Plymouth Sport Fury
prusaprinters
<p>Highwayman from Fallout 2, styled as a pre-war vehicle. Wheels in this case are donated from 1970 Chevelle Super Sport wagon pictured behind it in the second photo.</p> <p>Recommended remixes:</p> <p>Highwayman: Post war. Redo trunk and make thing stick out of hood</p> <p>Convert into '59 sport fury or belvedere, mainly bumpers and fins</p> <p>More detailed interior. I figured it's good enough to ship.</p> <p>Specific mods to base to make work with various wheels- rather than relying on post-print work to make for a solution.</p> <p>Gaslands mods: Add on some guns, armor, damage before printing.</p> <h3>Print Settings</h3> <p><strong>Printer Brand:</strong></p> <p>Anycubic</p> <p class="detail-setting printer"><strong>Printer: </strong> <div><p>Photon</p></div> <p><strong>Rafts:</strong></p> <p>No</p> <p class="detail-setting supports"><strong>Supports: </strong> <div><p>Yes</p></div> <p><strong>Resolution:</strong></p> <p>.05</p> <p class="detail-setting infill"><strong>Infill: </strong> <div><p>N/A, no hollowing</p></div> <p><strong>Filament:</strong> Siraya Tech Blu DLP resin Translucent</p> <p><br/> <p class="detail-setting notes"><strong>Notes: </strong></p> </p><div><p>Printed with above specs/resin, with AA enabled (requires newer Firmware on printer.) Sliced in Chitubox with AA enabled.</p> Car base printed at ~40 degree angle with supports around islands and edges. Will upload a plated version of parts with supports as time permits. <p>Windows, front and rear, were printed with the bottoms against the build plate, with no supports as this rendered the best results. Printing near the middle of the build plate seemed to result in higher quality prints with less post-processing.</p> <p>Interior was printed vertically with the front oriented against the build plate, manual supports added around the bottom and three medium supports added to the part of the steering wheel that forms an island.</p> <h3>Post-Printing</h3> <p>Post printing: rinsed in IPA, cured in a box with UV/blacklight strip LEDs until no longer tacky/bendy.</p> <p>Support marks removed using diamond impregnated needle files, with both the parts and files kept wet using warm soapy water. Some additional filing was needed at the back of the interior piece and on the front of the base to allow the current tires to fit.</p> <p>If you do a wheel swap/donation from a HotWheels/Matchbox car some additional filing may be necessary on parts depending on the size of the tires used, it may also help to add epoxy putty to the middle of the axle brackets to hold them in place. See also <a href="https://www.thingiverse.com/thing:3731515">https://www.thingiverse.com/thing:3731515</a> for another option for tires available on amazon. There are a few places where custom wheels and axles for die cast cars can be obtained, including some printed from thingiverse, although I haven't tried this myself yet.</p> <p>When painting, I recommend masking off the section of the car body where the windows will sit, as seen in 3rd (?) photo. Afterward some CA/super glue should be used to hold them in place. I used a healthy dollop on the body interior and a thin line of glue inside the roof.</p> <p>The interior was filed along the inside of the dash and back flat section until it fit snugly, and is held in place by the base.</p> <p>Windows finished by removing bulges in the windscreen surfaces with 400 grit sandpaper, followed by 600 grit, then jumping to 2k grit to smooth out scratch marks from previous. Afterword used https://www.amazon.com/God-polish-high-count-surface-treatment/dp/B017JNYJ1G/ sponges to polish, and then dipped in acrylic floor wax and allowed to dry before gluing up, taking care to avoid coating the bottom mating surfaces where they glue to the body.</p> <p>The base and the two posts inside the body had to have their holes chased/redrilled with a pin vise and tiny drill bit to receive the screws. See also the linked text for my Chryslus Cherry bomb for more details.</p> <h3>How I Designed This</h3> <p>Designed in Blender 2.79, using box modeling based off of drawings found on the internet. Mirror, Subdivision surface, and solidify modifiers were used to make printable parts out of the mesh. I'll try to clean up and upload the .blend file used as with my last model for future reference and anyone wishing to customize/remix.</p> </div></p></p></p> Category: Toys & Games
With this file you will be able to print 1:64 Chryslus Highwayman Fallout 2 / Customized 1959 Plymouth Sport Fury with your 3D printer. Click on the button and save the file on your computer to work, edit or customize your design. You can also find more 3D designs for printers on 1:64 Chryslus Highwayman Fallout 2 / Customized 1959 Plymouth Sport Fury.
