1/48 Scale Ryan Monoplane blurred propellor
prusaprinters
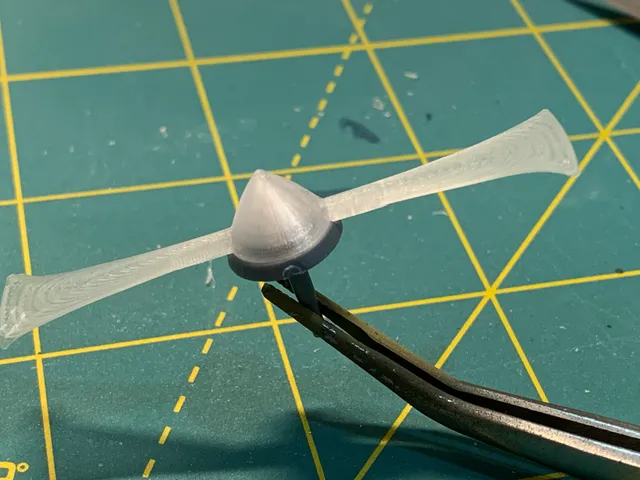
IntroductionI like to build static model aircraft and prefer them displayed in-flight since it's a more natural state for them. I've tried making various propellors that appear to be spinning but they always seem to appear “off” whether a clear disk or the photo-etch metal ones that are opaque and must be painted. I decided to see if a clear filament could be printed thin enough to be transparent and if the design could look like a spinning prop.There are two types of blurred props (but only 1 in this upload):Slow shutter speed photos show a curved prop blade that is an artifact of the slow shutter speed.High quality photos show a clear prop hub and blades that are semi-transparent with blurred edges. This is the variant in this upload.I am designing blurred props specific to kits where there is a spinner covering the hub. Other props I will upload as I complete will be more generic and can be used on various kits. Most will be 1/72 or 1/48 scale. PrintingI designed these to be printed with a 0.25mm nozzle and 0.05mm layer height on a Prusa MK4. Any printer should suffice. All settings are default for Prusa Slicer for the MK4 using a 0.25mm nozzle except:First layer height = 0.05mmGenerate support material = checkedTop contact Z distance = 0.1mm (detachable)First layer nozzle temp = 235*cOther layer nozzle temp = 245*cMax volumetric speed = 10 mm3/sUse ramping lift = uncheckedI tried transparent/clear PLA but every print was opaque and closer to a white. PETG provides a decent level of transparency as I can read lettering under the individual blades.On the MK4 it takes about 21 minutes to print.ScalingWhile the STL can be scaled I've only had success going up or down 1 factor – in other words, sometimes scaling to 1/72 (67%) or to 1/32 (150%) might work, but going further than this tends not to work as well. I believe this is due to the first layer thickness as I've designed the props for 0.05mm at the tips. When I rescale the design it's fairly simple and I then design the propellor set around the new blade size and for a specific kit.ConstructionThe 3 printed parts can be cemented together and to the kit part (part number 9) and the printed parts replace kit part number 10. I used Testors Liquid Cement with success as it fuses the PETG and the polystyrene. This cement contains MEK and acetone and the combination makes for a good bond, any cement containing these two chemicals should work.Assemble by first removing the support from inside the spinner. Cement the two small parts to the rear of the blades. They should fit flat against the rear of the blade and match the contour. If they don't match, you'll have to sand/trim them a bit to get to fit into the backplate (kit part 9) notches. Once the parts are cemented together and cured (takes about 30 seconds) then cement the back plate (kit part 9) to the printed parts. PaintingOnce the cement has cured you can paint the blurred prop. I prefer to paint the spinner (aluminum in this case) and the back of the blades with a thin line to represent the blade. Make it a bit wider at the tip and closer to the hub make it more opaque. Once painted, install just like the original instructions call.
With this file you will be able to print 1/48 Scale Ryan Monoplane blurred propellor with your 3D printer. Click on the button and save the file on your computer to work, edit or customize your design. You can also find more 3D designs for printers on 1/48 Scale Ryan Monoplane blurred propellor.