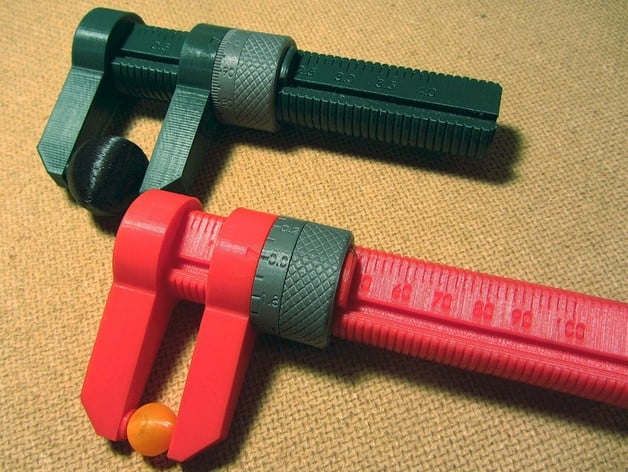
0-4"/100mm Dial Caliper
thingiverse
The inch version of these calipers has a direct-read scale with precise 0.1" markings and a reliable secondary micrometer-style scale that accurately reads down to 0.001"! You can realistically expect an accuracy of +/- 0.010". The metric version offers a direct-read scale with clear 2mm markings and a supplementary scale featuring fine 0.1mm graduations. UPDATE: A new metric version has been added! The same convenient slider part is utilized for both. To set up, simply select the parts that match your preferred unit of measurement - either body_mm.stl, nut_mm.stl, dial_mm.stl and slider.stl for metric or body_in.stl, nut_in.stl, dial_in.stl and slider.stl for imperial. These versatile parts were skillfully printed in high-quality PLA with 0.2mm layers, three perimeter shells and a solid twenty percent infill. If you lack access to a heated bed, it is highly recommended that you print the body and slider parts using a raft to ensure their flatness and retain precise details. It's also suggested to slow down the printing process for optimal results. After successfully completing the printing stage, a thorough sanding process should be applied, especially to the inner threads of the nut and other critical components. Assembly is straightforward - start by performing a preliminary test fit of the dial onto the nut, taking care to achieve the ideal level of friction so it requires gentle effort to rotate. Fine-tune as necessary with gentle sandpaper or adhesion film. To prepare the assembly for calibration: pinch the ears on the slider tightly together and press them securely into place within the confines of the nut's hollow core, until the ears snugly snap in. Carefully apply a small amount of grease or Vaseline to the outer threads of the body. With smooth ease, guide the slider onto the prepared surface, then commence threading the nut. The process will initially prove challenging, but repeated cycles of advancing and retreating along its full extent should eventually ease it to a satisfactory level. Consequently, proceed by securing the slider in place near complete closure - take note that some fine adjustment might be required here. Using your fingertips, slide the enclosed 120 grit (or so) sandpaper into a lightly clasped state with the grit-facing nub located within close proximity of the fixed jaw's moving counterpart. Effortlessly back-and-forth movements should then serve to finely hone the exposed surface parallel to its stable mate - ensuring utmost accuracy and reliability in use. Just prior to initiating usage, proceed to press the slider and body completely closed together until any detectable glimmer between them becomes negligible. With your hands carefully clasped on one hand, grasp the stationary nut, turning the dial counter-clockwise towards its initial 'zero' setting mark with utmost ease. Please be aware that as your threaded parts naturally undergo slight wear over time, some adjustment in caliper accuracy might necessitate - hence recalibration becomes imperative for consistent operation and performance.
With this file you will be able to print 0-4"/100mm Dial Caliper with your 3D printer. Click on the button and save the file on your computer to work, edit or customize your design. You can also find more 3D designs for printers on 0-4"/100mm Dial Caliper.
