z ring toy 3d models
309735 3d models found related to z ring toy.
thingiverse
Or click Download once on the file Girl_Unicorn.rar My some other things: ...
thingiverse
Or click Download once on the file Unicorn.rar My some other things: ...
thingiverse
Or click Download once on the file heisenberg.rar My some other things: ...
prusaprinters
But for now here are all the main parts if anyone wants to start playing with it. Build Thread https://forum.lulzbot.com/viewtopic.php?f=16&t=5733&p=33503#p33503 Preliminary Bill of materials: 1 Bondtech Drive gear kit for 3.00mm fillament...
thingiverse
... time. My some other things:
thingiverse
... My some other things:
thingiverse
... screws, for example, on a workbench in your garage. My some other things:
thingiverse
... My some other things:
thingiverse
Then fix it on the wall with nails or screws or use double-sided tape. To achieve the wow effect, you need to place an LED strip on the back of the decor. My some other things: ...
thingiverse
... each time. My some other things:
thingiverse
... each time. My some other things:
thingiverse
Then fix it on the wall with nails or screws or use double-sided tape. To achieve the wow effect, you need to place an LED strip on the back of the decor. My some other things: ...
thingiverse
... the site is broken and no one is going to fix it. ...Download files one at a time by clicking Download each time. My some other things:
thingiverse
Then fix it on the wall with nails or screws or use double-sided tape. To achieve the wow effect, you need to place an LED strip on the back of the decor. My some other things: ...
thingiverse
... each time. My some other things:
prusaprinters
If you have a more friction resilient plastic available this part especially will benefit from it.QualityRandomise the z-seam on the rollers, main drive axel and spindle, this helps prevent noise and vibration.Layer heightI printed the cam and tooth...
thingiverse
First, do a manual X, Y and Z adjustment and see how the carriage moves. If everything looks normal heat up the extruder to printing temps and feed in the filament using the load menu. If everything goes well it will now extrude from the nozzle. ...
thingiverse
Dans le domaine de vol de l'avion, le turboréacteur est sollicité par des accélérations suivant l'axe longitudinal (X), qui ne fait pas l'objet d'une limitation particulière, et l'axe vertical (Z), pour lequel le motoriste impose une limitation en...
prusaprinters
First, do a manual X, Y and Z adjustment and see how the carriage moves. If everything looks normal heat up the extruder to printing temps and feed in the filament using the load menu. If everything goes well it will now extrude from the nozzle.Level...
thingiverse
First, do a manual X, Y and Z adjustment and see how the carriage moves. If everything looks normal heat up the extruder to printing temps and feed in the filament using the load menu. If everything goes well it will now extrude from the nozzle. ...
thingiverse
First, do a manual X, Y and Z adjustment and see how the carriage moves. If everything looks normal heat up the extruder to printing temps and feed in the filament using the load menu. If everything goes well it will now extrude from the nozzle. ...
sketchfab
In the Transform panel, click on the "Location" tab and set the X-coordinate to -50 mm, the Y-coordinate to 0 mm, and the Z-coordinate to 0 mm. Next, go to the Edit Mode and select all vertices by pressing Ctrl+A. Then, press F2 to open the Mesh tab...
prusaprinters
I recommend raising the Z-axis toward the top before starting this procedure so you have ample room to work.Remove the print fan (tuck it between the X-axis belt and bottom bar).Remove the SuperPINDA (lay it over the top X-axis bar or over the X-axis...
thingiverse
First, do a manual X, Y and Z adjustment and see how the carriage moves. If everything looks normal heat up the extruder to printing temps and feed in the filament using the load menu. If everything goes well it will now extrude from the nozzle. ...
prusaprinters
The wires should be long enough to keep the bluetooh remote controller on the desk when the print head goes (on Z -Axis) upto the height of the model printed (ie max 250mm for Ender 3). So approx. 40cm wire length will be sufficient).</p>...
thingiverse
Thread the assembled carriage holders into the rails and rods of the Z-axis. 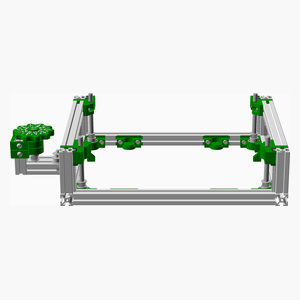 <span></span> ...
thingiverse
First, do a manual X, Y and Z adjustment and see how the carriage moves. If everything looks normal heat up the extruder to printing temps and feed in the filament using the load menu. If everything goes well it will now extrude from the nozzle. ...
prusaprinters
I found a lot of inspiration and I have remixed a lot of designs that I found online, but at the same time I designed a large portion of models, so I will try to provide as much references as possible in this description. My main goal with this...
thingiverse
2 #1 # # ## # ## # I' #1 # #03, 6) #0x # #01 # In [0 A #09 #0: ## # A_ - # #0. ## 0. The Astra,0x 03 ## 0. This ## 0. #07 (0x package_ package and 1 #06, 0x #08b 0x #02 using the end #2 package 0x The C++ #롤лове ersteھٹ Dopo DoposcriptstyleHECK...
prusaprinters
You could also use a piece of Stripboard to just use oneground pin of the Raspberry Pi and connect all ground wires of the buttons just to this Stripboard.If you want to use the exact same configuration forRetrogame you can use the following...