sagstua bed 3d models
119158 3d models found related to sagstua bed.
prusaprinters
The top magnets have since been moved closer to the hinge for better springiness during clip actuation. Step 3: Press the magnets all the way into their pockets until the tops are flush with the top surface of the print, then resume the...
prusaprinters
the others are printed with their flat faces to the bed. The only part that requires a little bit of support is the Top piece for where the switch goes.</p><figure class="image image_resized" style="width:75%;"><img...
prusaprinters
The "Horizontal" version is designed to print horizontally on the printer bed and prints quick and easy and only needs a small number of supports. The "Vertical + Carbon Rod" version prints vertically. This makes it weaker so I have left a 2mm hole...
prusaprinters
It was the bed height. The hotend tip on the AB toolhead is much higher than the stock hotend, which makes the X carriage having to be much lower than before. It almost hit the bottom limit - actually the X carriage end hit the Z stepper mount bar...
prusaprinters
Screw the fans into the mounts and attach over the mainboard and Pi to get good coverage over the driver heatsinks and cpu.Attach the foot extension and TPU feet to the frame using T nuts and boltsMount the 4 deck panels using T nuts and boltsMake...
prusaprinters
FeaturesModular structure, easily scalable, put modules together, twist & lock, doneFilling module with cap3-way planting modules (hollow version recommended)Internal/external water dispenser modulesLidCustom net pot for Jiffy-7 41 mm grow medium...
cults3d
Desired print size should be the same for the frame pieces (largest print bed space) are 190mm x 155mm and the dual tower support is 190mm in length. Axle parts: Housing 5mm Bearing holder Housing backing Frame parts: Frame parts are able to...
prusaprinters
Do not let your slicer place supports because the FDM files are properly prepared to not need any additional supports.If your slicer has a “print thin walls” setting (Cura has!) make sure it is enabled!Use a brim of at least 1.5cm on intake and...
prusaprinters
The overall size was optimized for efficient extrusion outlines (~.42mm), and to fit on a Prusa MK3 print bed (with a little finesse, two compartments can be printed at the same time.) The exterior faces can be customized with colors, textures, or...
prusaprinters
Also when the buffer is placed behind the printer there is a chance of interference with the Y axis (bed Plate).The remaining choice is to place the buffer outside of the enclosure, but this leads to very long runs of filament guide tubing, and no...
prusaprinters
Post-Printing In addition to the supports added by your slicer, the gear box has a ring and a set of little vanes about a centimeter tall at the bottom end, just there for the purposes of bed adhesion. Cut them off if so desired - they shouldn't get...
prusaprinters
It gets accurate time through NTP and lights appropriate LEDs (WS2812b) to cast a shadow indicating the hour. Print instructionsThe Clock The creation and how it works can be seen in the video: It proudly hangs above our bed, it seems very bright...
prusaprinters
Since it is a large print, please make sure you have good bed adhesion or it will warp. The smooth steel sheet worked great. The other advantage of using the smooth sheet is that it makes the front of the TV look better. While I love the look of...
prusaprinters
Please also note, I have added some "attachment supports" to the wipe tower and some parts in order to make them attach more firmly to the print bed (you don't want them to come loose after 24 hours of print). This lamp was designed using blender,...
prusaprinters
https://newdimension.company.site/Before we begin, I'd like to thank ktothestank for his 250mm Bridge Test Model which I used in these tests. Slicer: Cura 5.1.0Resolution: 0.2mmNozzle: 0.6mmPrinter: Creality Ender 3 ProModifications: Creality...
prusaprinters
Of course the version with the grid is well pushed with the grid on the bed.In addition, these filters can also be used in industry in the dust environment. I found that they fit well into the welding mask.<br/>And if you have the original 3M half...
prusaprinters
This convenience comes with disadvantages, however: this 16-cup design uses far more material, the size of the part makes it susceptible to warping away from the bed if printing with PLA, it requires a longer feed path (or mounted on a raised...
prusaprinters
It was the bed height. The hotend tip on the AB toolhead is much higher than the stock hotend, which makes the X carriage having to be much lower than before. It almost hit the bottom limit - actually the X carriage end hit the Z stepper mount bar...
thingiverse
Minimum of 25% infill is recommended, as well as a full layer every 40 layers, mainly for toughness of the drawer front.If your printer has a moving bed on an axis (lots of printers) then the drawer must be printed with the front parallel to the...
prusaprinters
If you have a printer with less then 250mmx200mm print bed, this thing might not be for you. Once you have the printed parts available, and sourced the list above, this was my way to go. BE CAREFUL! WARNING: Voltage from mains is dangerous and can...
thingiverse
**Printing Notes:** Creality Ender 3 v2 Material: PETG Nozzle Temp: 250º Bed Temp: 75º Bearing blocks were printed at 30% infill, 4 layer walls, top, and bottom. Sidewalls and Pulleys were printed at 50% infill, 5 layer walls, top and bottom. The...
thingiverse
Since I have a textured print bed this fits perfectly together 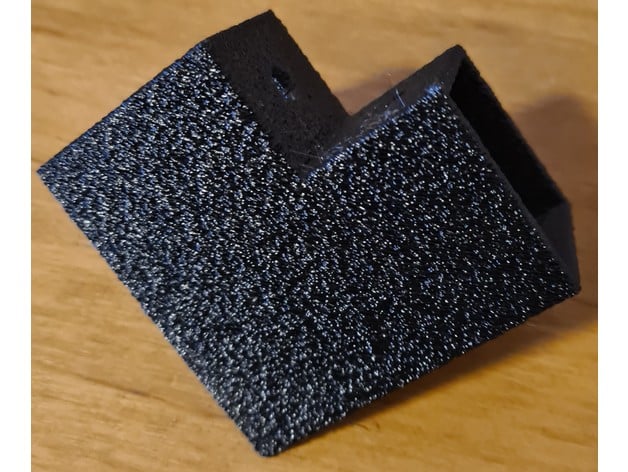 After all parts are printed and the wood is cut to length and...
prusaprinters
And like Norm always says, wear safety glasses. PARTS LIST 1x 7.5x20mm spring (this is the type of spring used in the beds of 3d Printers) https://www.amazon.com/URBEST-Compression-Printer-Extruder-Accessories/dp/B07C1LL4B2 1x M4x40mm hex head...
prusaprinters
The blades are printed with one side on the bed with transparent filament. To achieve the best effect, use a large nozzle with large layer height and line width. The hair is the most difficult to print. If you want a nice surface you need to print it...
cults3d
If you're worried about adhesion of the supports then there are separated versions of the sphere and back piece so that the supports will be printed directly onto the bed. Assembly Considerations You will need to do some sanding here and there to...
cults3d
I provide screenshots for the position of the parts on the print bed. I use Simplify3D which allows you to vary the height of the layers (and many others settings) during printing. For example for the T2 plate I start at 0.16 or 0.2 mm for the...
prusaprinters
Depending on your wiring style you can get some pretty nice looking effects with this logo and the use of an NodeMCU controller.The model is in two formats. One for those who have a large format printer and can print the entire model as...
prusaprinters
If you wish, it's also a good time to paint the bird logo as I did.The Budgie parts need to be assembled for use, but it's pretty simple:Put the E and M parts together with the sides that were on the bed facing each other. Push the top and bottom...
prusaprinters
Last step is to divide it up to fit on your print bed and cut-out pin recesses.I print from there, and as i assemble, I tweak my model as needed to make it better for then next person who prints.Its good to remember that plastic is melt-able and easy...
prusaprinters
The height of the main area of the coaster is 6 mm, with the total height being 7 mm to the top of the rim.You can fit two coaster bases onto the bed of a Prusa Mini! Coaster PartsEach coaster has 4 parts that need to be printed:BaseBeauty...