plastic rack 3d models
136150 3d models found related to plastic rack.
prusaprinters
The holes are 3.3 mm so there should be enough plastic inside the holes for the screws to grab into. If not then you will need to add some nuts to the back to hold the screws into place.</p> <p>When you mount this to the heat sink it is EXTREMELY...
thingiverse
but do this outdoors because you are basically burning plastic and the fumes are anything but healthy, 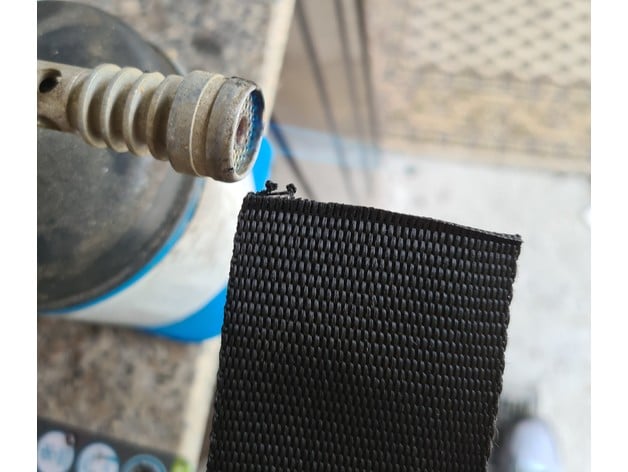 Now you can start...
prusaprinters
Just attaching straps to the ends would stress the fasteners and plastic parts of the chest. Thread the first strap:Thread the strap from the outside to the inside on the top hole, then back out the bottom hole. Pass the strap under the chest.On the...
prusaprinters
Yay.How I Designed ThisWanted this to look like a clean stock light bar with dimensions that matched the top horizontal frame of the printer and didn't require any other mods to fit in place due to the stock filaments sensor mount and plastic top...
thingiverse
https://cdn.thingiverse.com/assets/06/1f/d3/a2/7d/2021-03-13_15.05.35.jpg Tighten fully the Bed Adapter fixings (ensures good alignment) and remove the protective plastic from the top of the glass bed:...
thingiverse
Dual fans, mounted up high and ducted down so they don't block visibility, integrated (and I'd dare to call it "armored") BLTouch mounting that was super close to the extruder point and fully protected by plastic on all sides. Only problem is I...
prusaprinters
I do have an m2 tap and have tried it and it just seem to strip holes in printer PLA plastic. I HIGHLY RECOMMEND tapping the screw holes. It makes the end project so much nicer. It makes assembly so much easier. It's fun too… well, maybe not...
thingiverse
Observing the new born artillery X2, I was intrigued by the shape of the very minimal but at the same time well structured plastic rear attachments, these replaced the previous metal ones, and based on this I adapted that geometry to create...
prusaprinters
Move to step 3!If the bolt does not fit into the cloud properly:Sand down (using sandpaper) or scrape off (using a cutting tool) the sharp edges at the top of the bolt and/or any excess plastic on the inside of the large rectangular intrusion at the...
prusaprinters
You have to scale the top and cone rocket parts to fit your bottle.2) A garbage bag or plastic foil or kite nylon to cut out a parachute of approx 80 cm diameter. How to make the parachute you can find here: <a...
prusaprinters
If you filed any parts, it's probably a good idea to lightly wash them to remove any plastic dust. If you wish, it's also a good time to paint the bird logo as I did.</p><p>The Budgie parts need to be assembled for use, but it's pretty...
prusaprinters
The hinge wires do not go all the way through, there is about 1mm of plastic which stops the wire from going through. If you press too hard while installing the wires, it could bust through that 1mm wall, and pop out the other side - and you don't...
prusaprinters
And if you don't like my track segments, you'll need Sketchup 8 (free) to modify the included ".skp" files to make your own.Unless noted otherwise, the following ReplicatorG settings are used (using the GCode/Generate dialog):Infill: 100%Layer...
prusaprinters
Be careful not to damage the input jack for the power connector. Your'e done Step 10 Insert the the window, followed by the plastic frame with the knobs and then mount the controller board. Use the orignal screws.Connect the wire for the input jacks...
prusaprinters
I used more walls than normal (4) on this part since I did not want the drill guides to wear out too easily (they are plastic after all so use your best judgement). 0.2mm resolution Knob: See the 10th Pic. Supports touching the build plate (only) are...
prusaprinters
You can install heat-set inserts by pushing them into the plastic with a soldering iron. I use screws from local market. Dimensions are: M3 5,5 x 4,3mm Place 2 more M3 nut as shown in the picture..</p><p>You will need 5 x M3 nut and 8 x M3 insert in...
prusaprinters
Remove the plastic heatbed and extruder cable clamps from the original Einsy enclosure base. <li><p>Unplug the various cables from the Einsy. They're all pre-labelled/unique, and the online assembly manual gives detailed instructions for...
prusaprinters
This may take some getting used to. what you need: A 3D-printer with an at least 18x18cm print bed, 20cm high 2x 15mm ID/16MM OD carbon fiber tubes, about 70-75cm 2x 12mm ID/14MM OD carbon fiber tubes, about 70-75cm about half a roll of PLA...
prusaprinters
The green plastic is also machined (then possibly mold taken from the machined master to be reproduced in the resin). The numbered buttons look like a found item I have yet to figure out their source and they could be entirely fabricated but their...
thingiverse
... them together in your slicer if you’d rather print them as one piece. For the ones I did split, I used plastic putty to lessen the gap. You can still see them but not nearly as severe. I hope you enjoy building this as much as we did! ...
thingiverse
I initially started trying to print everything, but found that very cost prohibitive, each cube would require around 400-450 grams of plastic to fully 3d print a solution, and since I don't have a printer that can print 11inx10.5in the shelf wouldn't...
cults3d
Printing a big track could take many many plastic (various KG) and hundreds of hours of 3D printing, so this InfraRed lane-changer system in combination with your old black track parts could be the most economically interesting solution from my...
thingiverse
- Glue: preferably plastic welder but any sufficiently strong glue will suffice. This will only be used to glue in the 2.5mm x 32mm pin to reinforce the sledgefire. Preparatory Sledgefire Work: - Remove air restrictors. - Sand the front of...
grabcad
The introduction of additive manufacturing via the use of 3D Printing however, has presented a renewed need for such a tool, as manufacturing defects are much more severe than in conventional metal forming or plastic moulding creation techniques, and...
prusaprinters
Many parts require holes to be tapped so a 2.5mm drill bit and M3 tap is required, these don't have to be expensive if you don't already have them as it's only for plastic.You will need 2x 20-tooth GT2 metal drive pulleys with (normally) 5mm bore to...
prusaprinters
Lesson Plan and Activity:You and your partner should develop an agreed-upon plan for your figure:Each person will make a single front view sketch of your piece at 2x scale so that dimensions can be clearly labeled. Start with your constraint...
cults3d
Place the thermal sensor against something with a uniform temperature like the side of an empty cardboard or plastic box. (Don't rely on a wall to be thermally uniform, as there may be conduits or pipes inside.) Run the following command and wait...
thingiverse
10/3/2022 - decided to add a different type of pedal ("pusher") that is 2 pieces and hollow to save on plastic. 10/9/2022 - Narrowed the linear bearing seats and widened the rod through-holes on the slide top and bottoms (it seems to be rubbing...
prusaprinters
Initially I had planned a voltage converter module (present on one of the photos, but do not take it into account), but after the tests, it works better directly without the converter.You will need:3 batteries Li-Ion 186501 fan :...
thingiverse
Keeping the bed as clean as possible is absolutely key to both part quality and safely operating your machine (EG: fire prevention and avoiding cyanide production from burning plastic on the hot end). *Collaboration* Please share your processes,...