nightmare before christmas christmas ornaments 3d models
211113 3d models found related to nightmare before christmas christmas ornaments.
prusaprinters
1000hrs you will have to do PTFE tube maintenance which is basically, pulling out the tube completely on both sides, cutting about 5-10mm of the hotend side (you will see, that the tubes colour changed to brow/black and the tube itself is getting...
prusaprinters
However, we must urgently avoid the IPA completely soaking the wall of the print: The part would then deform and the print would inevitably be lost:So take your time and follow my instructions.Before smoothing please attach the large ring to the...
thingiverse
Level the bed by turning the thraded rods, before tightening the pulleys 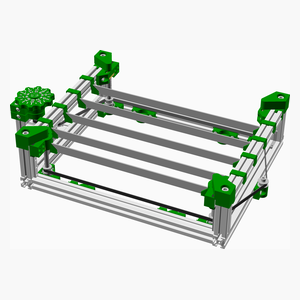 [Top](#TOP) --- Finished! ... <span></span> ...
prusaprinters
ENGFull article: https://blog.prusaprinters.org/how-to-print-for-animals_46054/Assembly and recommendations:All boxes are easy to assemble: simply use a piece of filament for hinges and M3 screws for securing the lid. Do not expose the...
myminifactory
- Weld the micro-switch cables (serial connection), it is preferable to carry out this operation before the pushers are glued, otherwise, it is difficult to position the wires, the iron is attracted by the magnets and its heat melts the Effector -...
prusaprinters
Either way, this Dice Tower - Building Under Construction will help you win as you have never won before! So when that stinking heretical neighbor opens his big yap about the games he's won, you take ‘em to the woodshed! Those damned tentacled alien...
prusaprinters
This kind of breaks the connector and exposes the contacts, but they will be protected by the case back later on.Before connecting the IDC cable to the display, split it into two like this. If you use a rainbow cable, it will be easier later on to...
thingiverse
Please stop the print just before completing the cavity for the nut or overhang (e.g., by using the printer's "filament change" function) and place an M3 nut or the "Ueberhang" part into the cavities. Then, you can resume the print. Some other parts...
prusaprinters
Run the camera cable through the small grove on the bottom of the piMount and loop it over before plugging it into the Pi. Be very careful to not bend or twist this cable, it is very fragile.</p> </li> <li><p>Plug the 4 jumper cables into the 4 pins...
prusaprinters
"Offline Mode":WordClock can still be used in "Online Mode" with all the smart functions controlled via your network environment and otional via Telegram as before… WordClock can now also be used in "Offline Mode" where you can use the time piece...
prusaprinters
This design has been optimized to be printed without supports, and is divided into multiple parts so it can be printed easily. BEFORE YOU START:To assemble this camera, it is required to have printed all the parts and have the following list of...
prusaprinters
links)4 AAA Batteries (each 1.2 V; 800 mAh)Shrink rap (I hardly used it due to too small diameter)Solder tinBit of copper wire (Stripped ethernet cable has solid core)3 V (3mm) LED (Colour your choice; Diode fit correct +/- orientation...
prusaprinters
It's yours to make!).Stand up your Space Port before it's too late! More Space Port!Space Port - https://www.printables.com/model/205432-space-port-terrain Space Port Living Quarters -...
prusaprinters
I'd recommend that you design your enclosure iteratively, before attempting to print it. A visual sense-check in the renderer will tell you if the overall design is about right. When you slice the model for your printer, check a few...
prusaprinters
Use plyers to gently push them into placeScrew the 3 M3 bolts into placeTHE RANGE FINDERScrew the Range finder into place using the M2 bolts - they wont go all the way in, which is expectedTHE SKULLGlue the skull into place but applying superglue...
prusaprinters
It's yours to make!).Stand up your Space Port before it's too late! More Space Port!Space Port - https://www.printables.com/model/205432-space-port-terrain Space Port Living Quarters -...
thingiverse
This limits the step generation to about 10MHZ before the CPU gets bogged down and begins to miss steps, this is with a single stepper too, divide that across 4 and you can quickly run into issues. This is with Marlin FW. Now on a board with a...
thingiverse
- Support for midmotor 30mm fan (no matter if the car is in 3 or 4 gear gearbox configuration, just mirror the fan mount in your slicer before printing if needed). - Support for inline 3S in rear motor configuration. - Support for inline 2S shorty...
sketchfab
...I've never actually built a 3D model before, so I'm hoping this program will be forgiving. I click on the "create" button and choose the "mesh" option. Suddenly, a bunch of weird-looking icons pop up on my screen. I have no idea what any of them do.
prusaprinters
When manually dialing, you must land on the gate with the exact roll count.When entering ANY gate, the player must draw a GateCard before traveling through the gate, and follow the instructions on the card. DHD:This is how you dial the gate to...
thingiverse
Double-sided Textured PEI Powder-coated Spring Steel Sheet before printing with PETG filament. For thin parts to stick correctly, you may need to adjust height of first layer perfectly and to reduce "Elephant foot compensation" from default value...
thingiverse
350–340 BC) showing Cadmus fighting the dragon of Ares[104] In the founding myth of Thebes, Cadmus, a Phoenician prince, was instructed by Apollo to follow a heifer and found a city wherever it laid down.[105] Cadmus and his men followed the heifer...
sketchfab
In the world of Wolverine Inferno, the stakes are higher than ever before. With his adamantium claws cutting through flames and igniting even more destruction, Wolverine finds himself at the center of an all-consuming inferno. His determination to...
prusaprinters
It helps to use a thin tool to lift the cork away from the blowpipe body before inserting the cage leg.Do the same with the opposite leg of the valve cage on the other side of the pipe.And insert one more leg.Place the flapper with its smooth side...
prusaprinters
(New in 2022-10-14 update.)Filament PM. This is a Czech manufacturer, well known to the older Prusa owners (as they provided the silver 1kg spool bundled with the Mk3 before Prusament times), that now also makes filaments for the “Made For...
prusaprinters
This cleaning Box will be always printed ...
prusaprinters
A reasonably strong blow is briefly at 3700 Hz before rolling back down as it slows. An average blow will be less than that. Perhaps around 500 Hz to 3200 Hz depending on how much air is blown into it. Please be careful with it and use it safely like...
thingiverse
Then run the following: import itertools x = [point[0] for point in Alien1] y = [point[1] for point in Alien1] coordinate_points_Alien1 = list(zip(x,y)) print(coordinate_points_Alien1) ``` As long as you have your coordinates in this order, then we...
thingiverse
A reasonably strong blow is briefly at 3700 Hz before rolling back down as it slows. An average blow will be less than that. Perhaps around 500 Hz to 3200 Hz depending on how much air is blown into it. Please be careful with it and use it safely...
prusaprinters
After drilling the holes you might consider painting it before attaching the hardware! ----How To Print---- Printing of Central Arch PartsThere are four parts: Large Arch which attaches the the central wood vertical beam and connects everythingBar...