mazinger z toys 3d models
129659 3d models found related to mazinger z toys.
thingiverse
If your print volume is smaller, try to rotate them by the Z axis. They should fit a 200x200 mm buildplate when rotated so they are placed diagonally on the build plate. **+++ Print settings +++** The relevant recommended print settings: -...
cults3d
If your print volume is smaller, try to rotate them by the Z axis. They should fit a 200x200 mm buildplate when rotated so they are placed diagonally on the build plate. +++ Print settings +++ The relevant recommended print settings: 0.2mm layer...
thingiverse
In addition it contains two zip file containing the parts STL files used to build the combined ships and the Blender files used to create those parts: - ...
prusaprinters
You could use larger sheets of adhesive tape, however, they are a lot thicker @ 0.5mm (the 235mm glass does not include thermal adhesive tape)....
cults3d
... 26, 2013. Vogel, L. Z.; Savva, Stavroula (1993-12-01). "Atlas personality". British Journal of Medical Psychology. 66 (4): 323–330. doi:10.1111/j.2044-8341.1993.tb01758.x. ISSN 2044-8341. PMID 8123600. "Nautilus Cup". ...The Walters Art Museum.
prusaprinters
Kompletna lampa Led do akwarium morskiego lub słodkowodnego, jest to cały projekt lampy led w drugiej wersji V2 o mocy 350W z obudowa elektroniki oraz wszystkimi elementami, do lampy potrzebne są jeszcze:1 . Elementy ze sklepu Aquma:</p><ul><li><a...
cults3d
(ENT: "Rogue Planet") Lors de son 8ème anniversaire, son père lui offrit son premier livre d'astronomie "Le Cosmos de A à Z". Archer passa des heures à admirer la couverture qui présentait la Nébuleuse Arachnid. Quelques temps après, son père,...
prusaprinters
The soundpost has to be placed vertically inside the violin (through the right f-hole), about a few millimeters below the right leg of the bridge.There are many videos on YouTube showing you how to do it, and this is just one of them:...
prusaprinters
For this increase the z (3rd) value of the rubber_dim parameter.Exception 2: You want a slightly smaller rubber part (e.g. printer not perfectly tuned, print with non-flex material, etc.). In this case you can ever so slightly reduce the x and y (1st...
thingiverse
If this is an issue for you in your use case then remove the mesh and simply scale the spacer ring in the Z direction in your slicer to compensate for the lost height of the mesh. That way the edge of the filter media can be clamped without a mesh...
prusaprinters
Use the other back bushing to fill the unused hole on the other side.ADDITIONAL NOTES AND PRODUCT LINKSBUILD VOLUME Z HEIGHT REMAINS INTACTOne other note on the extra enclosure height needed to accommodate a B1: The B1's advertised build volume...
prusaprinters
if you have higher print, you will spend more time with printer ?? ...
thingiverse
ADDITIONAL NOTES AND PRODUCT LINKS -------------------------------------------------------------------- ***BUILD VOLUME Z HEIGHT REMAINS INTACT*** One other note on the extra enclosure height needed to accommodate a B1: The B1's advertised build...
prusaprinters
My first thought was to use perfboard with connectors each side.I toyed with compressing the footprint by consolidating the wiring to JSTs and header pins. On reflection, a bigger footprint using JST XH connectors and 5.08 pitch right angle...
cults3d
I had a 4xAA battery box from some toy. This is from where I scrapped the "Negative pole springs" and the "positive" metal plate I used. The springs should be like 10mm tall and 5mm tall when compressed by the batteries. Their diammeter should be...
myminifactory
I had a 4xAA battery box from some toy. This is from where I scrapped the "Negative pole springs" and the "positive" metal plate I used. The springs should be like 10mm tall and 5mm tall when compressed by the batteries. Their diammeter should be...
prusaprinters
Print at 0.2mm layer height in something nice and bright, like orange PLA, to make it clear that your print is not a weapon.Rainbow camo trim platesIt's important to make it clear to passersby that this is a toy and not a weapon, so I decided to go...
thingiverse
First, do a manual X, Y and Z adjustment and see how the carriage moves. If everything looks normal heat up the extruder to printing temps and feed in the filament using the load menu. If everything goes well it will now extrude from the nozzle. ...
thingiverse
Dans le domaine de vol de l'avion, le turboréacteur est sollicité par des accélérations suivant l'axe longitudinal (X), qui ne fait pas l'objet d'une limitation particulière, et l'axe vertical (Z), pour lequel le motoriste impose une limitation en...
thingiverse
(rotate 45 degrees in Z axis, enable supports)Cabinet_Light_Bar_Plug.stl is for plugging the two holes near the top left on the back of the cabinet. The original HF light is useless, and is generally replaced with LED lights or halogen bulbs. You'll...
thingiverse
First, do a manual X, Y and Z adjustment and see how the carriage moves. If everything looks normal heat up the extruder to printing temps and feed in the filament using the load menu. If everything goes well it will now extrude from the nozzle. ...
prusaprinters
(if the gap is 1.2mm, you will read 06 for 0.6mm on both sides, just to be clear ;) )In your slicing program, scale the washer (Z-axis only) to the desired thickness and print 4. I would suggest TPU or TPE as it will function as a vibration dampener....
thingiverse
First, do a manual X, Y and Z adjustment and see how the carriage moves. If everything looks normal heat up the extruder to printing temps and feed in the filament using the load menu. If everything goes well it will now extrude from the nozzle. ...
thingiverse
Thread the assembled carriage holders into the rails and rods of the Z-axis. 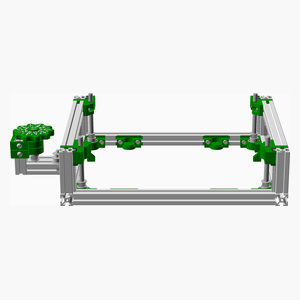 <span></span> ...
prusaprinters
First, do a manual X, Y and Z adjustment and see how the carriage moves. If everything looks normal heat up the extruder to printing temps and feed in the filament using the load menu. If everything goes well it will now extrude from the nozzle.Level...
prusaprinters
If you have a more friction resilient plastic available this part especially will benefit from it.QualityRandomise the z-seam on the rollers, main drive axel and spindle, this helps prevent noise and vibration.Layer heightI printed the cam and tooth...
prusaprinters
These are hosted externally.Ryobi to Makita Adapter:Wire Spool Holder:---------------------------------------------------------------------------------------------------------Edit: I guess I should have added some short instructions on how the gif's...
sketchfab
In the Transform panel, click on the "Location" tab and set the X-coordinate to -50 mm, the Y-coordinate to 0 mm, and the Z-coordinate to 0 mm. Next, go to the Edit Mode and select all vertices by pressing Ctrl+A. Then, press F2 to open the Mesh tab...
thingiverse
First, do a manual X, Y and Z adjustment and see how the carriage moves. If everything looks normal heat up the extruder to printing temps and feed in the filament using the load menu. If everything goes well it will now extrude from the nozzle. ...
thingiverse
First, do a manual X, Y and Z adjustment and see how the carriage moves. If everything looks normal heat up the extruder to printing temps and feed in the filament using the load menu. If everything goes well it will now extrude from the nozzle. ...