intel cpu pins 3d models
82759 3d models found related to intel cpu pins.
thingiverse
The stepper connectors are slightly different, but the metal pins are the same, so... I pulled off and pushed on just the plastic part of the stepper connectors. Take some pictures as a security blanket before you start so you can reverse the...
thingiverse
Then put the plate on by locating it on three slots in the threaded part and on the three pins on the wheel. This stops everything from tuning and the nut can now be put on. You can print a BBS Wrench (80mm) to help you undo the nut but you should...
prusaprinters
Designed to be used with the LM2596 step down convertor. all bolt holes are m3. push in nuts in the bottom of the partcavity for the input power cables to the step down to enter from below to keep it as low profile as possible. opening...
thingiverse
In this case, the centre pin is common, and toggles between both sides. You'll want a SPST (single pole single throw) with a 6mm neck and body depth of 13mm I used a combination of 3mm screws, ranging from 10mm to 12mm, and 30mm - all in stainless....
thingiverse
I use a removable pin jumper eg: https://www.aliexpress.com/item/32873263301.html - If you can, make the motor mount lid out of G10 or metal so it doesn't flex. - The tail accepts a push fit magnet to keep stability in metal floor arena's. keep the...
thingiverse
You can also use the original code from the developer, but than do not use a speed switch on PIN D9 !!! Original version: https://github.com/fehlfarbe/arduino-motorfocus https://www.thingiverse.com/thing:2063325 German / Deutsch: ...
thingiverse
There's a plastic pin on the case that fastens the pump and power supply wires with hallermann ties. The idea is to turn on the sensor using digital IO, measure humidity using an analog input, and if it's greater than 650, the soil is very dry. If...
prusaprinters
These are NOT compatible with the A mount, but offer a few advantages: they joining pin is now 4mm across (was 2.8mm), a set of three teeth now lock the two parts together (assemble/disassemble at 90° rotation), and both pieces can be printed without...
thingiverse
## Demo Videos #### JWST LED Panels Demo #1 [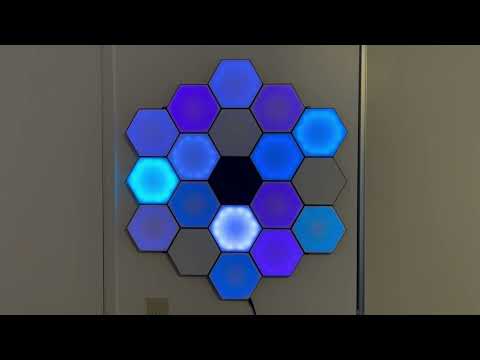](https://youtu.be/lVMFP3fJyJ0) #### JWST LED Panels Demo #2 [![JWST LED Panels Demo...
prusaprinters
A fuse to the converter would be a good idea. Also, the locating pins don't seem to survive very long - I made them small for easy assembly but slightly larger diameter might help and still assemble. The BuckConverter is larger than some:Valefod Ean...
thingiverse
Glue hilt pins into Guard Back (or Front). The pegs on the rest of the parts should align with the holes of the neighboring part. I used glue the first time. For the next version I will use epoxy and spot welding with a soldering iron or 3d...
thingiverse
UPDATE (25 Jan 2022): - Added models to support adding a PRG (user) button - Added front/back covers with various patterns (dots, hexagons, ribs) Required hardware: - Four (4) M3x20mm socket head cap screws - Four (4) M3 nuts - Two (2) M2.5 screws...
cults3d
The parts are interchangeable with the other 4 torso’s available in the “ADD-Ons NSFW download available here ; https://cults3d.com/en/3d-model/naughties/bgc-nene-hard-suit-adult-add-ons-only-by-sparx The model is1/6 scale at H290 x W140 x L145 With...
thingiverse
Also, don't forget to print a dome pin of any desired color. The assembly begins with the attachment of bumps and bump rings. These are added without glue or fasteners; simply place them through their respective holes and twist them into place by 90...
thingiverse
20 cm on the BIQU BX, fitted with a new JST-PH connector (2.0 mm 3-pin) and then plugged onto the small circuit board as shown in the photo. The cable can be fed into the housing in the same way as the cable from the bed-level sensor. Of course, the...
prusaprinters
A video of the extruder in action is here: https://www.youtube.com/watch?v=0NzpV7vTFIg Instructions To complete this, you will need: Three 608 bearings An 8mm diameter 18-20mm pin for the guidler bearing Three 50-60mm M3 screws Three 10mm M3 screws...
thingiverse
It's not recommended to try running these lighting devices directly from the controllers' pins due to high current draw. I used an adjustable buck converter, which also needed a housing, so I included it in this project. The housing can be used with...
cgtrader
We provide comprehensive CAD files of various diamond jewellery products including: Engagement Rings: Elegant rings designed to seal your commitment with a beautiful sparkle Couple Bands: Adorable pairs that bring partners closer together in style...
myminifactory
You'll need the other 2 crocodile wires to connect one end of each to the last dominoes piece in line and the other ends to pins 0 and GND on the Micro:bit. If necessary, use Blue Tack or Sellotape to secure the wires in a position. The Micro:bit...
thingiverse
There are no alignment pins for the inner and outer hubs. They should be assembled using the truck axle or a 5mm hex key for alignment. Be careful not to glue the truck axle or hex key in place! Make sure the "spoke" supports of both hubs are...
thingiverse
TOW CABLE: No supports, but you might have to adjust its length in your slicer to fit snugly on the pins that hold it to the chassis. <b>Updates:</b> July 1, 2020 - Minor fixes to Chassis Top B. -- Adjusted details so they don't hit when turning...
thingiverse
In the electronic version of Wall-E there are 43 individual files, 84 main parts, 72 treads, and 144 pins needed. So that's a total of 300 individual parts that need to be printed. This is a list of the electronics components that I used. They...
prusaprinters
Come back here for wiring and WLED setup.Changes from Mew's Version:Light Controller box stl fits in a D1 Mini.Added magnetic end capsAdded support bars (replaces bamboo sticks)Wiring for D1 MiniCustom G-Code for WLED...
thingiverse
Especially if you're going to use it as designed (the metal pins will be abrasive for the print material, and the can shouldn't have too thin walls). You can print all parts with a 200x200 build area. The middle part is optional; if you need a...
cgtrader
#GEMSTONE JEWELLERY Gemstone Rings: Capturing nature's essence with a variety of colours, each symbolizing its unique essence.\nGemstone Earrings # Gemstone Pendants: Radiant and full-of-life expressions that mirror their wearers' personality.\n#...
myminifactory
The switches for select and start buttons fit with M3x25mms nut/bolt or just use a bit of glue or a zip-tie.\r\nThe top plates fit into the case by pressing them carefully.\r\nWhen mounting the side buttons, first put the base in place and use the...
grabcad
A small wheel, guided along this cam profile, enables the radial motion of a vane, connected to its inner end via a pin that serves as the wheel's rotation axis. The cam profile ensures that inlet ports are opened only during the desired angular...
prusaprinters
Named funnel_top_v, funnel_bottom_v & funnel_hook_vSlicer Settings:20-30% Rectilinear infillTurn off Only infill where needed (if using Slic3r/PrusaSlicer/SuperSlicer)0.20mm layer height (or lower)FINISHING & ASSEMBLYYou may need to sand the...
thingiverse
-You can manage to remove the wires pushing down the pins (photo), but remember to lift it up before you insert inside again. -If you are using the "bed chain bracket chain up" (the same I am using) you have to put the correct amount of chain links,...
thingiverse
(updated 12-21-23 with several base options as well as timing belt sizes and profiles.)The colors in the pictures indicate:yellow -- 3D printed partsblue -- piano wire partsgreen -- standard hardware (bolts, nuts etc)red -- other parts with minimal...