folding angle bracket 3d models
202957 3d models found related to folding angle bracket.
prusaprinters
Transform any of the models in X/Y or X/Y/Z direction with your slicer for your needs.Usage Information:Too much vertical (90° angle upwards) force on the Chunky may break it or small parts of it, especially on the rail / hook side. So don't just...
prusaprinters
Be careful not to over-tighten the screw; loosen and tighten this screw to adjust the angle for holding the micrometer.Finally, assemble the ClampScrew by putting the two screw halves together and inserting them into the ClampScrewKnob. Note that...
thingiverse
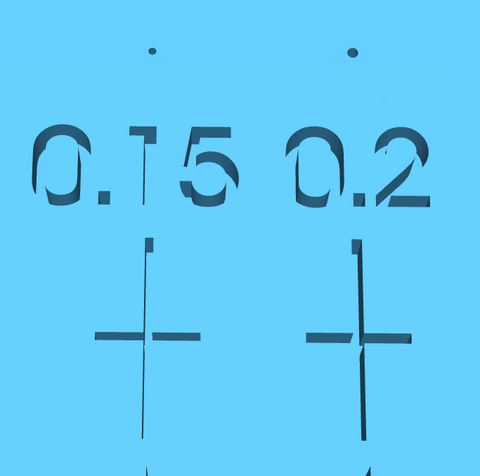
~10]clockwise from in to out, each crossing of the 1C reference line begins a new row below : 1.01,1.011, 1.012, 1.013, 1.014, 1.015, 1.02, 1.021, 1.022, 1.023, 1.024, 1.025, 1.03, 1.031, 1.032, 1.033, 1.034, 1.035, 1.04, 1.042, 1.044, 1.05,1.052,...
thingiverse
Latest development status: - Angle and position of the horizontal mount for the dual-left controller mount has been optimized - Contact pressure pad for the right controller mount has been re-positioned and enlarged There are two versions for each...
thingiverse
The Right Rear corner also has the angled notch for the Bowden tube. Place each betweener in their respective spots, the rear betweener has no ledge and has a notch. If everything fits properly it's time to glue it up. On a flat surface, place all...
prusaprinters
Added support for symmetrical camera and home button openings so the keyguard can easily be rotated if the tablet is rotated.Update 25 July 2022 (Version 46): Added support for changing the angle of the bottom edge of rectangular cell...
prusaprinters
The angles on 8 and 10 should be pointing up on the inside edge.Step 4- Frame 11 & 12 get glued together with the stops facing each other.Step 5- Frame 14 & 15 glued together with the door stops facing left. 14 on top and 15 on the...
prusaprinters
At first glance it appears that these screws attach at an angle, but they don't. All 4 screws, screw in perpendicular to the bottom of the tray. The screw under the motion detector (back right) requires a ball end 2mm hex wrench to install because...
thingiverse
 Another way to check to see if exposure is too much is by checking the triangle feature here: ![Alt...
prusaprinters
A smaller aperture will help account for small errors as the depth of field will still cover your subject.As this camera does not have a viewfinder, a wide angle lens (less than 50mm) is probably going to be your best bet. I use a 28mm.Due to the...
cgtrader
... archway_3.................................1426 polygon, a harmonious blend of curves and angles. ..................................................715 vertices contribute to the creation of a dynamic entrance that captivates the senses.
prusaprinters
Note the treads match in shape the body of the Freight Ten.Superglue the cab to the body to the front grill is overhanging the front slightly (see the images).There are extra parts you can print (road wheels, treads, etc.) to add to the model.No...
prusaprinters
Do NOT attempt to use the normal bed leveling with the dial mounted, it will hit the frame and likely break!Print SettingsPrinter:QIDI Tech X-MaxRafts:NoSupports:YesResolution:0.2 mmInfill:25Filament: Prusament ASA Jet BlackNotes:Print all parts in...
prusaprinters
Then we drew the line in. To make the other line we ended up creating a line which was parallel to the previously created line, then manual relations these to be parallel and added a smart dimension angle to set them as fully...
prusaprinters
Wind directions are measured using either 8 reed contacts, or an magnetic angle measurement sensor. Wind speed is measured by a single reed contact closed every time the anemometer wings do a full rotation. It is connected to the Central...
prusaprinters
You will need to bend the pins (if necessary) so they are at right angles to the body. I used tweezers to place all pins in the handle and bent them all at once as shown in the included picture.Buzzer: I used an active Buzzer. The Dupont connectors...
cults3d
Make sure the first digit isn't placed at an angle. The base of the number should be parallell to the bottom edge, it doesn't matter what number the digit is. (picture 1) (tip: you can use the front casing to make sure the first digit is aligned...
prusaprinters
The extrusion script copies the 2D origin-centred polygon along each of the points along the path, rotating each copy around the origin to face the next point on the path, and to be oriented in such a way that a unit vector perpendicular to the...
thingiverse
Additional components needed are as follows: * A 5.5mm x 2.1mm DC Power Extension Cable (Right Angle Male to Female adapter) or equivalent. This is necessary as there is not enough space to plug the original adapter into the board when mounted...
thingiverse
Fan screws might make step 5.2 difficult, but doable with a small screw driver or a right angle screw driver If you’re mounting the GPU to a regular motherboard without any riser cables that mount the GPU upright, then you want the fan blades to be...
thingiverse
Assumed data --> implemented in the model to Bond lengths C-C bond length 139 pm --> 69.5 mm C-H bond length 109 pm --> 54.5 mm CHC bond angle 120 ° --> 120 ° Covalent radii Carbon 76 pm --> 38 mm Hydrogen 32 pm -->16 mm Instructions: Since many 3D...
prusaprinters
Just contact me via twitter @Kerlemakerspace or send a message :DDisclaimer: alcohol in moderation! Print instructions:Supports: all the parts can be printed without supportLayer Height: 0.3mmPrint Files: .3mf - Files are provided for adaptation...
prusaprinters
Seriously, I cut some angle iron (mild steel) with it, and it sliced it like butter. Here's a link to where I bought it:</p><p><a href="https://amzn.to/3DJd9py">https://amzn.to/3DJd9py</a></p><p><strong>How I used these:</strong></p><p>I recently...
cults3d
#BOM: Powerboost 1000c https://www.adafruit.com/product/2465 or https://www.amazon.com/Adafruit-PowerBoost-1000-Charger-Rechargeable/dp/B01BMRBTH2 3.5" LCD https://www.amazon.com/gp/product/B0045IIZKU 3 Position switch...
myminifactory
Mounting plate assembly: Make sure the first digit isn't placed at an angle. The base of the number should be parallell to the bottom edge, it doesn't matter what number the digit is. (picture 1) (tip: you can use the front casing to make sure the...
thingiverse
All of the angles are designed to be printed without supports. If your slicer has the ability to add supports for the snap fits only, that would be preferable, however even a substandard snap fit should work fine. I have included two part files...
prusaprinters
But if you want to adjust the position of the crosshairs you can use the angle on the pin or pliers to move the string along the notches at the front of the frame. Don't forget to re-tighten the strings after you are done by pulling on the little bit...
prusaprinters
You can change the brightness by short click the button.With another longer press, you change to “setup summertime" mode.The minute needle moves to 0 and the hour needle represents the daylight saving time shift.With a short click on the button, you...
prusaprinters
Some items, like the single LED and resistors, can be swapped out as long as you use suitable replacement items.NeoPixel Ring - 12 x WS2812 5050 RGB LED with Integrated Drivers - 2 units @ $7.50 eachArduino Pro Mini 328 - 5V/16MHz - 1 unit @ $9.95...
prusaprinters
No support required as everything is at 45 degree angle including the inside overhang area that would normally need support. No soldering required as you can remove the entire guts if you carefully remove the old electronics and break the old black...