dragonball z font 3d models
188363 3d models found related to dragonball z font.
thingiverse
ADDITIONAL NOTES AND PRODUCT LINKS -------------------------------------------------------------------- ***BUILD VOLUME Z HEIGHT REMAINS INTACT*** One other note on the extra enclosure height needed to accommodate a B1: The B1's advertised build...
prusaprinters
if you have higher print, you will spend more time with printer ?? ...
thingiverse
Petralak Logo Font - A Work of Art Petralak logotipoa font is a work of art in itself, meticulously designed to convey the brand's message with precision and elegance. Petralak logo typography perfectly balances form and function, creating a visual...
prusaprinters
Change the font to Impact and adjust positioning and size to your desire.Then use the extruded cut tool to indent the letters.The first step of making these ghosts was to sketch them out on a piece of paper. We had to sketch them with 2x dimensions...
thingiverse
Les impressions se font sans support. ## Assemblage : 1. Sur l'anneau méridien bleu, passer un fil par les deux trous. Faire un noeud pour empêcher le fil de traverser le trou près de la graduation à 90°. Tendre le fil et le bloquer en posant...
prusaprinters
These can easily be fixed by clicking on the warning triangle in front of the object names.The light bulb icons are derived from a design by Adrien Coquet and the arrival flag icon is from oNline Web Fonts.Building a custom PrusaSlicer with FlowSnake...
cults3d
Les deux font appel à des microprocesseurs de la classe Motorola 68020, tels que ceux employés sur les premiers modèles d'Apple Macintosh, et sont programmés en langage Ada, langage informatique souvent utilisé dans les systèmes critiques de...
prusaprinters
- I am curious to see your uses in the wild!This design is very very similar to his gaellafonds design (all credits for the OpenSCAD file go to him!), only changes are:The arm locking mechanism is such that gravity will lock it.I increased the font...
prusaprinters
You can customize the font, size, angle, even enter several lines of text and extra icons on the side.Printing:Just print it without supports, base down as in the STL. It will print fine!</p><h4>Customizing:</h4><p>The included OpenSCAD file with...
thingiverse
http://www.thingiverse.com/apps/customizer/run?thing_id=739573 Instructions Using the following options: extruder2 font_size = 12 extruder lug_text_distance = 2 narrow_widen = 0 text_font Nib textextruder = extruder2 style_outline_rounded border...
thingiverse
First, do a manual X, Y and Z adjustment and see how the carriage moves. If everything looks normal heat up the extruder to printing temps and feed in the filament using the load menu. If everything goes well it will now extrude from the nozzle. ...
prusaprinters
The wires should be long enough to keep the bluetooh remote controller on the desk when the print head goes (on Z -Axis) upto the height of the model printed (ie max 250mm for Ender 3). So approx. 40cm wire length will be sufficient).</p>...
prusaprinters
I recommend raising the Z-axis toward the top before starting this procedure so you have ample room to work.Remove the print fan (tuck it between the X-axis belt and bottom bar).Remove the SuperPINDA (lay it over the top X-axis bar or over the X-axis...
thingiverse
2 #1 # # ## # ## # I' #1 # #03, 6) #0x # #01 # In [0 A #09 #0: ## # A_ - # #0. ## 0. The Astra,0x 03 ## 0. This ## 0. #07 (0x package_ package and 1 #06, 0x #08b 0x #02 using the end #2 package 0x The C++ #롤лове ersteھٹ Dopo DoposcriptstyleHECK...
thingiverse
First, do a manual X, Y and Z adjustment and see how the carriage moves. If everything looks normal heat up the extruder to printing temps and feed in the filament using the load menu. If everything goes well it will now extrude from the nozzle. ...
thingiverse
First, do a manual X, Y and Z adjustment and see how the carriage moves. If everything looks normal heat up the extruder to printing temps and feed in the filament using the load menu. If everything goes well it will now extrude from the nozzle. ...
thingiverse
First, do a manual X, Y and Z adjustment and see how the carriage moves. If everything looks normal heat up the extruder to printing temps and feed in the filament using the load menu. If everything goes well it will now extrude from the nozzle. ...
sketchfab
In the Transform panel, click on the "Location" tab and set the X-coordinate to -50 mm, the Y-coordinate to 0 mm, and the Z-coordinate to 0 mm. Next, go to the Edit Mode and select all vertices by pressing Ctrl+A. Then, press F2 to open the Mesh tab...
prusaprinters
You could also use a piece of Stripboard to just use oneground pin of the Raspberry Pi and connect all ground wires of the buttons just to this Stripboard.If you want to use the exact same configuration forRetrogame you can use the following...
thingiverse
Dans le domaine de vol de l'avion, le turboréacteur est sollicité par des accélérations suivant l'axe longitudinal (X), qui ne fait pas l'objet d'une limitation particulière, et l'axe vertical (Z), pour lequel le motoriste impose une limitation en...
prusaprinters
These are hosted externally.Ryobi to Makita Adapter:Wire Spool Holder:---------------------------------------------------------------------------------------------------------Edit: I guess I should have added some short instructions on how the gif's...
prusaprinters
First, do a manual X, Y and Z adjustment and see how the carriage moves. If everything looks normal heat up the extruder to printing temps and feed in the filament using the load menu. If everything goes well it will now extrude from the nozzle.Level...
prusaprinters
If you have a more friction resilient plastic available this part especially will benefit from it.QualityRandomise the z-seam on the rollers, main drive axel and spindle, this helps prevent noise and vibration.Layer heightI printed the cam and tooth...
prusaprinters
I found a lot of inspiration and I have remixed a lot of designs that I found online, but at the same time I designed a large portion of models, so I will try to provide as much references as possible in this description. My main goal with this...
thingiverse
First, do a manual X, Y and Z adjustment and see how the carriage moves. If everything looks normal heat up the extruder to printing temps and feed in the filament using the load menu. If everything goes well it will now extrude from the nozzle. ...
thingiverse
Thread the assembled carriage holders into the rails and rods of the Z-axis. 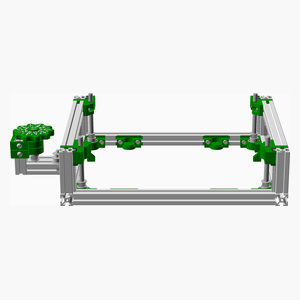 <span></span> ...
prusaprinters
First, do a manual X, Y and Z adjustment and see how the carriage moves. If everything looks normal heat up the extruder to printing temps and feed in the filament using the load menu. If everything goes well it will now extrude from the nozzle.Level...
thingiverse
(rotate 45 degrees in Z axis, enable supports)Cabinet_Light_Bar_Plug.stl is for plugging the two holes near the top left on the back of the cabinet. The original HF light is useless, and is generally replaced with LED lights or halogen bulbs. You'll...
prusaprinters
There are also useful coat hangers and finger toys.There is functional furniture as well:Or check out the 1250 keychain name tags:Print instructionsYou can print it without any support, and it prints very fast.Standard settings will be fine, like...
prusaprinters
First, do a manual X, Y and Z adjustment and see how the carriage moves. If everything looks normal heat up the extruder to printing temps and feed in the filament using the load menu. If everything goes well it will now extrude from the...