cr 10 dual z sync 3d models
399784 3d models found related to cr 10 dual z sync.
prusaprinters
I only use 2 on the tripod adapter clamp, as it needs to be tight, and 4 on the magnet holders.4x 20x10x5mm MagnetseBay search:20 10 5 N52 neodymiumor 20x20 5 neodymium (this type is more rare, and expensive)They are glued into the mounts. ...I'm using...
thingiverse
I did slice it in Cura 4.0 and it looked fine, long print with .2 Layer & .4 nozzle (over 10 hours) due to the details. There is a lid posted in the Comments section of the original by @ktapper: https://www.thingiverse.com/thing:3225542/comments ...
prusaprinters
See section Tail feathers remix. Print settingsLayer height: 0.2mmInfill: 10-20% (pendulum weight 100% infill)Seam: All shafts and gears have a small notch for the seam. Make sure when slicing that the seam is placed in that notch (in...
prusaprinters
Once the correct amount is placed (making sure you can still mount the motor), you can fix it by gently dropping some epoxy over it.You'll also need 8 pcs of neodymium magnets for the cabin/lid.8 mm diameter 3 mm thick, like these...
prusaprinters
Use 2x 10 mm M3 screws. Run the camera cable and the jumper cables up through the bottle and out the hole in the piMount. Run the camera cable through the small grove on the bottom of the piMount and loop it over before plugging it into the Pi. Be...
prusaprinters
According to Canislupus: “you will need ~16cm from wheel buffer to spool + ~50-100cm from box interface to MMU unit depending on your setup”Reusable silica gel in sachets or pearls. The color will change when it's full of humidity, you can microwave...
prusaprinters
... We'll set aside our Base piece for now. STEP 4Now we will attach our 2 × linear slide MGN linear rails guide with mini Carriage Block to our Base For Rails piece. For easy workflow, place your Base for Rails upside down on a flat surface.
prusaprinters
If you have a more friction resilient plastic available this part especially will benefit from it.QualityRandomise the z-seam on the rollers, main drive axel and spindle, this helps prevent noise and vibration.Layer heightI printed the cam and tooth...
thingiverse
2 #1 # # ## # ## # I' #1 # #03, 6) #0x # #01 # In [0 A #09 #0: ## # A_ - # #0. ## 0. The Astra,0x 03 ## 0. This ## 0. #07 (0x package_ package and 1 #06, 0x #08b 0x #02 using the end #2 package 0x The C++ #롤лове ersteھٹ Dopo DoposcriptstyleHECK...
thingiverse
Thread the assembled carriage holders into the rails and rods of the Z-axis. 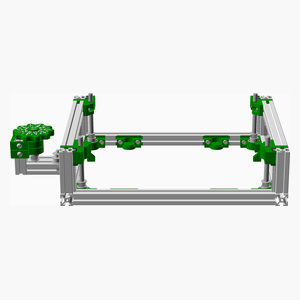 <span></span> ...
thingiverse
(rotate 45 degrees in Z axis, enable supports)Cabinet_Light_Bar_Plug.stl is for plugging the two holes near the top left on the back of the cabinet. The original HF light is useless, and is generally replaced with LED lights or halogen bulbs. You'll...
sketchfab
In the Transform panel, click on the "Location" tab and set the X-coordinate to -50 mm, the Y-coordinate to 0 mm, and the Z-coordinate to 0 mm. Next, go to the Edit Mode and select all vertices by pressing Ctrl+A. Then, press F2 to open the Mesh tab...
prusaprinters
I recommend raising the Z-axis toward the top before starting this procedure so you have ample room to work.Remove the print fan (tuck it between the X-axis belt and bottom bar).Remove the SuperPINDA (lay it over the top X-axis bar or over the X-axis...
prusaprinters
instead of 10 minutes assembly, it took her 17 minutes but I was very proud of her since she had done it without any guide or manual.BTW, next week I will add a complete video guide showing how to assembly the enclosure. I already took the...
prusaprinters
7 - 10 W, 2-3 levels approx. ...10 - 15W)Sample links:Power Cable Lamp Socket with Switch E27 - https://www.amazon.de/dp/B00P2DV2NY/ref=pe_3044161_189395811_TE_SCE_3p_dp_1?th=13 - 12 W E27 LED Light Bulb Corn Light -...
prusaprinters
I personally prefer high tension)For a set of 10 (Including feet) (Including elbows)x7 Bodyx5 Lids(Same as above)What are the GPCA, Hip clips, Cable management clips and Thigh lids for? No one else has them- GPCA is a goprochest adapter. For the main...
thingiverse
The first one was a box, with an RFID reader, that provided clues on its LCD screen and had a secret compartment that opened with a specific secret code. The second device was this Bocca della Verità with RFID in the mouth (it was a secret) provides...
myminifactory
We also used 10 awesome backers of Vol.1 to test our designs with their own printer. A 220x220 bed is perfect to print all parts. Most parts on full bed takes around 6 hours to print with good quality settings. Before printing, we recommend that...
thingiverse
#Features & BOM: - 18650 battery https://www.amazon.com/gp/product/B01C4GFVN8 #or - 2500 MAH Lipo - use the cover without 18650 holder https://www.amazon.com/YDL-2500mAh-battery-Rechargeable-Connector/dp/B07BTY599F #or - 5000mah battery and the 3mm...
prusaprinters
I changed the VID and PID values as per jfedor's instructions: vid=0x256f, pid=0xc631 (SpaceMouse Pro Wireless (cabled))When compiling and uploading, I select Arduino AVR boards (in Sketchbook) > Spacemouse and then the serial port.You will also need...
thingiverse
With some battery wire "training", this battery will fit and can fly the conversion for >10 minutes with no reserves. I fly for 7 minutes and land with ~30% remaining. A word about glue.... The only thing I have found that actually produces a...
grabcad
Bright, even light maintains consistent color over time.10. Instant on/off - No flickering, delays or buzzing.11. Very good color rendering.12. Vibration/impact resistant.13. Significantly cooler operation.14. ...Less frequent outages, higher output...
prusaprinters
It may also be remixed to suit other SKR boards.Features: NEW (as of July 7, 2022) “Low Fat” Base option. See above.NEW (as of June 10, 2022) support for those with ¼" thick struts. The original base has an attachment rail on the back that is...
prusaprinters
For those please use paint-on support like this:My tips to make watertight prints:Increase the flow rate (extrusion multiplier) to 105% (1,05)Ironing can be used (print settings → infill)Infill overlap 15%Increase the nozzle temperature by 10°CLower...
prusaprinters
You can adjust this if you have a different model of laptop.(ignore the tiny size of the stand in the photo above, this is an optical illusion caused by perspective and distance)Print settingsThe provided 3MF files include the default recommended...
thingiverse
My build is reliable, and uses a breakout board that should only cost $5 for 10 and the Alps RKJXM1 goes for $7.80 on Mouser. ### Parts list --------------------- 1x Alps RKJXM1. Here is [a link to the Mouser page I purchased...
thingiverse
I barely had to sand anything, not much more than 10 minutes for the whole kit. A lot of thought went into fit here :) - Install pictures are below General print settings - .20 quality (each part group is detailed so if something is different...
prusaprinters
I have since uploaded them in the folder named “Latch Parts”.Update 12/25/2023 - Thanks to feedback from Stephen Friend, who advised me that the handle was missing, I've added that part to the “BOTTOM PARTS” folder.UPDATE 1/20/2024: Thanks to some...
thingiverse
10" long Flexible medium clear super glue (Mercury adhesives brand on Amazon) and accelerator Some substitutions: All non-printed materials should be available at most home improvement stores. I ordered the foam from Amazon. I do not recommend...
grabcad
Bright, even light maintains consistent color over time.10. Instant on/off - No flickering, delays or buzzing.11. Very good color rendering.12. Vibration/impact resistant.13. Significantly cooler operation.14. ...Less frequent outages, higher output...