bottle finish 3d models
143729 3d models found related to bottle finish.
gambody
So the author spent 165 hours working on the figurine to represent the major hero of all the times as if he’s just landed finishing another of his epic performances rescuing someone once again. The muscles structure, the firm abs line and his strong...
gambody
The bust for 3D printing in its assembly version was divided into as many assembly parts as needed to fit even the smallest 3D printers' build plates and for you to receive a neat finished piece after assembly.The cutting of the Qui-Gon Jinn bust was...
gambody
In the course of the model’s preparation, Gambody team came up with 3 full kits of various assembly elements that will allow you to build a DeLorean time machine from either of the Back to the Future trilogy’s instalments and place your finished...
thingiverse
... My some other things:
thingiverse
... Added an EztoPrint .zip into downloads today. This breaks down the fuselage in a much different way, much more Ideal for scaling down to 60%. I have split the model at the keels, enabling super easy support removal and an overall cleaner finish.
thingiverse
Then fix it on the wall with nails or screws or use double-sided tape. To achieve the wow effect, you need to place an LED strip on the back of the decor. My some other things: ...
thingiverse
... each time. My some other things:
prusaprinters
His diagrams and commentary on escapement efficiency were excellent, however. I only discovered this write up on escapement design after I'd finished, but it would also be a useful head start for anyone interested -...
thingiverse
... each time. My some other things:
prusaprinters
Repeat on other side. STEP 16Attach your Front Frame to the Rail baseInsert a 1" Steel Hex Head Screws to a Small Side Knob and screw into the Tapping Inserts for Plastic ¼" previously installed.STEP 17 Place 2 M3 Alloy Steel Socket...
prusaprinters
It'll keep itself in place by friction as long as you don't over-tighten it.Finish the drive assembly and install it:Remove the M5 nut from the bolt, but keep it handy, you may need it later. Leave the washer in place (it'll probably be stuck-on by...
prusaprinters
I need to finish building the complete assembly to know for sure.Prior to modifying the rails however, I opened up the escapement gear with a 7/64 drill bit on which removed the binding between the escapement gear and the gear train gear. I put the...
thingiverse
... the site is broken and no one is going to fix it. ...Download files one at a time by clicking Download each time. My some other things:
myminifactory
Move along until you've measured 15 readings and finished measuring between positive pins 14 and 15. If all is good we can continue, if not something is wrong and you'll need to check your welds, soldering and if it's all connected up properly.19. Do...
prusaprinters
Pretension them a little more than you think is necessary, as the fur will put additional stress and friction on the jaw mechanism.This completes the head.You can now insert the 4cm wide rubber band into the respective slots.Next up is the creation...
prusaprinters
Once this is done the top panel can be screwed back in place using the M3*8 screws and nuts. Note: when installing Beam A2 make sure that the two wires that lead to the power supply go through the hole.5) Connecting the frameConnect the top frame to...
thingiverse
EDIT: 11/9/2022 I finished adding in the cable chain system. This system is an addon to the printer and if you don't want to use it, simply don't print the 2 holders for the cable chain ends. The 2 cable chains I used are these: ...
myminifactory
For the measurement to be correct, it must be flattened when the nozzle probe the bed.As a precaution, disable the probe (M121) once the auto levelling is finished, because if the sensor is triggered during printing, the printer assumes that the...
thingiverse
All the available options for fans, sensors, lights, direct drive mounts, and more can be found on Thingiverse here: https://www.thingiverse.com/thing:4460970 All other Hero Me Gen5 fan duct accessories are compatible with the Hero Me Mutant, as they...
prusaprinters
I'm using Flexfill 98A.Extra parts required:M2x10mm cap head screw x1M2 hex nut x1M2x6mm screw, black finish, x3M3 hex half-nut/jam-nut, brass x1M2x20mm countersunk screw x1M1.7x6mm plastic self-tapping screws x2Silicone greasePlease note that the...
prusaprinters
Be aware oft the orientation of the front and back brackets ;D4.Finished:Last but not least, the roof flaps are mounted on the cross brace. 3x 20mm countersunk screws can also be used for this. And the greenhouse is ready, which you can easily...
prusaprinters
That's not a final amount, I thought I might need at least this many lengths.I've made some progress on the TFT43 V2 skirt, I'm still finishing the inlay around the screen and haven't tested how this feeds into the skirt either side yet.I've also...
thingiverse
😊 assistant I start and finish with the letter 'e'. Consisting of just one letter, I'm not the letter 'e' itself. Can you construct me using five triangles? If that's too tough, try the simpler 3-piece version! 🧩</s> <|im_start|> assistant...
thingiverse
Level the bed by turning the thraded rods, before tightening the pulleys 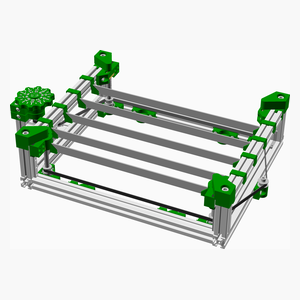 [Top](#TOP) --- Finished! ... <span></span> ...
prusaprinters
I'm using Flexfill 98A.Extra parts required:M3x50mm cap head screw x1M3x8mm cap head screw (hex drive), black finish, x3Hex driver tool to suit the M3x8mm screws (typically 2.5mm) with >=100mm long shaft, and ball endM3 hex nut, any material x1M3...
thingiverse
-There will be much less finishing work to do but for this kind of project the results are entirely down to the work you put in. The Keyboard Mechanisms: 2) 3) Both designs are my own work based off available Comodore reference material. They...
prusaprinters
Switched out the stock pulley for AndrewBCN's dual-623ZZ pulley. 2018-02-09: Increased the clearance around the spring and anti-backlash cap. 2018-02-06: Minor rework of the "support columns" on the idler end - they're a bit thicker and have a...
prusaprinters
If your motor runs at an appropriate speed at normal battery voltage, this isn't needed.M3 locknuts (x25)M3x10mm button head bolts (x32)35mm nylon standoffs (x3)Printed standoffs can also be usedMini felt or rubber feet (x3)Hot glue, wires,...
thingiverse
This worked really well on a Bambu Carbon X1C, resulting in a very strong part that had a nice finish to it. This may not work on all printers, but it's worth a try. Enable supports, set Type to normal(auto), Style to Default, Threshold angle to 35,...
prusaprinters
Print the file, it will heat up to 230 degrees in eight cycles then use the output result and apply to the printer immediately, no need for a reboot.pid-autotune.gcodeIt will take a few minutes to run so be patient until it finishes.My firmware...