5a vs 7a drumsticks 3d models
9377 3d models found related to 5a vs 7a drumsticks.
prusaprinters
The box definitely looks better at a .15 resolution, but the coarser texture of the .2mm resolution helps friction in the ball joint. For the Pi case itself, I've included the specific files I used from the other project, however there are other...
thingiverse
If you use more layers in the shell, use the Narrow vs ThickShackle shell versions, use different materials, or potentially even different temperatures (that impact layer adhesion), you may see different performance under load. Beyond structural...
thingiverse
If any walls are way out vs the others I will not use that wall measurement for the calculation. To calculate flow: V = average thickness of the walls F = current flow setting (start with 100%, or 100) W = wall line width, either...
thingiverse
But you would have to test it for your computer case and airflow setup (positive vs. negative air pressure). If you decide to use it to blow air into your case I would recommend you fit a dust filter. Otherwise, your case gets dusty very quick.<br...
cults3d
The idea came to my mind quite often but the challenge was always weight vs. size as I didn't want to ruin the speed of the Predator by making it too heavy and there isn't much space to work with... But evolution was in my favour this time! Now,...
youmagine
A quick way to dial in your slicer settings VS petal widths is to use a calibration comb where each tooth is a different width and they cover a range of widths. Get one here: https://www.youmagine.com/designs/custom-calibration-comb-openscadI also...
thingiverse
Ideally the part should be installed so the inner flat faces are to the sides, which will put the layers in a vertical plane oriented along the part for maximum strength vs. gravity. There should be plenty of clearance, though you might need to shave...
thingiverse
*A note on the choice of Pi Zero vs 3b+.* I started with the zero w thinking it would be enough to take pictures every couple seconds. It was *okay* at this but I was pushing it to its limits when I decided I wanted video output. So I switched to...
prusaprinters
If you want to use a rasperry pi camera, print out the picasetop_V3_picameraslit.stl for the camera ribbon slit and a pi case like this that accepts a screw - https://www.thingiverse.com/thing:299529 Can the camera position be adjusted for different...
thingiverse
I'll be adopting the new toolhead style, as I don't want to keep two different types of toolheads on hand - ones that work only on the 6, vs ones that will work on the Pro or with a crummy adapter. So, I designed new carriage mounts (X Motor & X...
prusaprinters
Zero hole separation and the spool bearing is 80mm from the hub. BearingPeg100 is a shorter version (100mm vs 120mm) and uses the full peg so there is no spool bearing slot. The purpose of this effort was to create a version that could be...
prusaprinters
Silent and smooth : stepper motor version of "Hollow Clock", https://www.thingiverse.com/thing:4747403Easy operation : super-easy time adjustmentEasy print : printable without supports (except optional cover.stl)Easy assembly : gears can be set by...
thingiverse
There is a small 1 mm dot feature on the back face to indicate the Traxxas mounting pattern vs the Kimbrough pattern. It is only off very slightly but pay attention when bolting the spur to the hub. To assemble, slip on the FR spacer and engage...
thingiverse
* It's compatible with the Vista mount for the FRL, but the 3D prints I have setup for the camera are made for 30mm standoffs vs. the Vista Mount for the FRL that is 35mm BOM: *Arms - 7mm (x4) *Bottom Plate - 2mm *Mid Plate - 2.5mm *Topplate...
thingiverse
With all that said then going with 20% infill is actually more than enough as it's now mass vs strength of the part you need - although be sure to have enough infill so your clamp arm isn't crushed when cranking down on a part if not using a large...
thingiverse
This tweak reduces the overall print time significantly vs the original 3mm walls, and means the remixed design takes about the same as the original design from Xuis to print (~14hrs on my Ender 3 V2). This doesn't really add any time to the overall...
prusaprinters
Which seems to not shrink and behave much like PET (vs ABS.) The box was made with a much coarser .25mm and lower infill (as low as your printer can effectively go) I think I used 25% just to speed up the print. Post-Printing 1 - Print 6 Copies of...
cults3d
I made my game reds against blues but you can make yours the way you like, featuring your team and biggest rival, like in my case Benfica vs Porto. I made this model to fit (barely) to most print beds (sorry Prusa Mini) with a little less than...
prusaprinters
These parts are different for starboard vs. port sides. The lifeline takes a slight 10 - 15 degree turn at the stanchion, which is mirrored on opposing sides of the boat.The mounting clamps hold the panel tight enough that it does not require a...
prusaprinters
-- THE CABLE WINDER II -- This design is an updated and improved version of my popular design “Charger Cable Organizer”Thanks to all that posted feedback and makes of my other design, and as a result of all your suggestions and ideas for...
prusaprinters
While this does not give you 90° opposition for force vs layer lines, it does give you about 45° which is much better than 0° printing with the bottom of the hook down. 3) supports, as shown in the pictures, is suggested but as you can see from the...
cults3d
Test each one to see which is best for movement vs. stiffness. A stiffer joint will allow you to hold heavier objects with each arm. Optional: If the three ball joint options don't work for you, check your horizontal expansion in your slicer to...
thingiverse
https://www.thingiverse.com/thing:3128309 Update 8/15/2020: Based on feedback, I understand that some 5/16-18 nuts are a bit larger than the ones I used (13mm vs 12.6mm flat to flat), so I updated the end parts which hold the nuts with slightly...
prusaprinters
Below, we've broken down how all the kits are organized to help you differentiate with what is required vs. optional. We hope that you find the printing process is enjoyable and hassle free but if for any reason it isn't, please feel free to leave us...
thingiverse
Super Glue on PLA/PLA+ vs. PETG ----------------------------------------------- If you print on PLA or PLA+ the super glue should hold well enough that the print will break before the bond breaks...however, the small clips will be more likely to...
prusaprinters
The biggest difference is I have a X-Plus vs the X-Max and while many things are the same there are some differences I found over this adventure. the next difference is I was using the stock carriage for now cause I can't decide which replacement I...
prusaprinters
I was unable to locate the max amperage the board can handle, but I highly doubt it is 3.5A for just one fan. If you want to have the exhaust turn on and off with the LaserPro, use a 12V power relay on the extra fan port with a small 2-pin cooling...
thingiverse
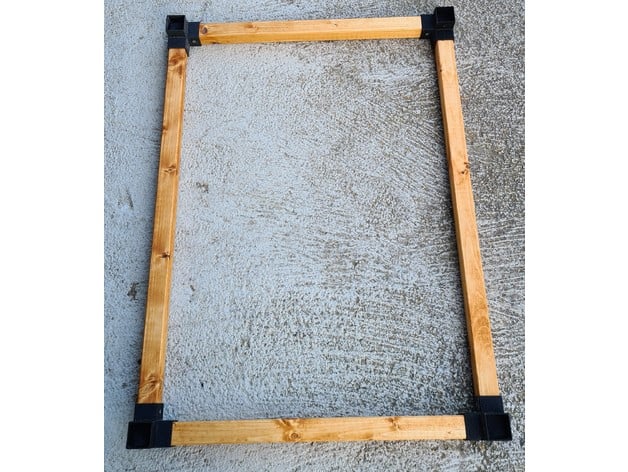 **Be careful when pushing the wood into the printed parts, if they become wedged, the printed part can break because you are...
prusaprinters
The cable of the probe and the power cable goes through the plate into the cable towerStep 5a If you want to install the second fan of the Infinity, add an 60cm 4-pin connector extension cable, like the Noctua NA-SEC3 or something cheaper.This end...