3rd gen 4runner rear bumper diy 3d models
110811 3d models found related to 3rd gen 4runner rear bumper diy.
thingiverse
[ ] 3D Print included stl files [ ] sunlu_fan_mount.stl -- Mounts 50mm blower fan and thermistor to rear of fan case. [ ] sunlu_gauge_ring.stl -- circular slip ring for mounting the hygrometer to the front of the case. [ ]...
prusaprinters
(After printing, attach the front and rear pieces to the holes in the ends of the sides with four screws.)<Update 2021.05.29>I've implemented dito49's suggestion to add a 30-degree chamfer under the braces on the Base, Top Tier, and Bottom...
thingiverse
support the slider from the rear while clipping in. A bigger and longer v2 version is available too. If required, for better hold of the sleeve to the inner cylinder of the clip on - Cut a gen1 sleeve so as to be an open sleeve then wrap this over...
thingiverse
Update 18/03/22: I have now added an alternative option centralised rear bed arm/leadscrew option to the files I send out. <b>What do Ventermechs do?</b> For many years designers have been trying to isolate or decouple the wobbling motion from...
prusaprinters
Better mount the stepper motor with its socket turned toward rear of the machine, and use short 20 cm cable to plug it into the daughter board right under the left pillar. Daughter board underneath, into which is plugged large 40 pin ribbon cable,...
thingiverse
Bill of materials Wemos D1 Mini 16x16 Addressable led matrix (D6) Switch (D5) 1k resistor Optional materials Usb socket if making a plug at the rear Circuit connections - overview The LED Matrix is supplied 5V and GND from 5V and G on the Wemos D1...
gambody
Similarly to the more common LAAT/i variation, this repulsorlift gunship has a trademark rear wing placement and a slim frame easily manned by a single pilot.LAAT/c Gunship 3D Printing Model will help you recreate the elegant Star Wars ship with...
gambody
The multipart head is designed for LED wiring;- Two chest assembly options - with closed and open plates to display the Anti-Kaiju Missile Launcher;- You can display Striker Eureka with or without the thermonuclear warhead on the back;- Moveable T-16...
prusaprinters
Either should work.Install Extruder Side Adapter Plate to Hemera with all 4 t-slot nuts in the rear using4 x 8mm M3 Cap head bolts.+ [**DO NOT USE LONGER OR SHORTER BOLTS. DO NOT OVERTIGHTEN.** Follow E3Ds recommendation here. Longer bolts are likely...
prusaprinters
These can go anywhere you want on the support rods and will spin on the rods so they allow/require alignment.Rear/Front Sights “on Support Rings”. Here I stole another of Maff's models and remixed it to be a simple naked 3-rod ring, but with the...
myminifactory
The babe was born as yet another clone of Henrique, but now reared from birth he hoped its experiences would differ greatly to that of its predecessors. In a strange twist of fate, the mother dubbed her child Henry, raising him in the dreary inner...
prusaprinters
product#94180A361 M5x6.7mm from McMaster-Carr will do just fine) (2) M3 x 16mm (for the upper holes upfront on the End Plate and all the way back to the Idler) Rear Rail Ends (Motor): (6) M5 x 10mm (use on the T-nuts) (8) M5 x 20mm (use upfront on...
gambody
Moreover, the ‘ankle drive motors’ of the rear legs were designed in such a way to ensure the footpad’s multidirectional movement. Both anti-ship laser cannons and the cockpit’s lid are movable as well. The glass cover of the cockpit is also provided...
prusaprinters
Set aside the springs for use later. Install the Carriage Clamp ArmInsert an M3 nut into the slot at the top of the rear clamp wing. Press firmly with screwdriver to ensure it is fully seated.Slide the Carriage Clamp Arm onto the front right arm of...
prusaprinters
because the M5 have bigger heads and allow a more powerful tightening), you will need at least 50, I advise you to take 100 lol, it goes quickly!In the end, I advise you to buy, a complete box of screws of different dimensions to have a lot of...
prusaprinters
Next week I will update and upload the files. Air circulation system / PurifierWill be updated - CAD files and STL files will be added walls filament mountsI plan to add a filament holder that can be installed on the side...
prusaprinters
Any of the options on the market, or DIY versions were not what I wanted (different for different reasons)How it went?I started with a reaserch on how different people approached the build of this treadmill. I found that most of them were either tube...
cults3d
Here I let you the links to the tutos/vids I used to understand and build this radio: https://howtomechatronics.com/projects/diy-arduino-rc-transmitter/ https://www.anyonecanbuildrobots.com/post/getting-started-with-the-rf-nano...
myminifactory
Here I let you the links to the tutos/vids I used to understand and build this radio: - https://howtomechatronics.com/projects/diy-arduino-rc-transmitter/- https://www.anyonecanbuildrobots.com/post/getting-started-with-the-rf-nano-...
myminifactory
Kweld is by far the superior welder however you can DIY a spot welder with simply a high current car battery, starter relay and a handful of other parts. One thing to note is you should never connect the battery to the Onewheel if they are not at...
thingiverse
Material: ABS, 3mm thick Nozzle: arcol.hu hotend v4.1.1, 0.35mm diameter Printer: DIY Prusa I3-like denly built indeed built INDUSTRY ĩndeed built Industrie Industrie Industrie Industrie Industrie Industrie...
thingiverse
# RevB This is a DIY laser bed for K40 cutters and clones. 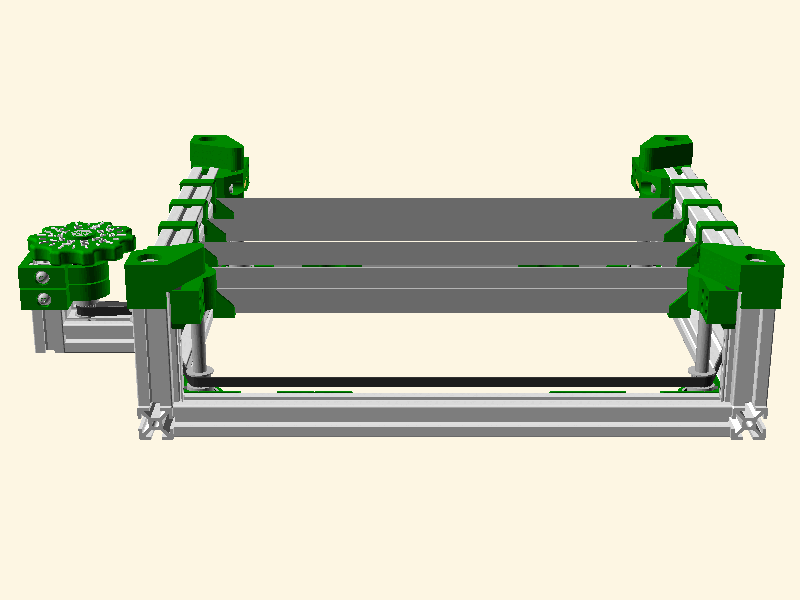 <span></span> --- ## Table of Contents 1. [DIYLB Top...
prusaprinters
You can find details on how to make them on this Adafruit project webpage for example (credits to John Park).To sum up, the XAC is a very interesting (if a bit expensive) solution for handigamers, and many hacks have already been proposed by the...
cgtrader
Name: Light_Bridge_Leader\nVersion: Alpha_11\nPreview: Enabled_by_Default\nUnits: Metric_Measures\nDimension: Five_Foot_Nine_inches_by_Eighteen_Inches_by_Three_Hundred_SevenpointSixFive\nGeometric_Parts:...
prusaprinters
Ensure the idler gear turns freely and that the direction of the bondtech gear lines up with the sprocket teeth towards the rear of the idler. See pictures for orientation. </li> <li>Install the idler assembly with a 20mm long M3 bolt. </li> <li>Now...
prusaprinters
These are available in our DIY stores in small sizes.After you have printed all the parts, you can start sawing out the lamp "glasses". I sawed out small plates Ø 65mm from a twin-wall sheet, 6 mm thick. I used a fretsaw with a very fine saw blade. I...
prusaprinters
Looking at the failed print I had the idea to use single or dual layer prints as sails or blades for a DIY 3D-printed wind wheel. So after a few days of planning, designing and a little bit of trial and error, this is the design I came up...
thingiverse
I also added provisions for a diy 3mm shaft using 623 bearings) https://www.aliexpress.com/item/32714017489.html https://www.aliexpress.com/item/32528668718.html - Servo: 9g servo (important you will want to waterproof or find an alternate...
prusaprinters
you should only have support in the four corners.This part takes about 170 meters of 1.75 filament, about 500 grams, and takes about 3 days to print (for me on my Ender 3, at least), so make sure you only need to print this once!about 30% infill...
thingiverse
- [AM8 Z Motor Mount and Top Mounts with Bearings On Both Ends!](https://www.thingiverse.com/thing:4030339) - [AM8 Mod Y Rod Support wIth Full A8 Travel](https://www.thingiverse.com/thing:4028536) - [Anet AM8 Y Axis Lead Screw Drive...