360 nissan z 3d models
152824 3d models found related to 360 nissan z.
thingiverse
http://www.thingiverse.com/apps/customizer/run?thing_id=116042 Instructions Using the following options: wall_thickness = 1.6 height = 15 mirror = Yes shape =...
prusaprinters
The software and detailed setup instructions can be found on GitHub and is compatible with Harvahammas Nanoleaf version. The nanoleafs were designed in Fusion 360. Bill of Materials 1x Wemos D1 mini is recommended, but any other ESP8266 variant...
thingiverse
V5 Update This release has experienced a unexpected delay, due to some design features we wanted to do that the current design 3D environment wasn't able to handle (Fusion 360). While we convert everything to a new design software, V4 is still a very...
prusaprinters
The tray should now slide into place.Installing Drawers/Trays under each other• This is the same process as above but instead of mounting the "Rail Lock" into the nut on the rail you will need to slide a “Rail Lock Upper” into place on the back of...
thingiverse
http://www.thingiverse.com/apps/customizer/run?thing_id=116042 Instructions Using the following options: shape =...
thingiverse
ADDITIONAL NOTES AND PRODUCT LINKS -------------------------------------------------------------------- ***BUILD VOLUME Z HEIGHT REMAINS INTACT*** One other note on the extra enclosure height needed to accommodate a B1: The B1's advertised build...
prusaprinters
Use the other back bushing to fill the unused hole on the other side.ADDITIONAL NOTES AND PRODUCT LINKSBUILD VOLUME Z HEIGHT REMAINS INTACTOne other note on the extra enclosure height needed to accommodate a B1: The B1's advertised build volume...
prusaprinters
if you have higher print, you will spend more time with printer ?? ...
prusaprinters
The tripod screw also protrudes 2.2mm further on the 30mm lens version for extra thread engagement.The camera's tripod thread socket is shallower than the lens clamps' and could be damaged if mounted on the wrong block.I've included the Fusion 360...
prusaprinters
I created all gears in this design with it:https://apps.autodesk.com/FUSION/en/Detail/Index?id=1259509007239787473&os=Win64&appLang=enFor preparing the release of this design I used the Fusion 360 Plugin Bommer by Jesse Rosakia and James Ray...
prusaprinters
I recommend raising the Z-axis toward the top before starting this procedure so you have ample room to work.Remove the print fan (tuck it between the X-axis belt and bottom bar).Remove the SuperPINDA (lay it over the top X-axis bar or over the X-axis...
prusaprinters
First, do a manual X, Y and Z adjustment and see how the carriage moves. If everything looks normal heat up the extruder to printing temps and feed in the filament using the load menu. If everything goes well it will now extrude from the nozzle.Level...
thingiverse
2 #1 # # ## # ## # I' #1 # #03, 6) #0x # #01 # In [0 A #09 #0: ## # A_ - # #0. ## 0. The Astra,0x 03 ## 0. This ## 0. #07 (0x package_ package and 1 #06, 0x #08b 0x #02 using the end #2 package 0x The C++ #롤лове ersteھٹ Dopo DoposcriptstyleHECK...
prusaprinters
There are also useful coat hangers and finger toys.There is functional furniture as well:Or check out the 1250 keychain name tags:Print instructionsYou can print it without any support, and it prints very fast.Standard settings will be fine, like...
prusaprinters
You could also use a piece of Stripboard to just use oneground pin of the Raspberry Pi and connect all ground wires of the buttons just to this Stripboard.If you want to use the exact same configuration forRetrogame you can use the following...
prusaprinters
First, do a manual X, Y and Z adjustment and see how the carriage moves. If everything looks normal heat up the extruder to printing temps and feed in the filament using the load menu. If everything goes well it will now extrude from the nozzle.Level...
prusaprinters
The wires should be long enough to keep the bluetooh remote controller on the desk when the print head goes (on Z -Axis) upto the height of the model printed (ie max 250mm for Ender 3). So approx. 40cm wire length will be sufficient).</p>...
thingiverse
First, do a manual X, Y and Z adjustment and see how the carriage moves. If everything looks normal heat up the extruder to printing temps and feed in the filament using the load menu. If everything goes well it will now extrude from the nozzle. ...
thingiverse
Dans le domaine de vol de l'avion, le turboréacteur est sollicité par des accélérations suivant l'axe longitudinal (X), qui ne fait pas l'objet d'une limitation particulière, et l'axe vertical (Z), pour lequel le motoriste impose une limitation en...
thingiverse
They're both 2 mm in Z height. One has no name and no background and the other has no name and no line under the name with a 0.4 mm background. ---- **Running the Customizer** When last checked, the Thingiverse customizer works only on the...
sketchfab
In the Transform panel, click on the "Location" tab and set the X-coordinate to -50 mm, the Y-coordinate to 0 mm, and the Z-coordinate to 0 mm. Next, go to the Edit Mode and select all vertices by pressing Ctrl+A. Then, press F2 to open the Mesh tab...
thingiverse
Este ejemplo asocia el código RF XXXXXX al registro 0 (movimiento de cabeza y sonido de R2D2) rf0 XXXXXX Estos son los registros disponibles: rf0 - Sonido R2D2 rf1 - Rueda Izquierda rf2 - Rueda derecha rf3 - Ambas ruedas rf4 - Melodía 1 rf5 -...
thingiverse
First, do a manual X, Y and Z adjustment and see how the carriage moves. If everything looks normal heat up the extruder to printing temps and feed in the filament using the load menu. If everything goes well it will now extrude from the nozzle. ...
thingiverse
First, do a manual X, Y and Z adjustment and see how the carriage moves. If everything looks normal heat up the extruder to printing temps and feed in the filament using the load menu. If everything goes well it will now extrude from the nozzle. ...
prusaprinters
I found a lot of inspiration and I have remixed a lot of designs that I found online, but at the same time I designed a large portion of models, so I will try to provide as much references as possible in this description. My main goal with this...
thingiverse
First, do a manual X, Y and Z adjustment and see how the carriage moves. If everything looks normal heat up the extruder to printing temps and feed in the filament using the load menu. If everything goes well it will now extrude from the nozzle. ...
thingiverse
First, do a manual X, Y and Z adjustment and see how the carriage moves. If everything looks normal heat up the extruder to printing temps and feed in the filament using the load menu. If everything goes well it will now extrude from the nozzle. ...
prusaprinters
If you have a more friction resilient plastic available this part especially will benefit from it.QualityRandomise the z-seam on the rollers, main drive axel and spindle, this helps prevent noise and vibration.Layer heightI printed the cam and tooth...
thingiverse
Thread the assembled carriage holders into the rails and rods of the Z-axis. 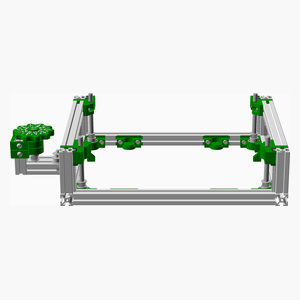 <span></span> ...
prusaprinters
Compared to the older design, the new version has significant internal changes, resulting in much quieter operation and an easier assembly process.Fusion 360 model link: https://a360.co/3g4nEfNChangesAll fasteners standardized to M3x10 bolts and...